
Once you've used Speckle in Grasshopper or Dynamo for a while you'll may start to realise that, if the data you're sending is too complex, those DataTrees and Nested Lists are not the most ideal way to share your data, as the actual meaning of those structures does not get shared along. Let's start fixing that by creating Speckle objects to organise and label our data.
::: tip Prerequisites
To follow along with this tutorial, you will need to register with Speckle and install the required connectors 🔌. It takes less than 3 minutes!
For a comprehensive overview of this connector, check our docs 📚!
:::
Your First Speckle Object
Imagine you have a point and a text message you want to send together. Initially, you may be tempted to join both values into a list like so:

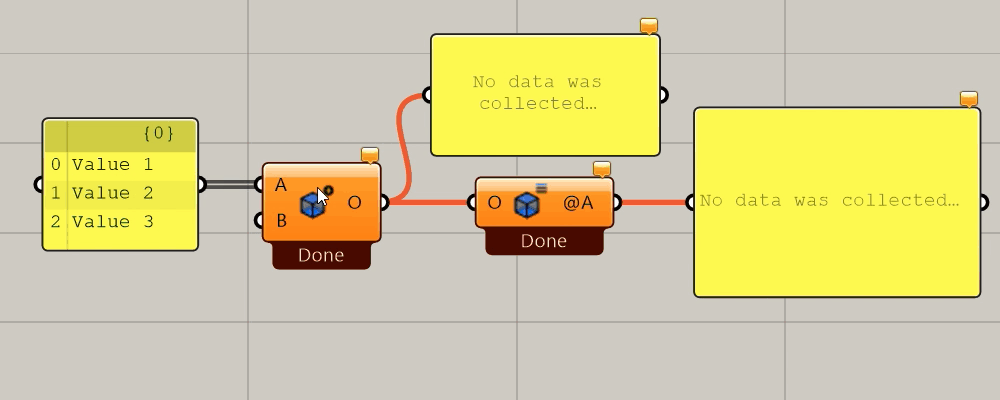
This will work and, initially, there is nothing wrong with doing so. But, notice that whoever receives this data will have to know (or remember!) what each of these items represent, and how are they ordered. The problem increases when you have many points in different structures:

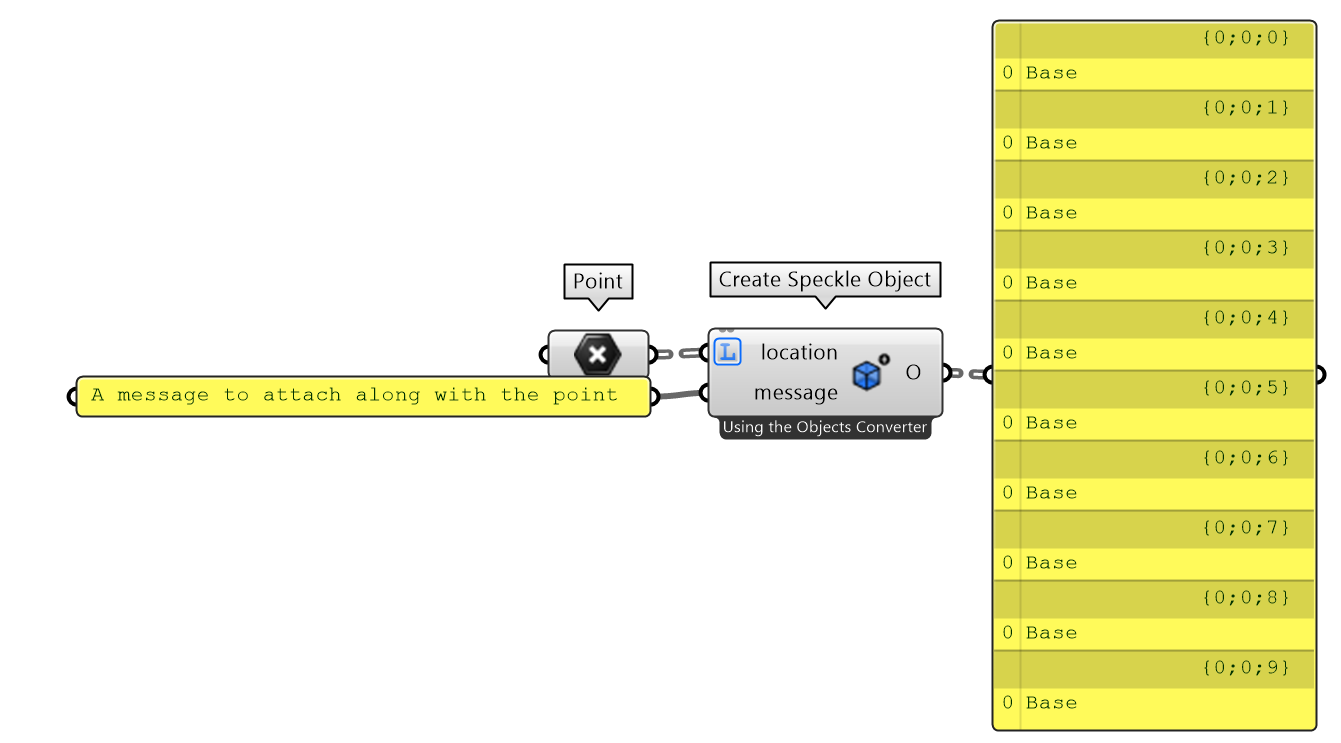
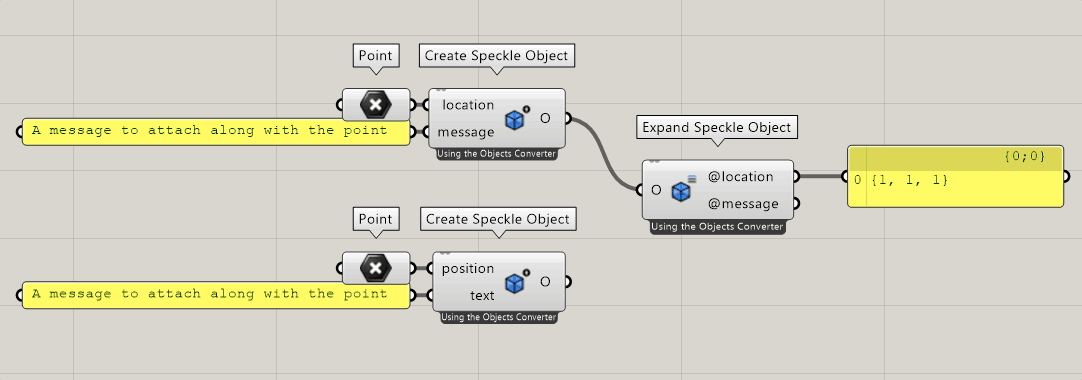
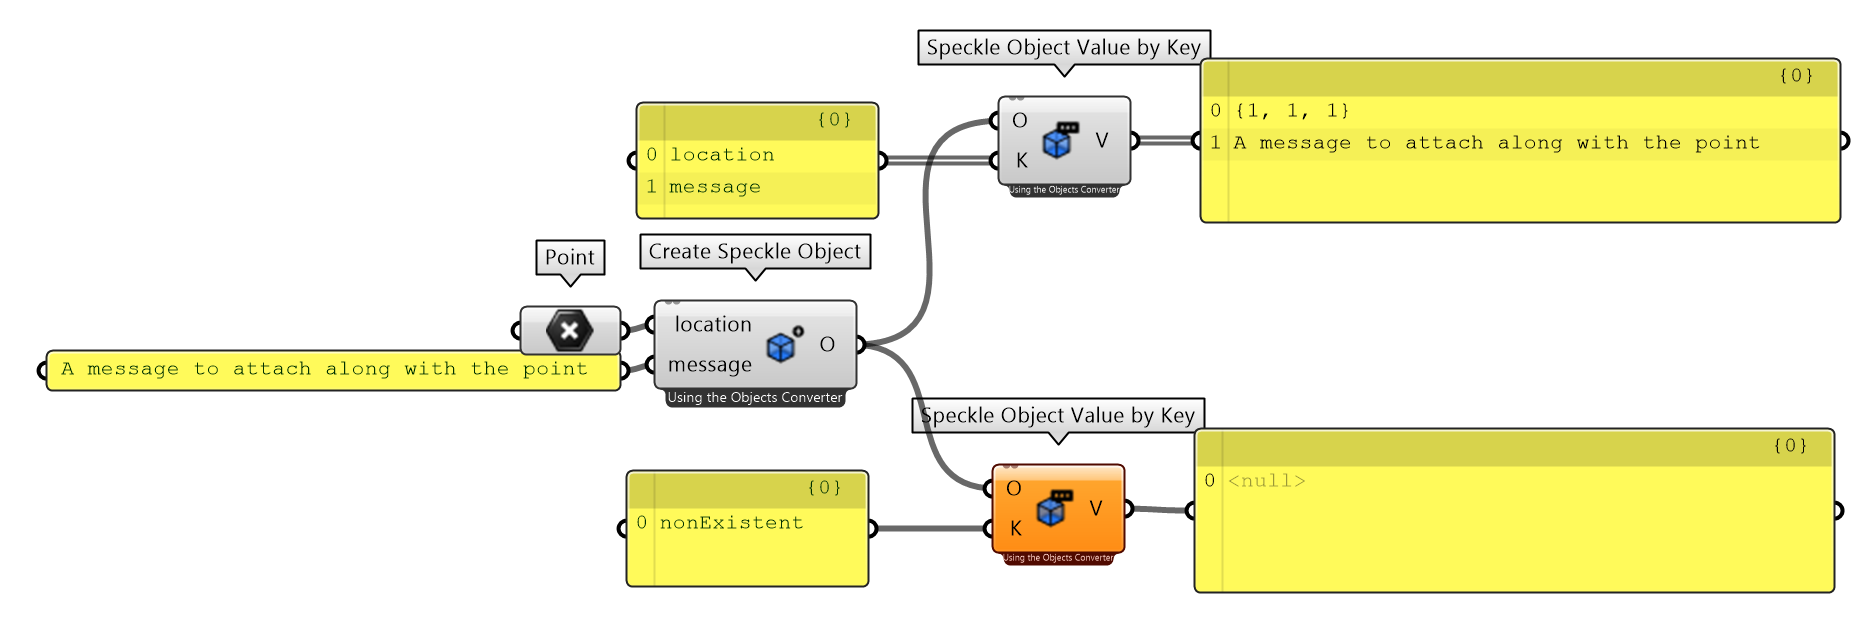
To fix this, add a new Create Speckle Object node to your canvas. This is a variable input node, which allows you to modify the inputs at will (and its names!). Add two inputs and change their names to location and message respectively. It should look like so 👇🏼

Connect the values as shown and the result will be a single Base object. This object holds both the point and the text message (similar to our first attempt)

List values
We just created our first Speckle Object, whose values were all single items, meaning: a single point and a single message got stored together.
::: tip
This behaviour is similar to the Python and C# scripts, where you must select the Access type for each input.

:::
Imagine now that, instead of attaching each message to a point, we wanted to attach a message to a group of points. We could just change the location access to list to obtain one custom speckle object per list of points, each with a message attached to it.
::: warning
Choosing the wrong type of access for your inputs will most likely result in data duplication. Choose wisely!
:::
Optional values
It is fairly common for your custom objects to require optional inputs. Take for example a conceptual wall: It may, or may not, contain windows, doors, etc... but still be a valid wall.
If we were to require all inputs on every case, it would be impossible to cover all the custom data needs of every user. Hence, the optional menu item is available to let the component know if an input is not required.
Inspecting Speckle Objects
Once you have a Speckle object, you may want to have a peek inside. You can do this in several ways:
Expand the object
Use the Expand Speckle Object node to retrieve all the keys and values of a given Speckle Object. This is, conceptually, the opposite action than Create Speckle Object.
Connect any Speckle object to this node and it will expose all it's values alphabetically ordered by key.

::: warning
We do our best to keep your Grasshopper wires in place, so if you had an existing connection and your object changes, we will preserve that old output to prevent loosing those connections. To remove this, just disconnect it manually and recompute.
:::
Get individual values
You can also get individual values from a Speckle object using the Get Speckle Object value by key node. This allows you to obtain just the values that you need from objects that contain many keys, and keep your Grasshopper definitions lean.
To do this, just plug in a Speckle object and a list of keys into the component. The output will be the value for that key when available, or null if the key did not exist in the object.
Extending Speckle Objects
We've covered how to create and inspect custom Speckle objects, but what about adding new information after the object was created? You can also do this easily with the `Extend Speckle Object` node.
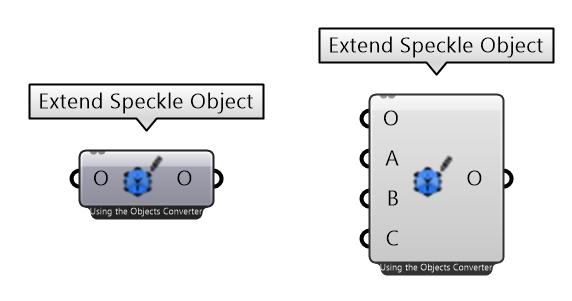
Just as the Create Speckle Object, this node is also a variable input node. The only difference being that its first input is the object you want to add information to.

::: tip
You can overwrite values too! You'll see a warning on the node to notify you

:::
Nesting Speckle Objects
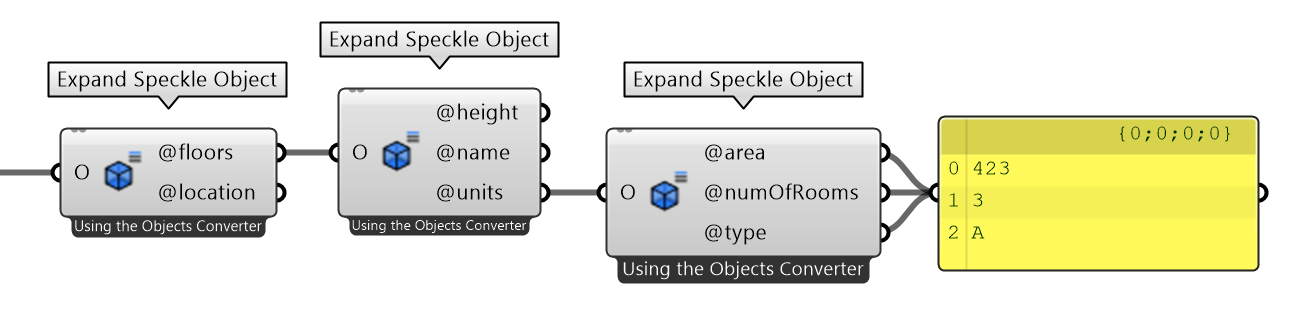
Nested speckle objects are also a thing!! No need to sweat, just plug Base objects as inputs of other Base objects.
Imagine a building that is comprised of a location and some floors. Each floor would contain a height, a name, and a list of units; and each unit contains the area, type and number of rooms.
You could replicate this type of structure in Speckle like so 👇

If you receive this structure from someone else, you just need to expand it until you reach the data you need 👇🏼
Conclusion
We hope you enjoyed this tutorial and found it useful!
Speckle is an Open Source project and we really ❤️ feedback, so if you have any questions, comments, critiques, or praises please let us know on our community forum.