
This tutorial will help you push your first data from Grasshopper, and then receive it in another definition. Let's get started!
::: tip Prerequisites
To follow along with this tutorial, you will need to register with Speckle and install the required connectors 🔌. It takes less than 3 minutes!
For a comprehensive overview of this connector, check our docs 📚!
:::
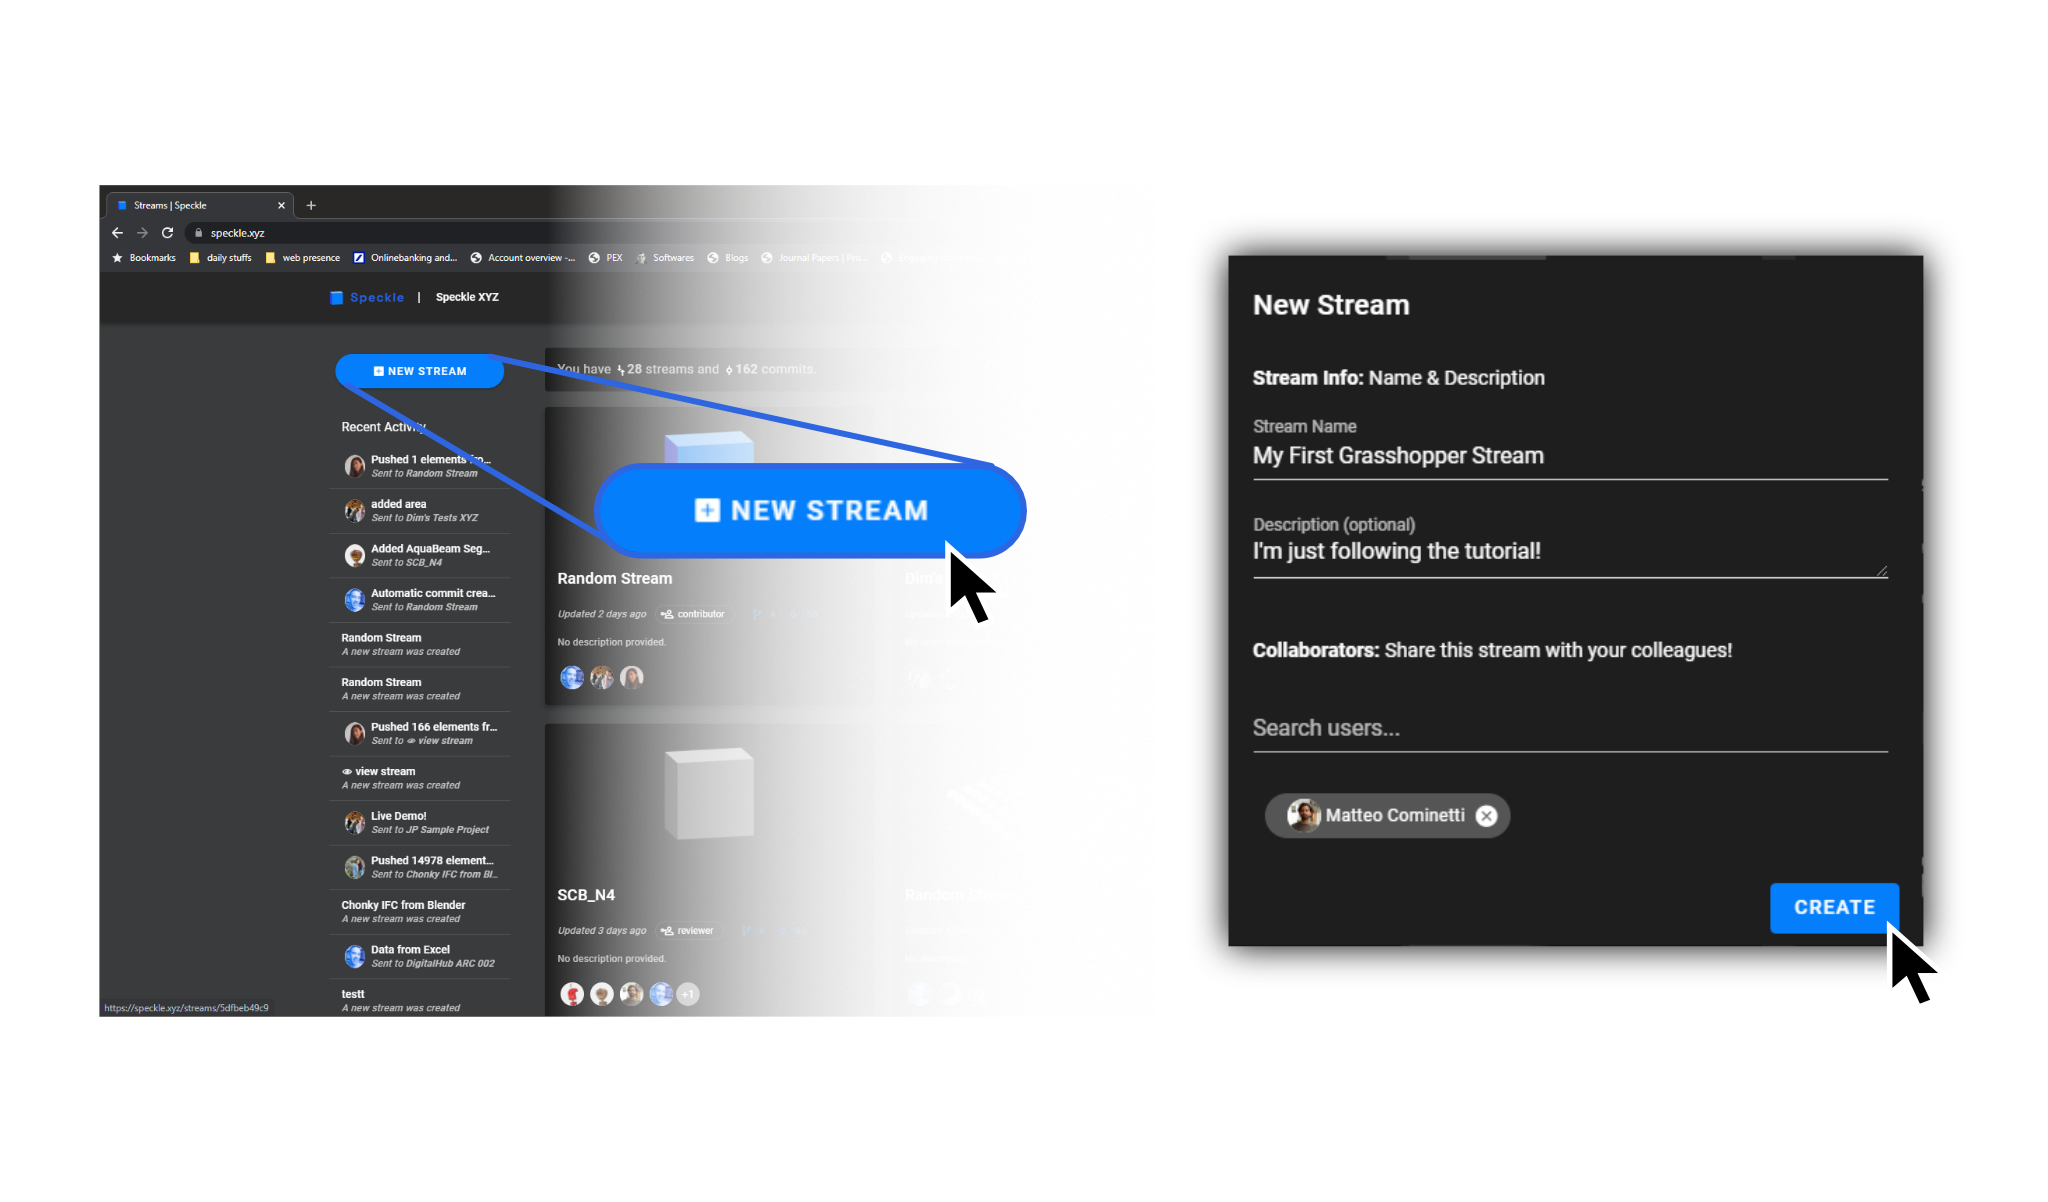
Creating a Stream
Go to our server (or yours!) and create a new stream by clicking the big friendly blue button. Give it a name, and optionally, share it with a colleague!
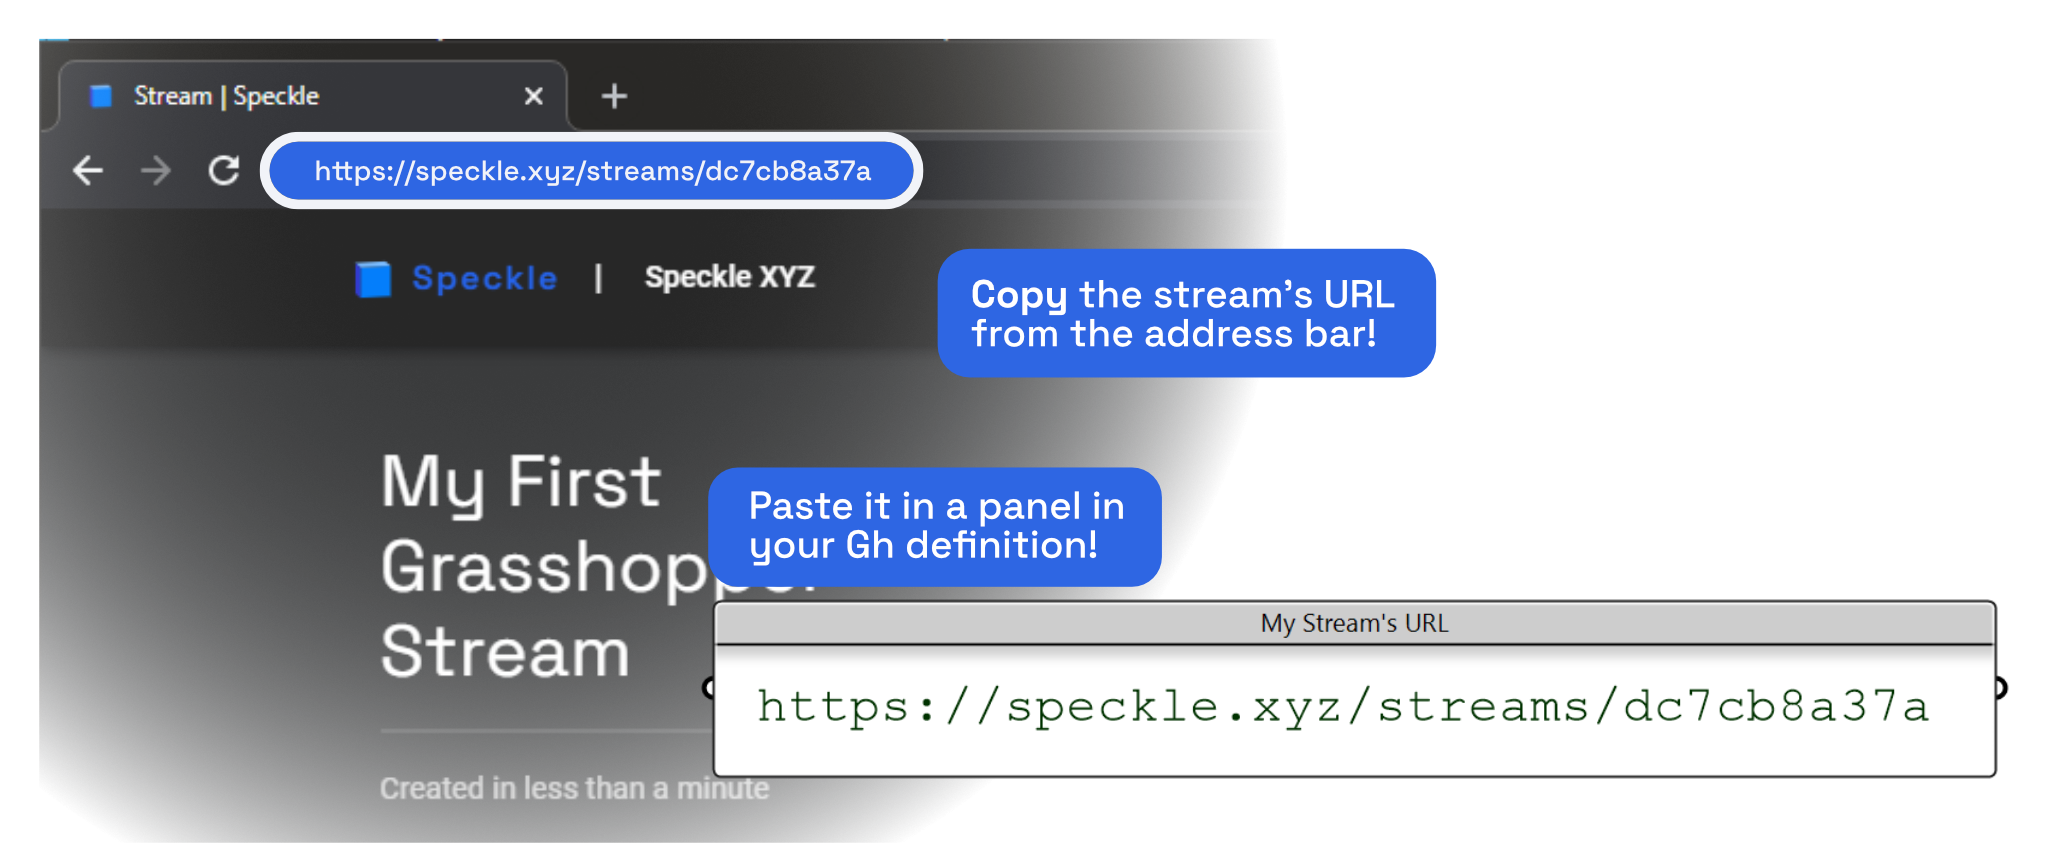
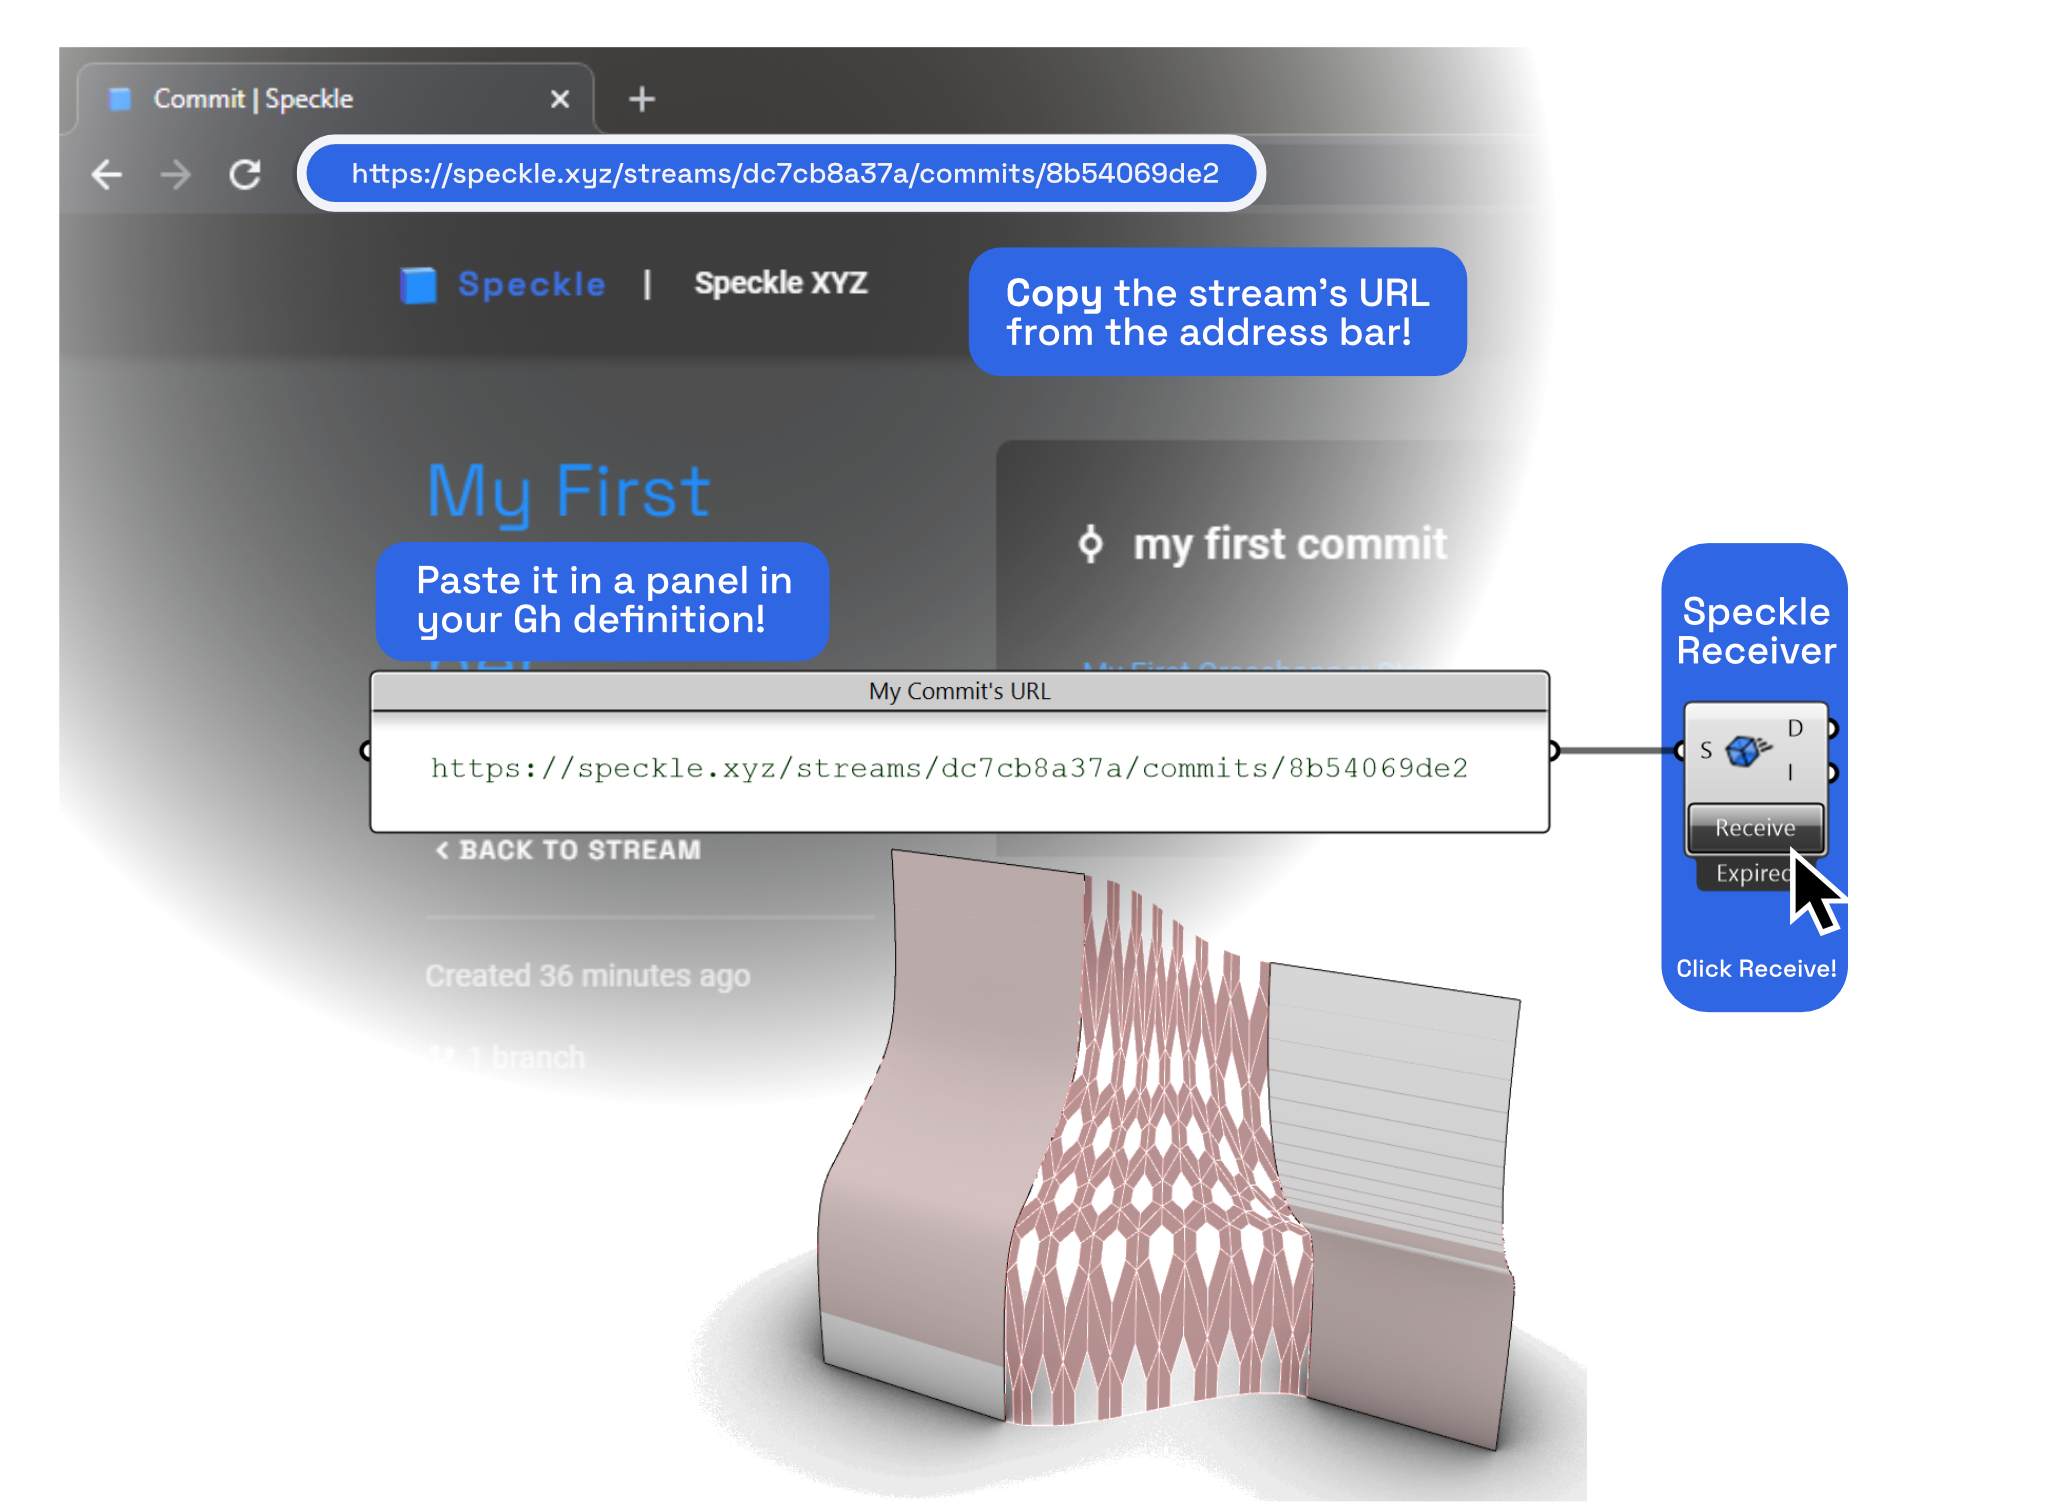
Once you've created the stream, copy and paste its URL from the browser's address bar into a panel inside Grasshopper.
Sending Some Data
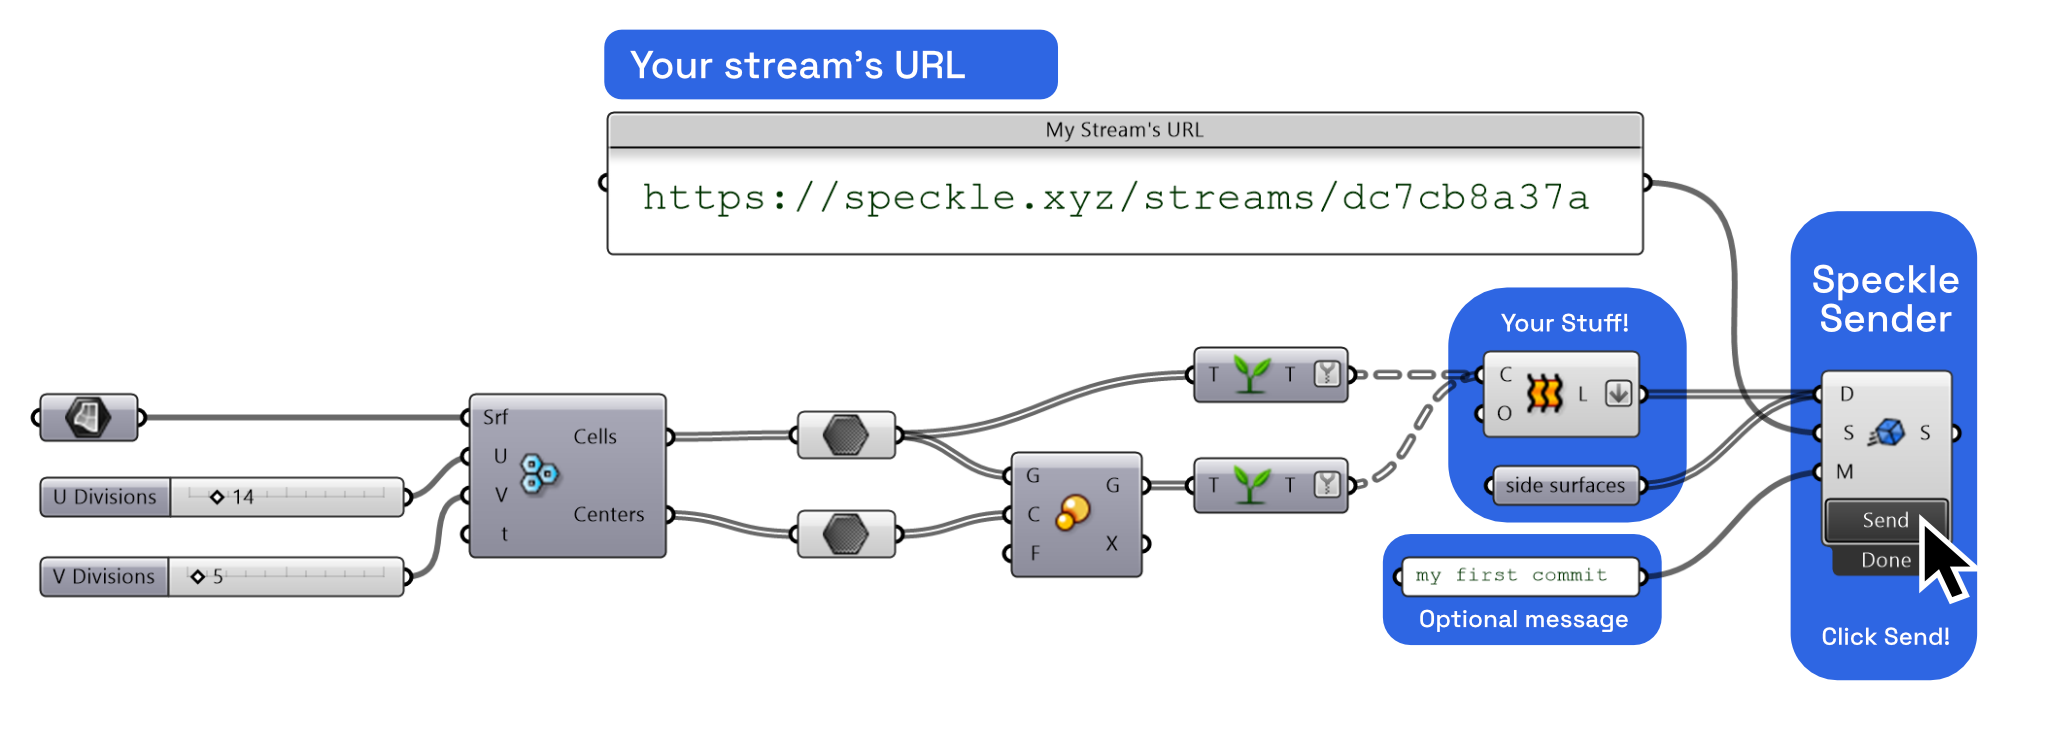
Next, Create a "Sender" component. You can find it under the Speckle 2 Tab, in the Send/Receive group.
Plug in the data you want to send in the "D" input, and in the "S" input, connect the text panel you created earlier that contains the stream's URL. Once everything is wired up, click Send!
Viewing the Data
After a (hopefully) short time sending, data is now safely within Speckle. Let's check it out! The easiest way to see what went up is to right click the Sender component, and from the drop down menu, choose the "View Commit id online".
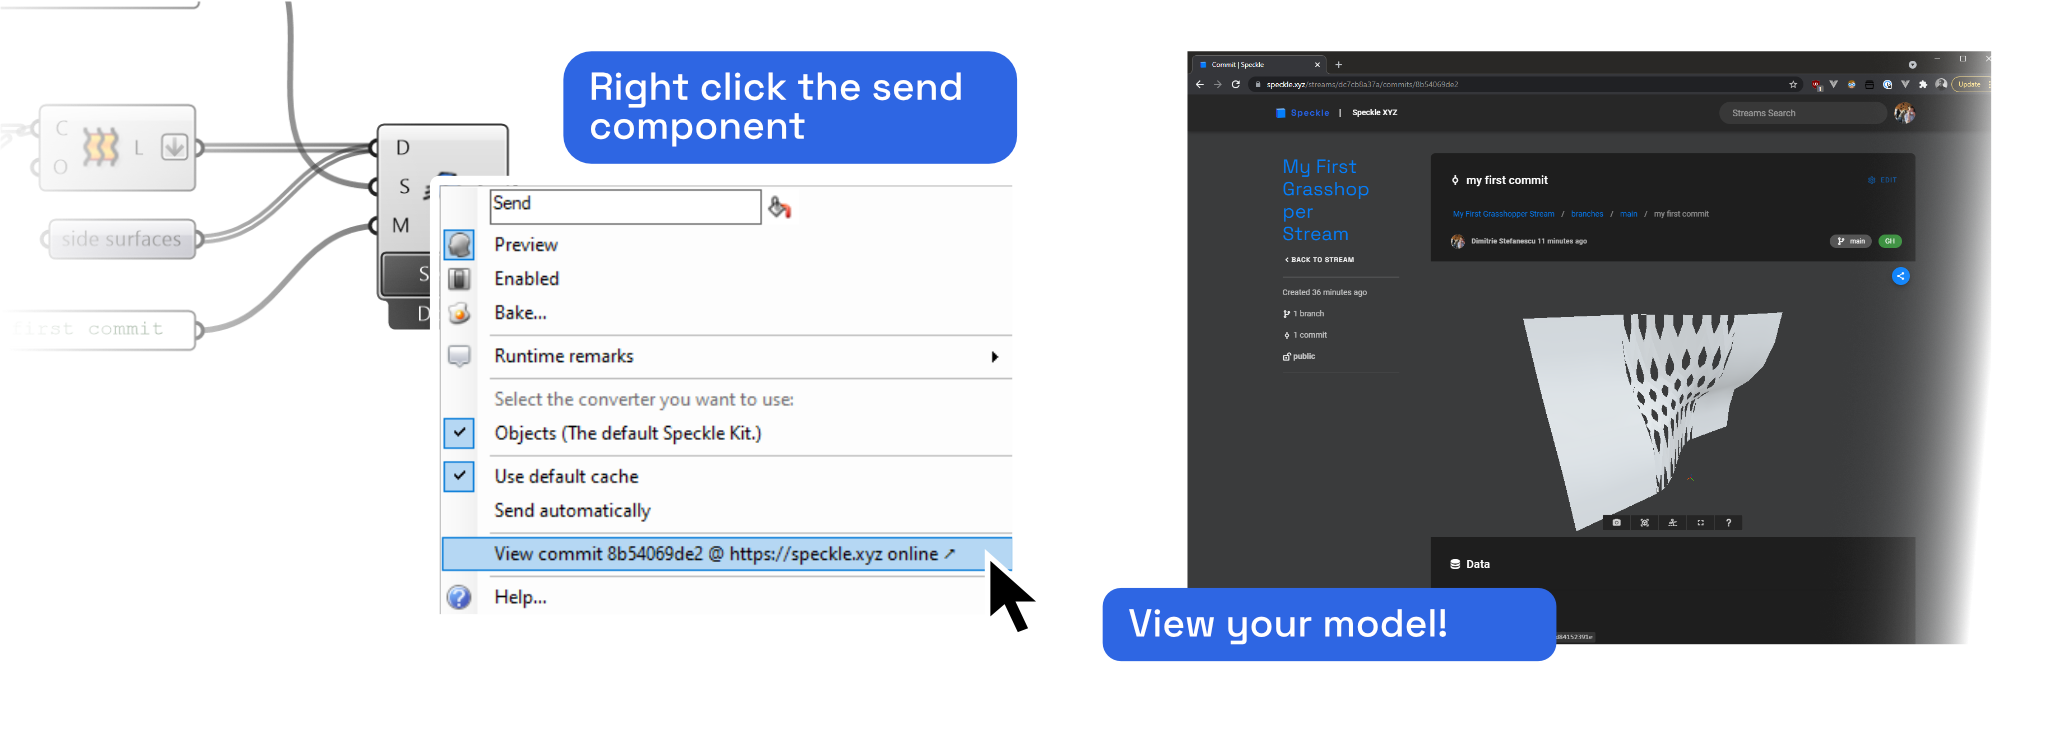
This will open up a new browser window displaying your commit. If you sent any geometry, you should be able to see it in the 3d viewer; if not, there's a data view below which you can use to inspect it. Here's mine below:
Congratulations! You've just created your first commit!
Receiving & Sharing Data
Receiving data is also super easy: you just need the link! So, for example, you can send the link above to your colleague. All they need to do to receive it is plug it into a "Receive" component and, you guessed it, click the "receive" button!
Voila, you're done!
Conclusion
We hope you enjoyed this tutorial and found it useful!
Speckle is an Open Source project and we really ❤️ feedback, so if you have any questions, comments, critiques, or praises please let us know on our community forum.