

::: tip Prerequisites
To follow along with this tutorial, you will need to register with Speckle and install the required connectors 🔌. It takes less than 3 minutes!
For a comprehensive overview of this connector, check our docs 📚!
:::
Introduction
Love it or hate it, Revit is an essential tool for many architects and engineers. However, Revit can't do everything. Let's look at how you can use Speckle to get data in and out of Revit and supercharge your productivity! Once your data is in Speckle, you can work with it though your own apps and scripts or receive it in our other connectors for Rhino, AutoCAD, Civil3D, Blender, etc.
If you're more of a watcher than a reader, have a look at this video which will teach you all the basics we'll be going over in this post.
Installation
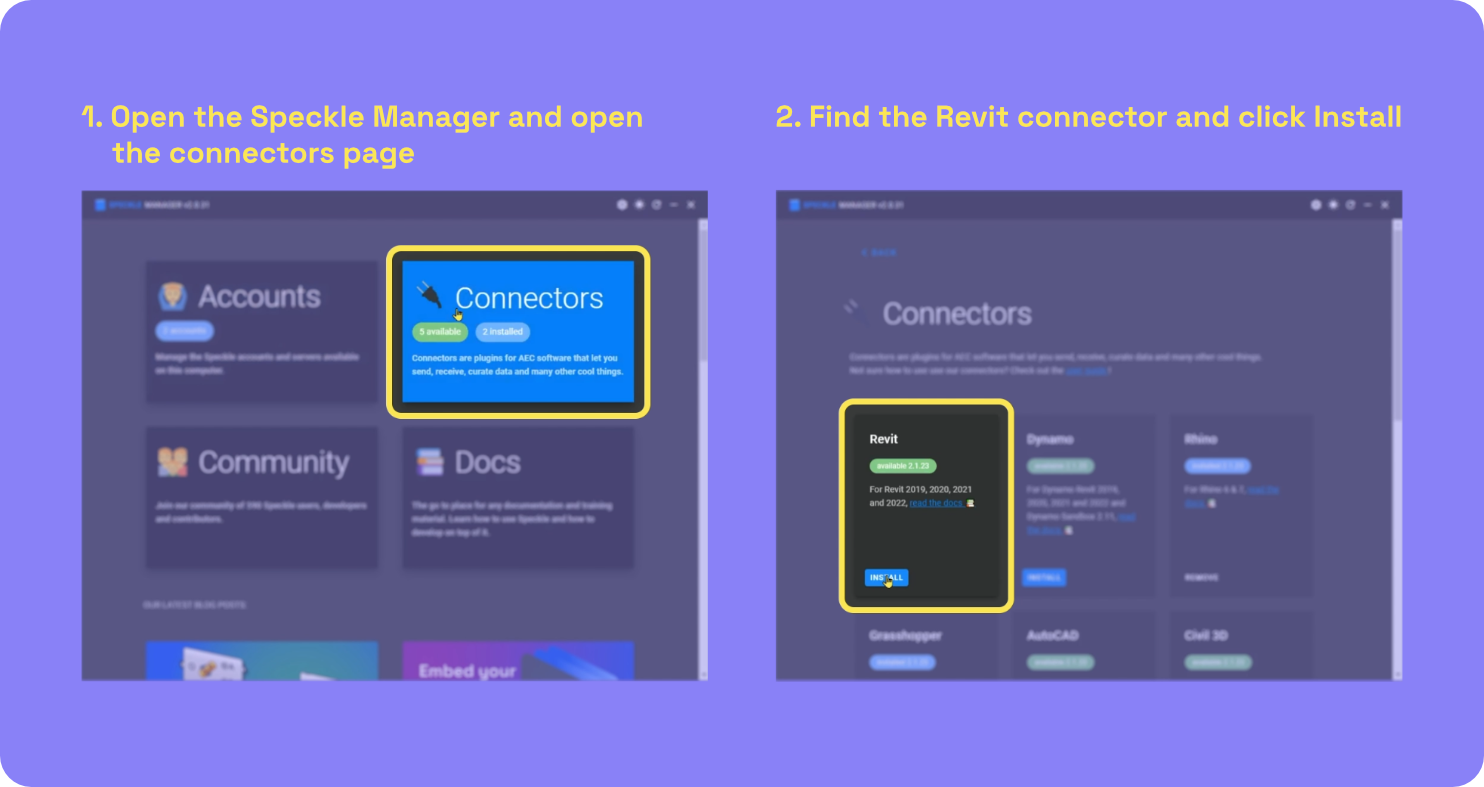
Installing the connector is as simple as finding it in the list of available connectors in Speckle Manager and clicking "Install"!
Launching the Connector
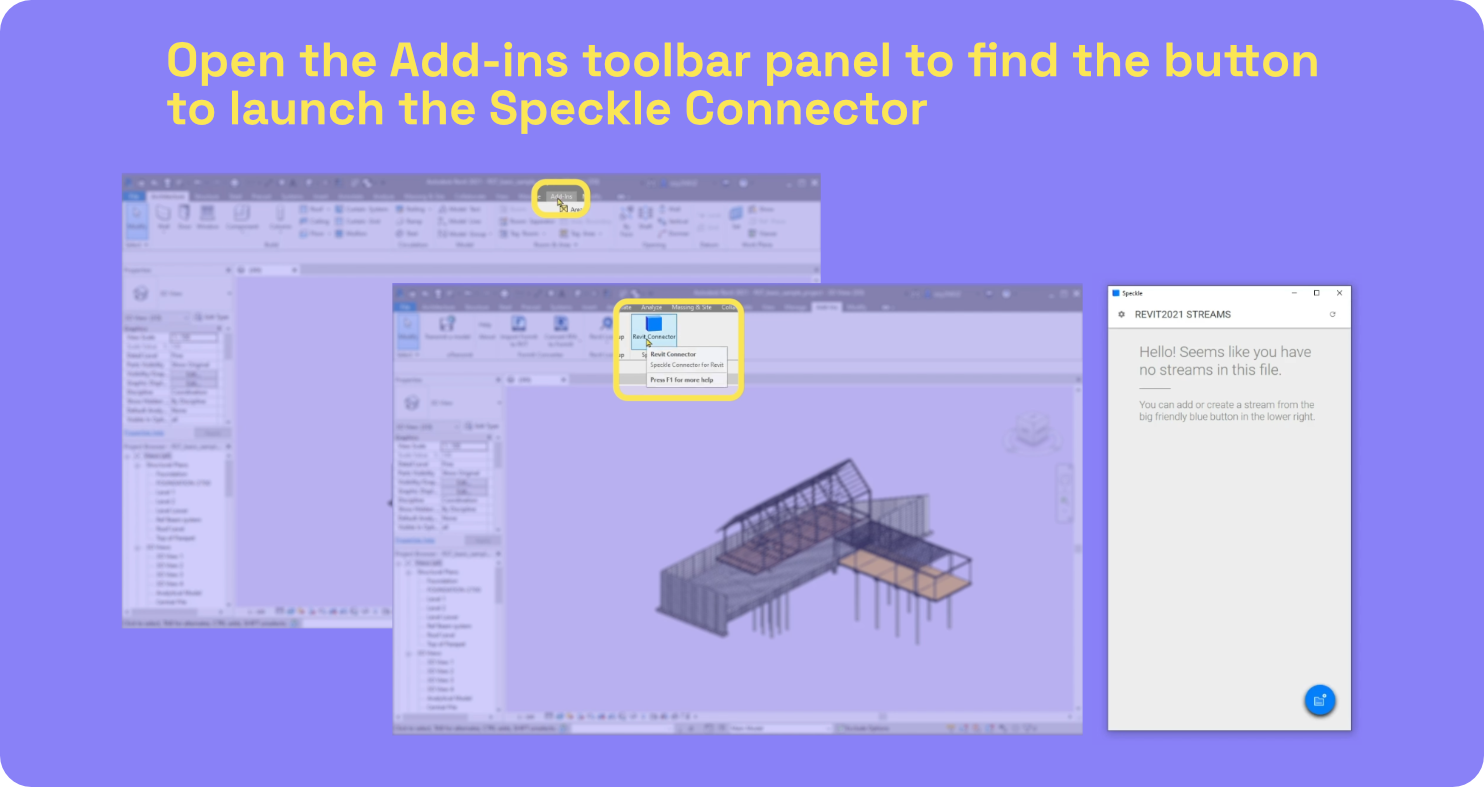
The connector will be added to all supported versions of Revit that you have installed.
To launch the connector, navigate to the "Add-ins" toolbar. There you'll find the Speckle Connector button - it's the one with the little blue brick 🧊
Adding or Creating a Stream

Adding a stream to your Revit project takes just three easy steps.
- Click the blue button on the bottom right corner of the connector
- You'll see a popup with a text box and three of your most recent streams
- You can use the text box to either search for an existing stream or name a new stream. Click the "➡" button to add a stream from the list or click the "+" button to create a new stream with that name.
You can also add streams by their URL. Simply paste the URL into the text field in the connector. The stream will appear below. Click the "➡" button to add it.

Sending from Revit
Sending data to your stream involves two steps:
- Adding the objects you want
- Sending the objects (with an optional message)
There are a couple different ways to go about this.
Sending the Current Selection
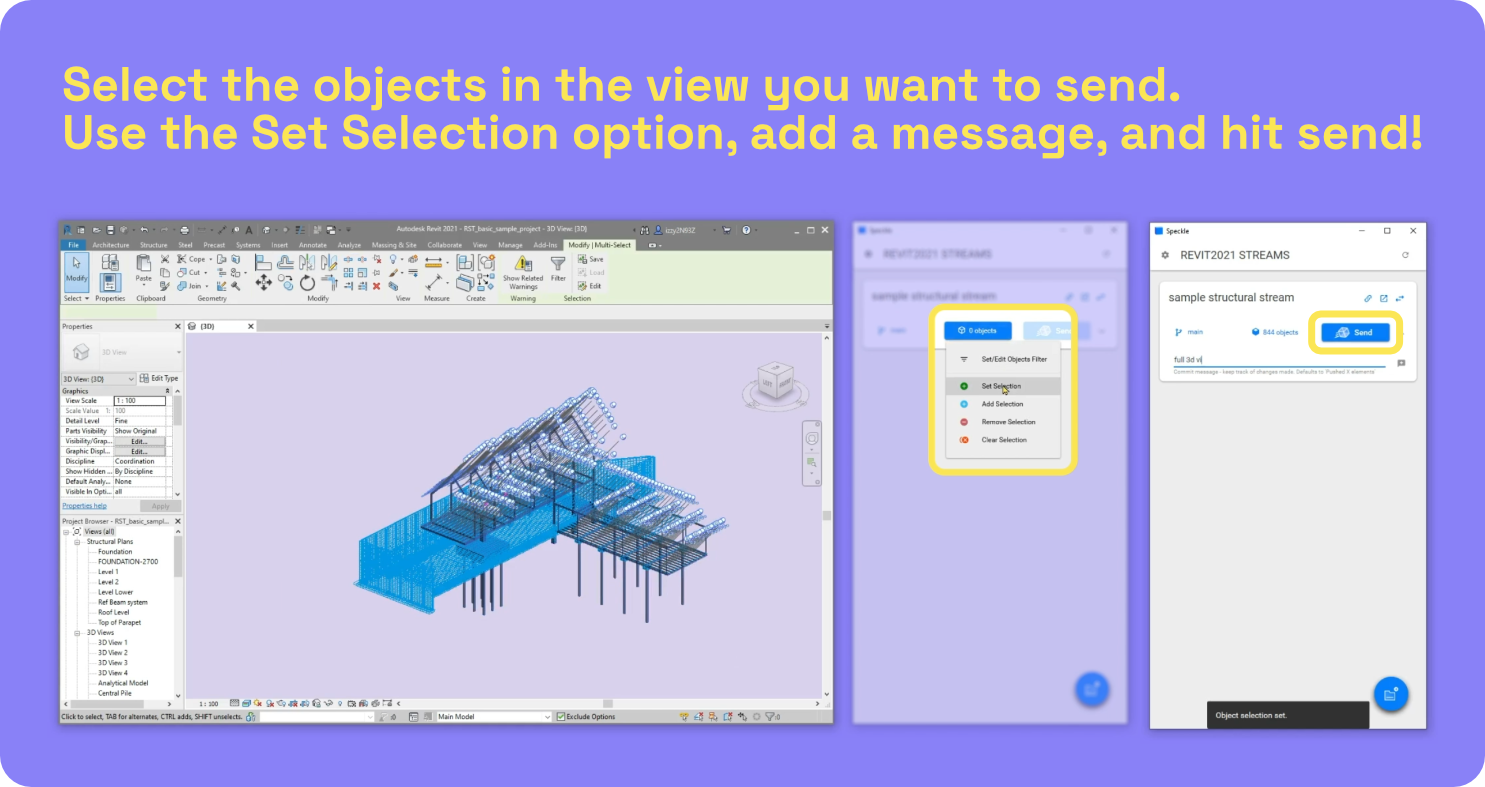
Choose what you want to send by selecting it in the Revit window. Next, click the blue button in the middle of the card. A menu with pop up with a few different options. Select the "Set Selection" option to add everything you have selected in Revit to your stream.
After you've added the objects, the "Send" button will have turned blue. This button is what you use to send the added objects to your stream! The send button is a bit quirky - there are two ways you can click it:
- Click it once, type a small message, then click it again to send.
- Double click it to send data straight away.
Check out the resulting model below 👇
Sending Using Filters
Instead of manually selecting the objects you want to add to the stream, you can use filters to select the objects for you. The connector includes a number of different filters you can use: category, view, parameter, project info, and all.
To apply a filter:
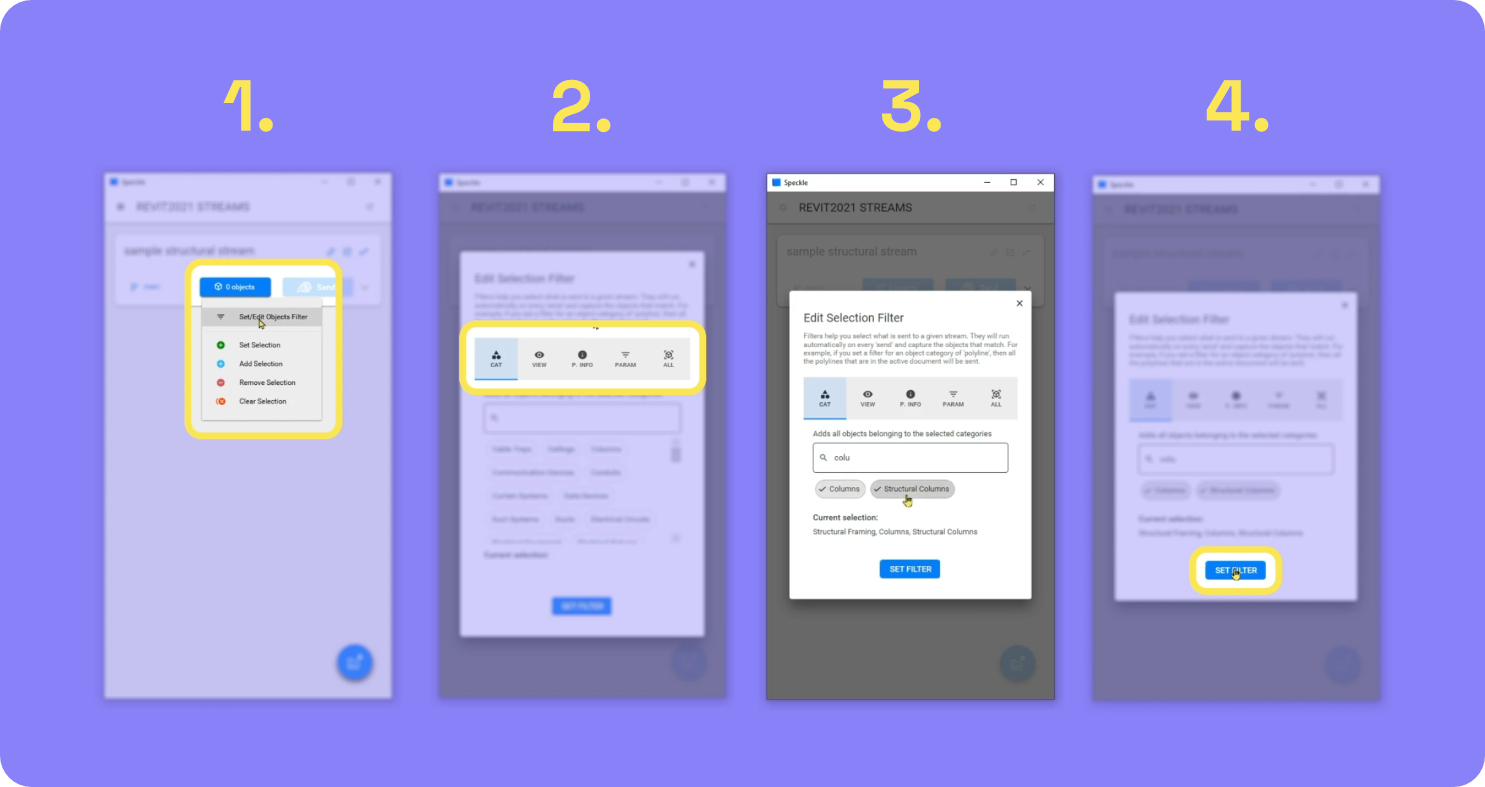
- Click the blue objects button and select the first option: "Set/Edit Objects Filter".
- Choose which filter you want to use. In this case, we're using the first filter: categories.
- Customise your filter. Here we're filtering for structural framing and columns.
- Finalise your selection by clicking the "Set Filter" option.
Click send and check out your filtered data on the web 👇
Receiving in Revit
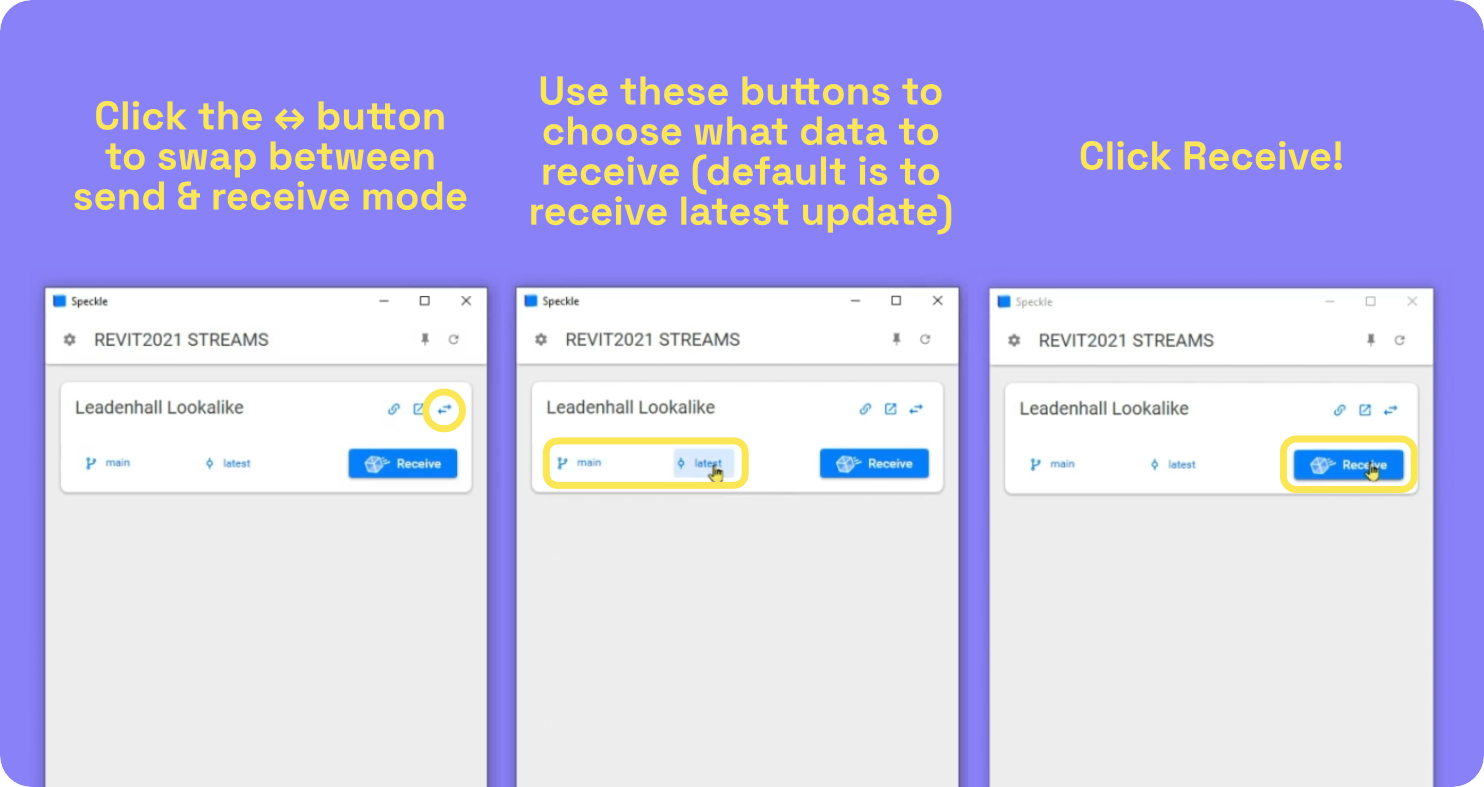
Receiving data into Revit is even easier. Make sure your stream card is in receive mode. If it isn't, click the ↔ button in the top right.
To receive the latest data from the stream, just click the blue "Receive" button and watch your data come in!
If you want to receive older data, you can use the centre button that says "latest" to choose an older send. If you have multiple branches on the stream, use the leftmost button to select a different one.
Here we've received this model from Rhino into Revit!
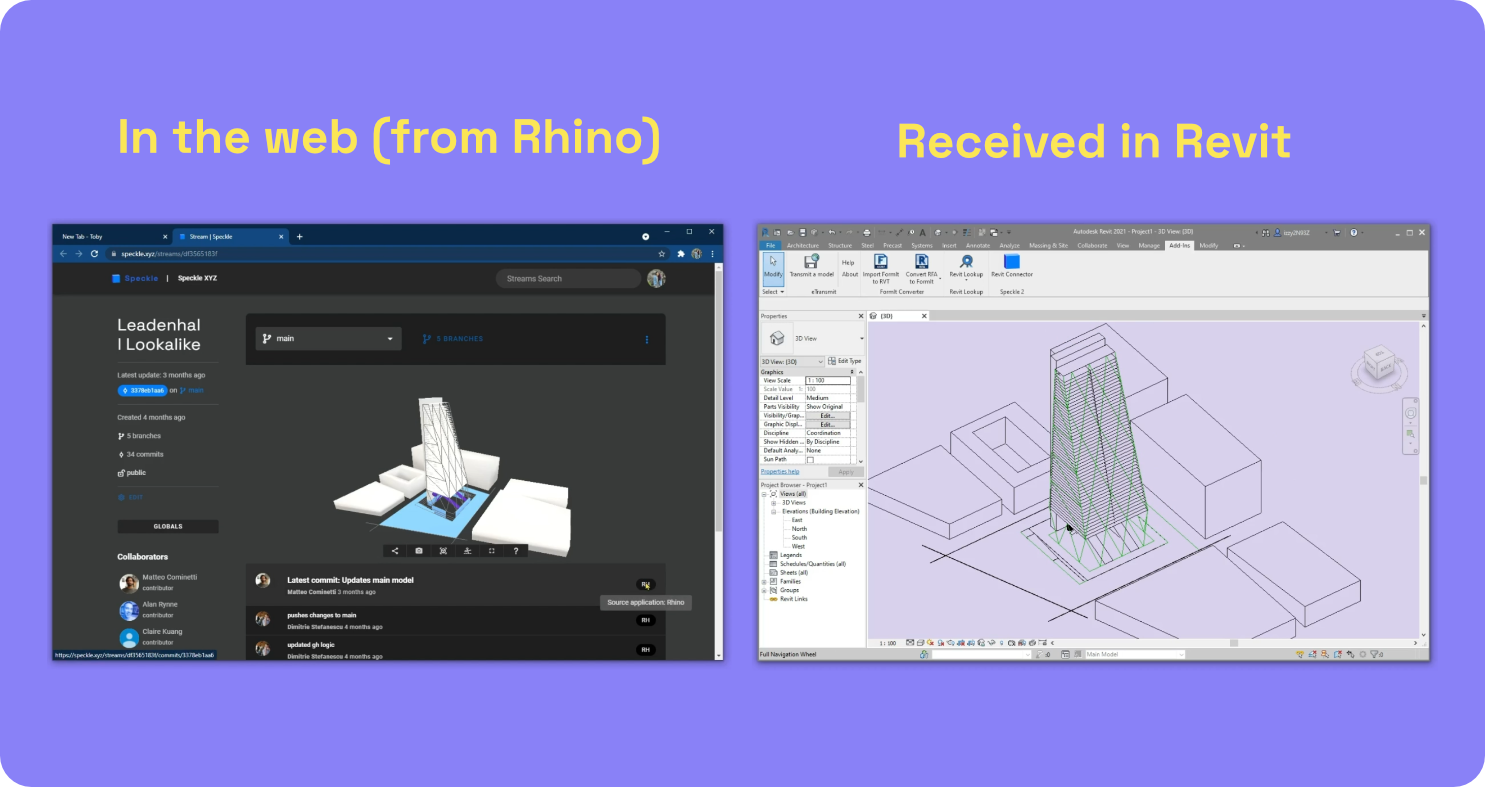
Check out the model on the web below 👇
If you want more detailed info on the Revit connector, head over to this page on speckle.guide!
Conclusion
We hope you enjoyed this tutorial and found it useful!
Speckle is an Open Source project and we really ❤️ feedback, so if you have any questions, comments, critiques, or praises please let us know on our community forum.