
Rhino is an amazing modelling software developed by an amazing team. Fun fact: Speckle was actually born as a Grasshopper plugin, followed really quickly by a Rhino connector. History aside, Speckle helps you take data in and out of Rhino, so you can scaffold bridges and workflows between people - even without opening up Grasshopper!
::: tip Prerequisites
To follow along with this tutorial, you will need to register with Speckle and install the required connectors 🔌. It takes less than 3 minutes!
For a comprehensive overview of this connector, check our docs 📚!
:::
Opening Speckle in Rhino
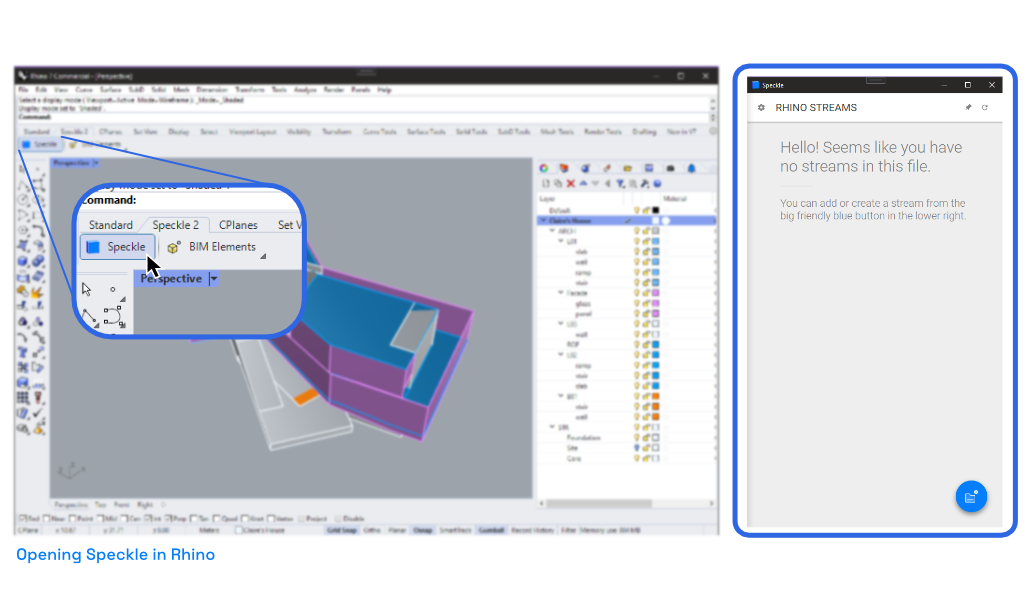
If this is your first time using Speckle in Rhino, don't worry! There's two main ways to open Speckle in Rhino.
If you like buttons, you can click on the "Speckle" button in our toolbar. If you can't find the Speckle toolbar, right click and look for "Speckle 2" - it should show up.
If you are like me, and don't care much for buttons, but rather speed, simply type Speckle in the Rhino command line. That should do it!
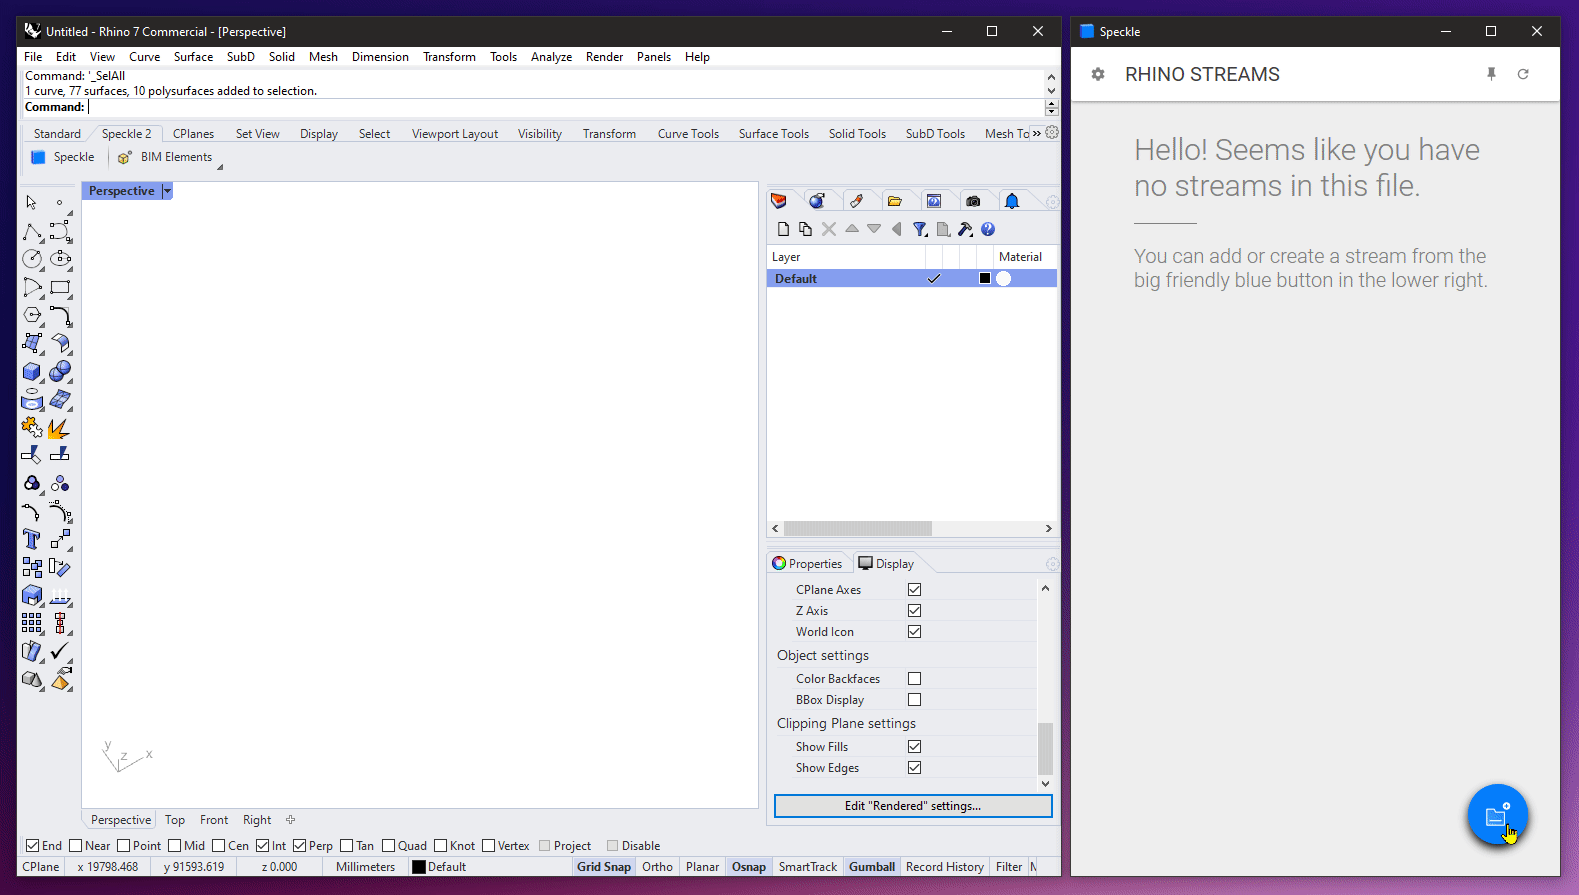
Creating a Stream
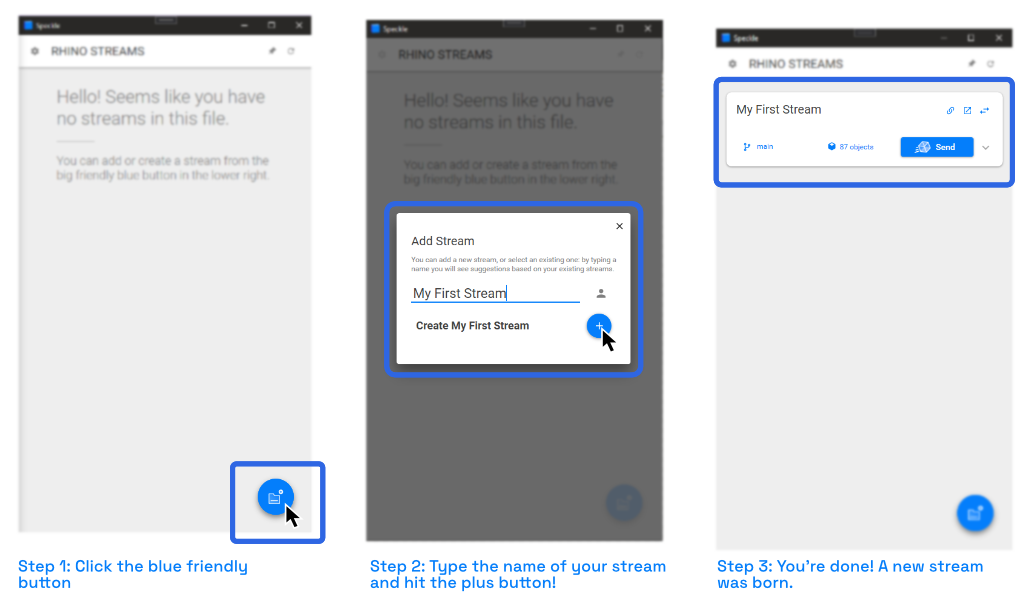
Creating a stream is super easy. First, in the Speckle Interface, click on the friendly blue button in the lower right. Then type the name of your new stream - should be something descriptive - and click the plus button. That's it - a new stream has just been born!
::: tip
If you have existing streams, when you click the new stream button, you will see a list of your most recently updated streams.
:::
Onwards to the next step, which is sending some data!
Your First Commit From Rhino
Commits are like snapshots: whenever you send data to Speckle, we store a copy of it. See it like infinite versioning that you don't need to worry about! Here's how you can create your first commit!
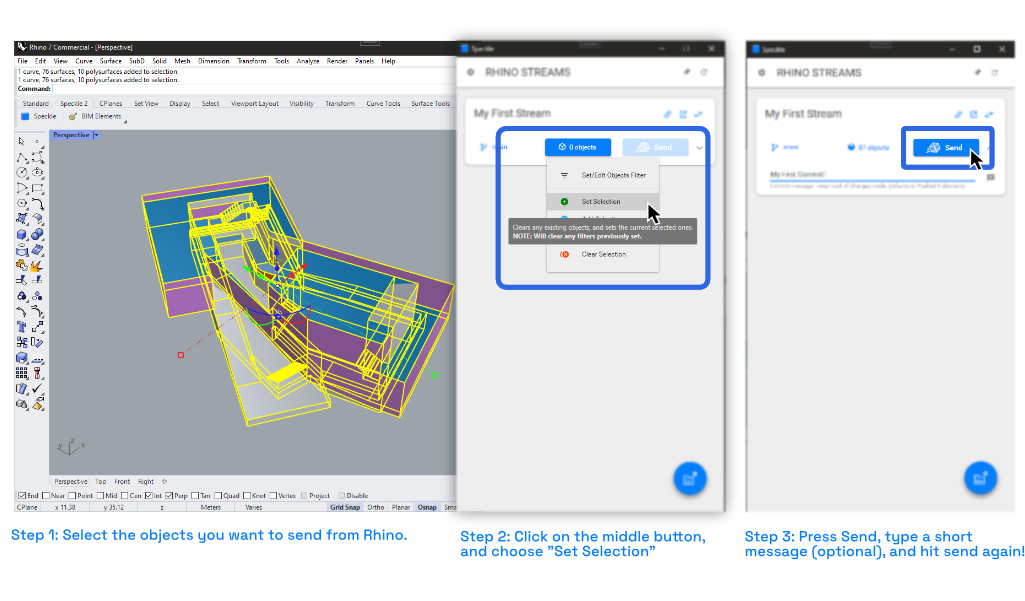
First, in Rhino, select the objects you want to send. Next, click the blue button on the stream card (in the Speckle interface) that says "0 objects", and then select the "Set Selection" option.
Next, you'll notice the Send button turns blue - that's because now there are some objects associated with this stream. This a bit of a quirky button currently, there's two ways you can click it:
- Click it once, type a small message, then click it again to send.
- Double click it to send data straight away.
That's it, you're done - you've just created your first commit! Welcome to Speckle.
View Your Model Online
Here's the live model from above:
Receiving Data in Rhino
Change of scenery! Let's say you now want to receive data in Rhino. There's several reasons why you'd want to do so:
- check out an older version of the model you're working on
- pull in geometry from a model that a colleague is working on
- validate alignments with a model coming from somewhere else (e.g., Revit)
Speckle makes it really easy to do so: in your currently open Rhino file, or a new one, click again the friendly blue button in the lower right, and search for the name of the stream you want to pull data from.
Easy, isn't it?
Some extra tips:
- Stream cards can be toggled from "send mode" to "receive mode" via the arrow button in the top right.
- You can select a specific commit and branch you want to receive from via the two buttons coming before the receive button.
::: tip Extra reading materials:
- The full guide on all the features of the Speckle Plugin can be found here.
- The in depth guide on the Speckle Connector for Rhino can be found here.
:::
Conclusion
We hope you enjoyed this tutorial and found it useful!
Speckle is an Open Source project and we really ❤️ feedback, so if you have any questions, comments, critiques, or praises please let us know on our community forum.