

By providing industry leading computer graphics technology to several billion dollar industries, Unreal Engine excels in its position as the world's most advanced real-time 3D creation tool for photoreal visuals and immersive experiences.
Unreal Engine facilitates the full spectrum of Architectural and 3D Visualisation, from quick drag and drop real-time renders to film quality cinematics.
With Speckle, we make it even easier to integrate Unreal Engine with your 3D workflows, and for developers, we provide an open and extensible set of tools to help you create applications that integrate flawlessly with Speckle.
Our Unreal Connector is in a beta stage of development, and our current focus is for creating a tool for developers.
That aside, here's a quick guide on how to get started with it!
Prerequisites
To follow along with this tutorial, you will need to register with Speckle and install the required connectors 🔌. It takes less than 3 minutes!
You will also need Unreal Engine 4.26 or newer installed.
For a comprehensive overview of this connector, check our docs 📚!
Installation and Project Setup
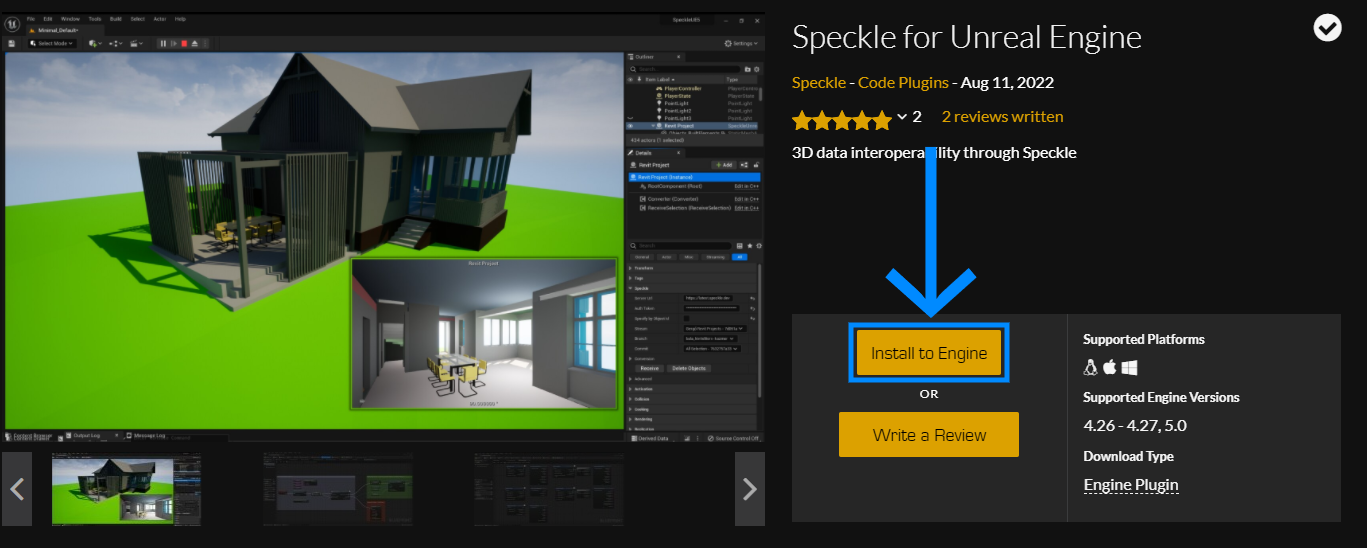
First, you will need to install the Speckle for Unreal Engine plugin from the Epic Marketplace.
Simply click Install to Engine and select the engine version you wish to use.
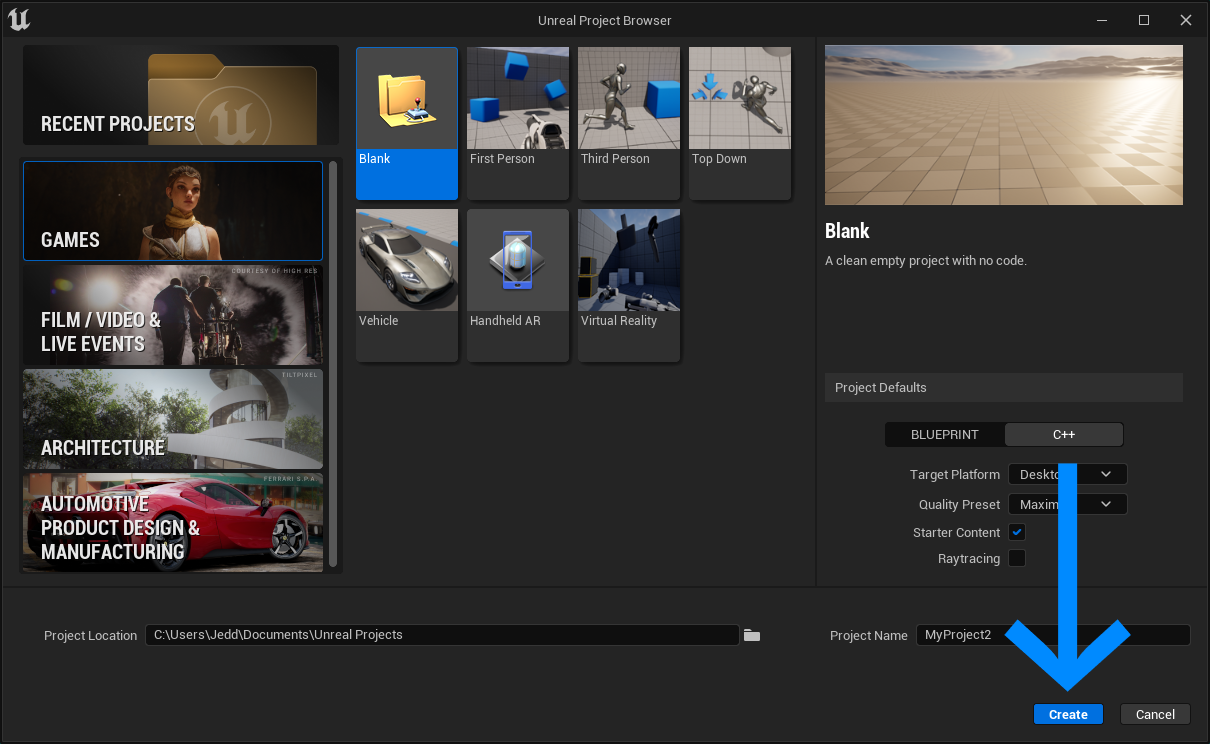
Next, you will need to create a new UE project (or use an existing one), any template will work.
Open your UE project, and head to Edit → Plugins, search for "Speckle Unreal" and enable the plugin.

That's It! The plugin is now enabled for your project.
Usage
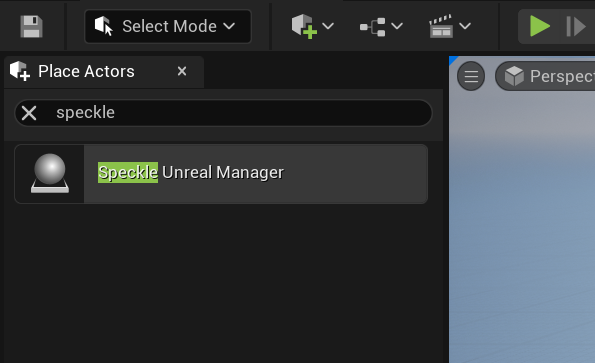
The plugin includes an actor type named Speckle Unreal Manager that you can use to import objects from Speckle.
Here is how to use it:
1. In the Place Actors sidebar, search for "Speckle Unreal Manager" and add it to the world.
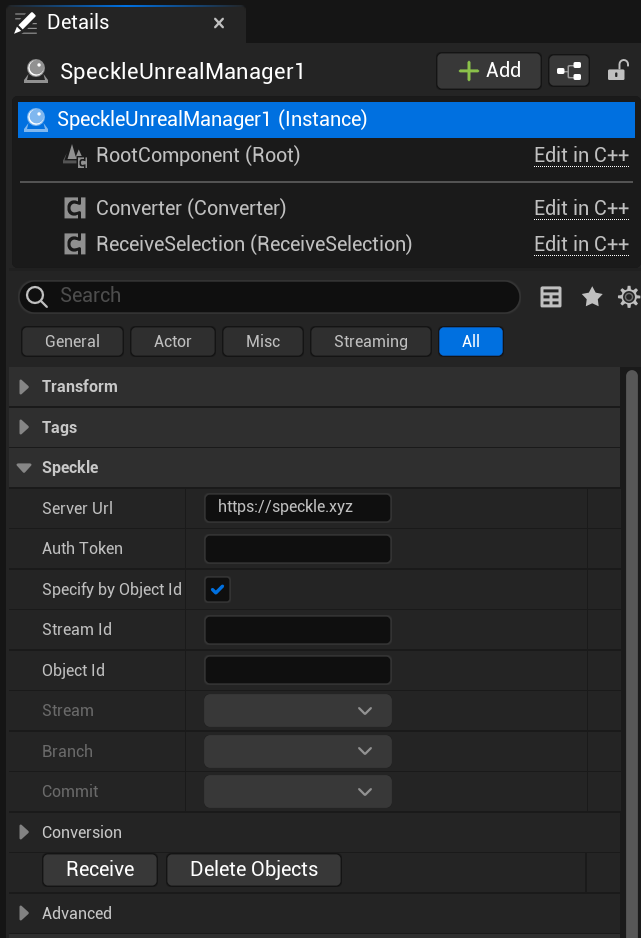
2. Select the SpeckleUnrealManager instance in the World Outliner sidebar and use the options presented in the Speckle category
3. Next, we need to authenticate our Speckle Account.
For this, you will need to head to your Speckle profile page, and generate an access token (aka auth token). It is important that you give this access token all permissions (scopes).
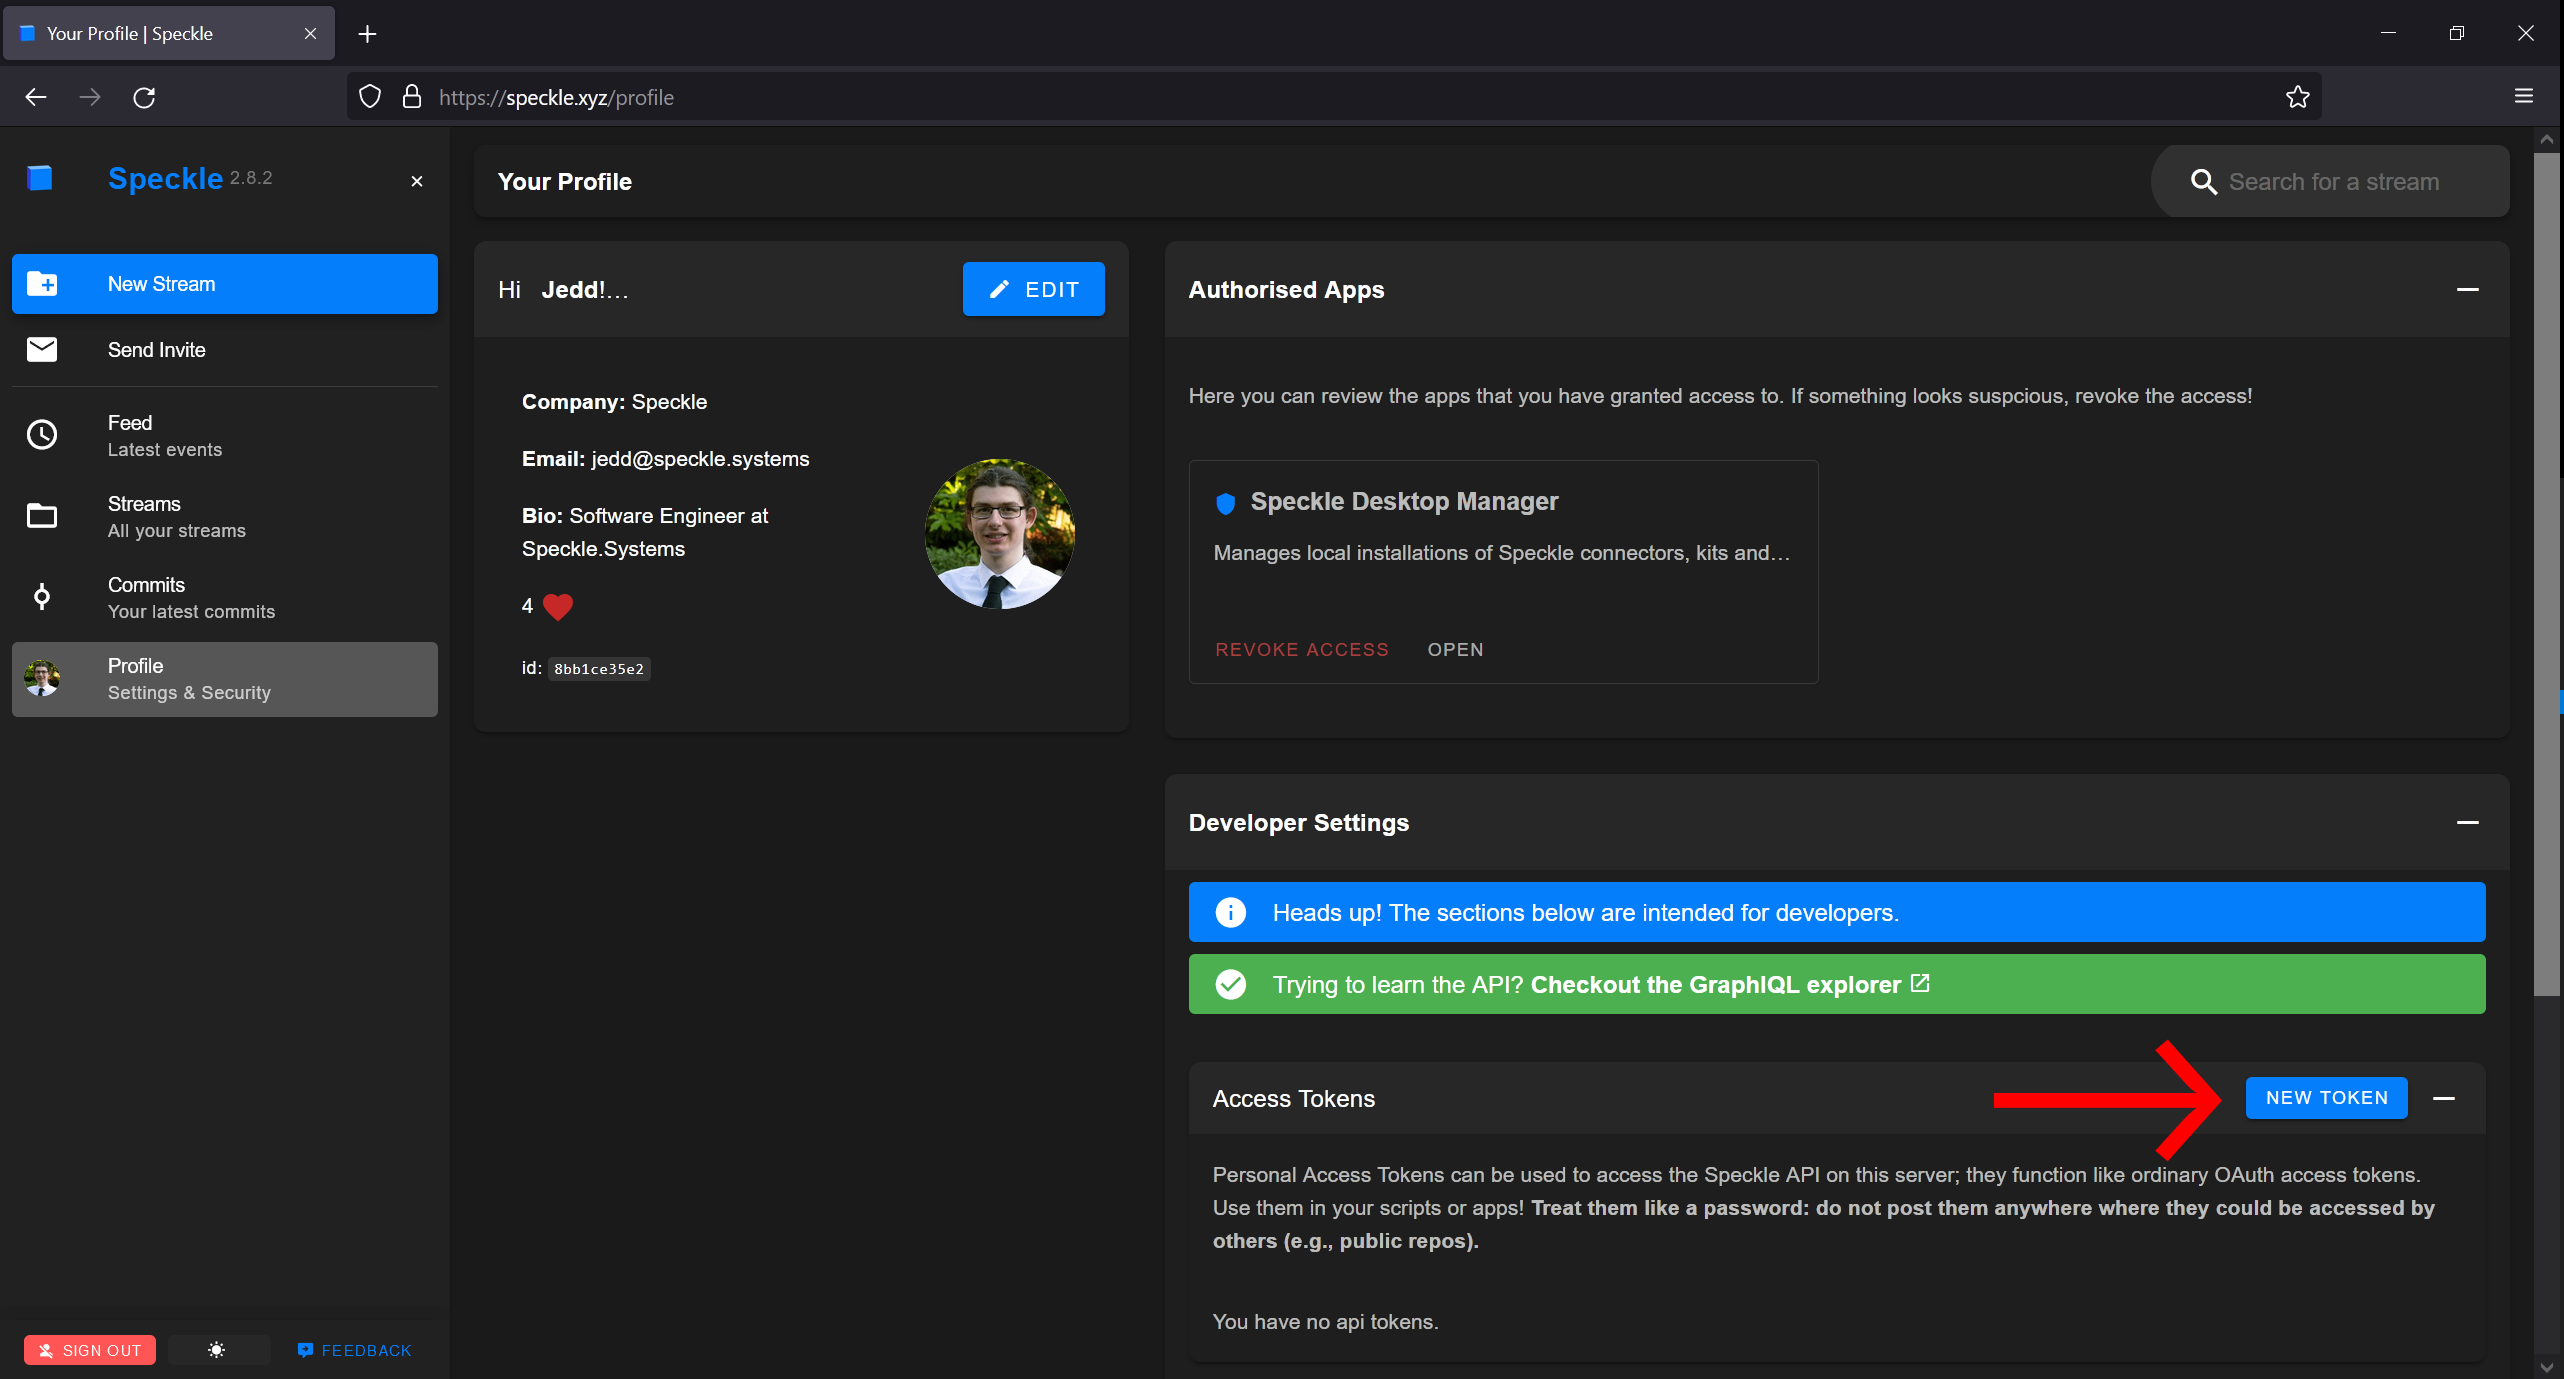
You should only need to generate this access token once, but tokens can easily be generated and deactivated here from the profile page.
::: warning
⚠️ Treat your Personal Access Token as a password. If someone else has access to your auth token, they can access to your Speckle data. ⚠️
:::
Once generated, copy and paste this token into the Auth Token property in your Speckle Unreal Manager.
6. We can use the Speckle Unreal Manager as is, and manually specify a StreamId + ObjectId to import.
Or we can simply deselect the "specify by Object Id" option, and select a Stream + Branch + Commit from the drop-down menu!
If the drop down menu options don't populate. Ensure,
1. You have created (or been added to) a stream that has atleast one commit made from another application (e.g. Blender, Sketchup, Rhino, etc.)
2. When you generate your auth token, you assign it all scopes.
3. That theServerURLis correct for your account, and there are no traling/or space characters.
4. Try deselecting, and reselecting the actor.
5. That no warnigns are posted in theOutput Log.
Feel free to reach out to us on the community forum for support!
6. After you set up the import parameters, just click the Receive button. The specified object and all its children will be important as Actors.
Receiving through Blueprint
The receiving process can be performed using blueprint, doing it this way can allow for extra flexibility for performing additional actions with received data/converted actors.
An example of this process in Blueprint is provided in the Plugins\speckle-unreal\Content\Examples directory.
Blueprint can be a powerful tool for implementing your own custom behaviours for receiving objects. Check out our Docs for more on Blueprint.
Source Code
All the code is available in our Github repository. Feel free to clone, fork and open issues!
Don't forget to ⭐ our repos if you like what you see!
Conclusion
We hope you enjoyed this tutorial and found it useful!
Please see our docs for more!
Speckle is an Open Source project and we really ❤️ feedback, so if you have any questions, comments, critiques, or praises please let us know on our community forum.