
::: tip Prerequisites
To follow along with this tutorial, you will need to register with Speckle and install the required connectors. It takes less than 3 minutes!
For a comprehensive overview of these connectors, check our docs!
:::
Getting Started
Before getting started, check that you have a supported version of Rhino (6 or 7) and ETABS (v18 or v19) and the Speckle 2.0 connectors installed for Grasshopper and ETABS.
With everything set up, download the Rhino and Grasshopper files for this tutorial here
::: tip
Our Rhino and Grasshopper connectors are independent of each other, unlike in Speckle 1.0. This means you can choose whichever one best suits your workflow 😁
:::
We're also going to assume that you already have access to a Speckle 2.0 server, and you have correctly set up your account for that server in the Speckle Manager.
Sharing ETABS Project Data
Let's start with the easy part: In order to create ETABS elements using Speckle, we should ideally have some knowledge of the current information available in our ETABS project.
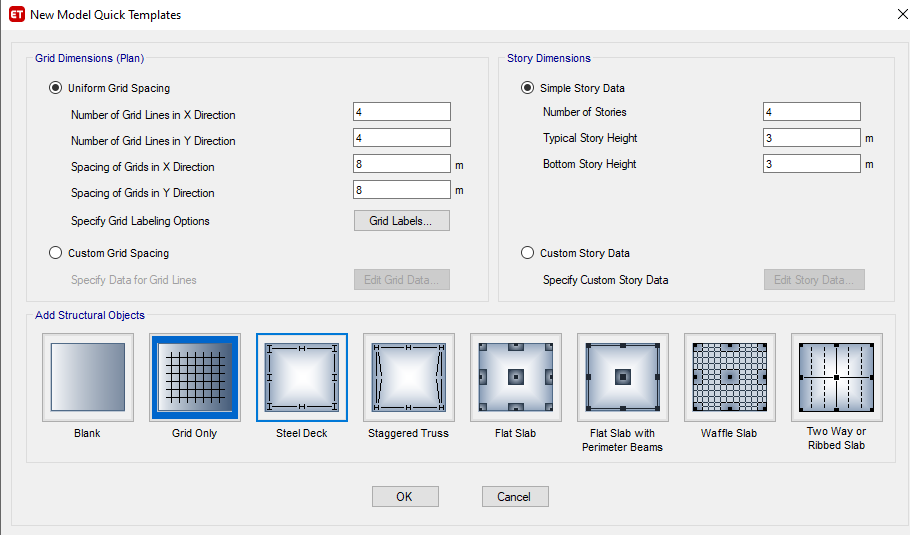
Let's create a new ETABS project using the default steel deck template that is offered in ETABS. You can use your preferred units, and code section. A project will be created with x default levels. The ETABS model labeled" " file in the drive has some default properties and imported sections as well as braced frames.
Now, go to the PlugIn tab, and press the ETABS connector plugin. If the plugin is not loaded properly; add the plugin at the current file location for ETABS18 or 19 respectively: "%LocalAppData%\Computers and Structures\ETABS 18\Speckle2ETABS" The Speckle Desktop UI2 should appear.
- Press the create new stream button on the lower-right corner to add a stream to the file.
- You should see the
Streamappear in the streams list in addition to the other streams
::: tip
In our case, we'll call our stream Interop - GH/ETABS
:::
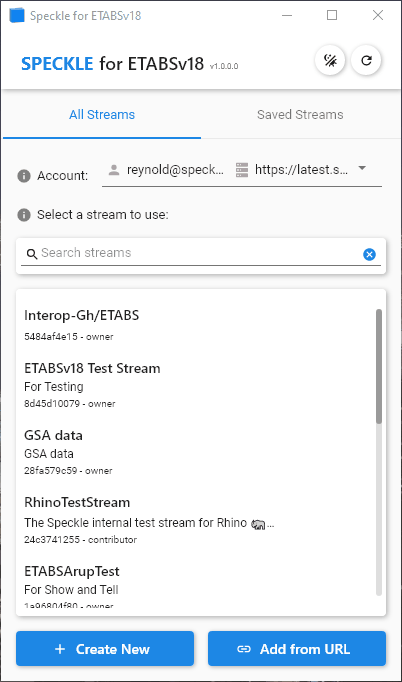
- Go to the
Categoryfilter type, select the Frame, and Area options. This will send all geometry to - Press the
Savebutton to save the stream button in the Project Data stream.
That's it! We've effectively pushed our project information, including all existing geometric properties to Speckle. We'll use this information to correctly change properties for the ETABS elements.
This concludes our setup. We'll now switch to Grasshopper to receive it and use it to generate new ETABS elements. Check out the elements in the following embedded viewer.
Using ETABS Project Data
Now let's open up our template building model in Grasshopper. Go to a blank area of your Grasshopper canvas:
- Create a
Paneland aReceivenode. - Paste the stream url we copied in the previous step into the panel.
- Connect the panel to the
Receivenode input and press the Receive button. - Create an
Expand Speckle Objectnode, and connect the received data to it. - Use more
Expand Speckle Objectnode to expand the data more as you would in the viewer.
Once done, it should look like this:
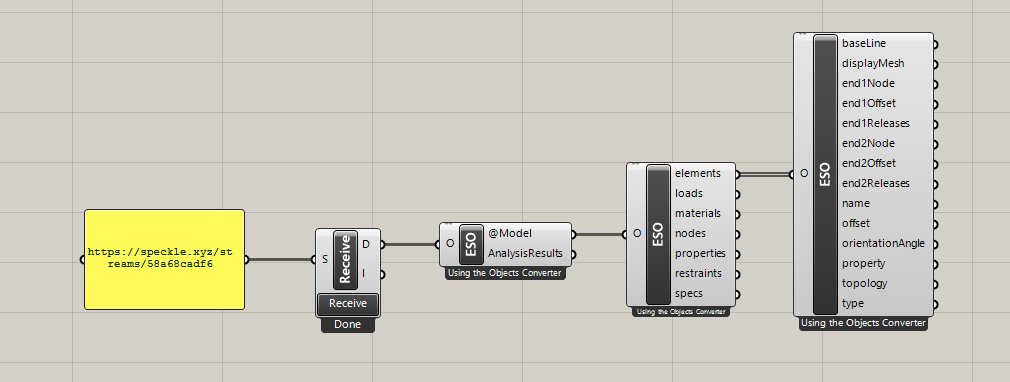
Most of the outputs will also be Base objects, meaning you'll have to expand them to inspect their properties. It is worth noting that all Speckle Structural Objects, will be encapsulated in a Speckle Structural Model Object which represents the structural components of a model. Expanding this will allow you to traverse through the model information in various layers and in an organized manner in ETABS.
Sending Geometry (Stick Model) to ETABS
For this section of the tutorial, we shall be using the grasshopper script. We'll send some parametrically defined space truss geometry to ETABS. The script depends on LunchBox since I'm slightly ever so incompetent at generating a grasshopper parametrically defined model. After generating your lines, you can receive the geometry inside ETABS. You can also receive rhino stick models likewise.
We'll need to create a new stream in our server to send our data to. Create it, name it interop-Gh/ETABS Parametric Space Truss , and copy its url.
Then, we can just plug in the geometries directly into their respective inputs. Connect it to a Send Data node pointing to the stream we just created and press Send.
In ETABS, find the stream in the DesktopUI and press Receive. Here's a quick peek of the process:
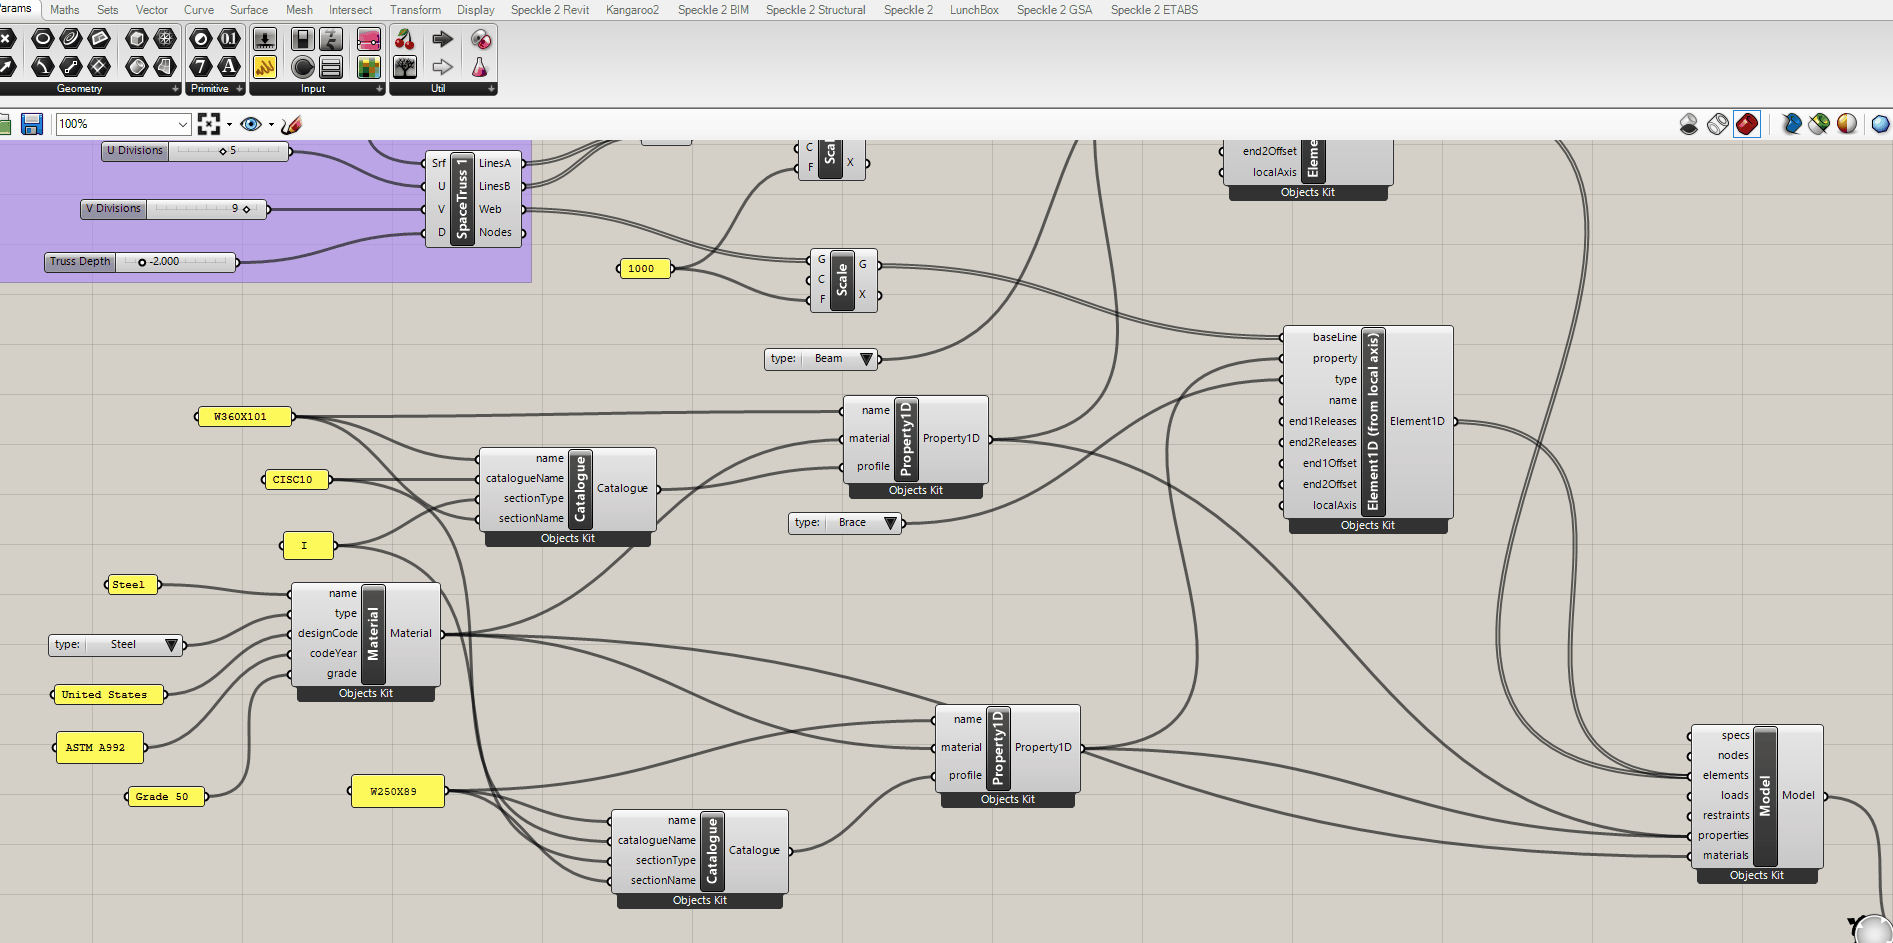
Controlling the Conversion and Advanced Structural building for the kits.
Sending line geometry isn't that useful by itself. It would be nice to define more aspects of the model parametrically such as properties. Fear not, because this is what the structural object kit. For this, we'll first create a Speckle Structural Model Object to organize our data. We shall explore each of these aspects in detail and what is required/expected of them if we want a clean conversion into ETABS. The user doc will be covering this more extensively as well. We'll send the same model again, but this time with some loading and properties.
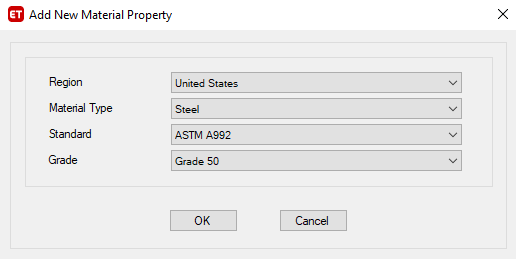
Creating Materials
For the purpose of this tutorial, we'll be importing material definitions into ETABS and using them.
- Name: This will be the name of it in ETABS in the end.
- Type: There are a couple of ETABS options within here as an enumerator.
- Design Code: This is the place of origin that we often see within ETABS
- codeYear: standard in ETABS
- Grade: self explanatory
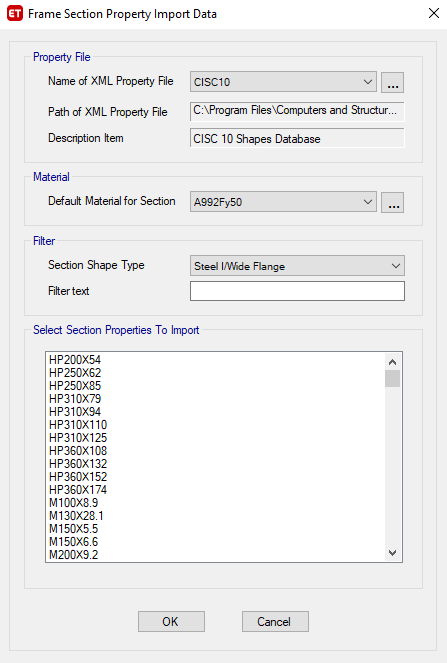
Creating 1D Properties
For the purpose of this tutorial, we'll be using only the catalog sections to be imported from the CISC10 database of Canadian sections. So to fully define a property element in ETABS we need to define the materials associated with the profile and the section profile (the shape of the profile)


- Catalogue Name: name of XML Property File.
- Section Type: This input doesn't matter for ETABS and makes no difference but is useful for your own documentation.
- sectionName: This is the name of the section property to import. Make sure they are spelled the way ETABS expects it.
- name: This is the name of the actual property itself. You can name this to be anything you want, but for clarity's sake, it would be good to keep it the same as the sectionName.
Creating 1D elements
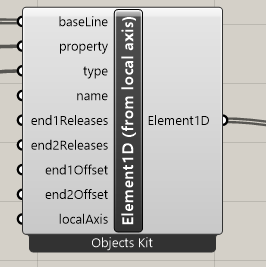
We can now create a 1D element, just connect the properties and the reference lines generated from the grasshopper script to generate the model. If you do not want to add loading to the 1D elements, it's not necessary to give them names. However, if you do want to give them loading, it is important to give them a name later on as well.
Creating Loads
::: warning
🚧 This section is still under construction 🚧
:::
Organize the Building Structure
Until this moment, we've been creating several ETABS objects we want to send. To receive the elements fully in ETABS, we need to encapsulate it back in the model object.
We have several parts to send:
- elements
- materials
- properties
Just hook everything back up to the Model node and we are good to go.
Sending the Building Structure
In the Speckle Web App, create a new stream to send the structure data to. Copy its url. In Grasshopper, create a Send node and a panel with the url of the stream we created earlier to share the structure.
In ETABS, add the newly created stream to the DesktopUI and press Receive. You can see the entire process in the animation below.
Using Branches to Swap Design Alternatives
This is a perfect moment to introduce the concept of branches and how you can leverage this feature to alternate between different design options.
- Go to the stream's url in your web browser, and create a new branch called
design-option-2. - Copy the url of the
branchpage (it should end in/branches/BRANCH_NAME) - On the grasshopper file, modify the points in any way, like modifying the
seedinput in theRandom numbersnode. - Change the
stream urlfor thebranch urlwe just copied and press send.
Known Issues
Speckle ETABS is currently in alpha release. You can find any known issues on our GitHub Repo Issues page.
Conclusion
We hope you enjoyed this tutorial and found it useful!
Speckle is an Open Source project and we really ❤️ feedback, so if you have any questions, comments, critiques, or praises please let us know on our community forum.