How to transfer IFC models to Blender via Speckle
This tutorial demonstrates how to upload IFC (Industry Foundation Classes) files directly to Speckle and import them into Blender for architectural visualization, creating an efficient workflow for working with standardized BIM data across platforms.
Prerequisites
Before starting, ensure you have:
- A Speckle account
- Speckle Blender connector installed
- Blender installed on your computer
Stage 1: Uploading IFC Files to Speckle
Accessing the Speckle Web Interface
- Navigate to your Speckle workspace in a web browser
- Select an existing project or create a new one for your IFC model
- Locate the project where you want to add your IFC model
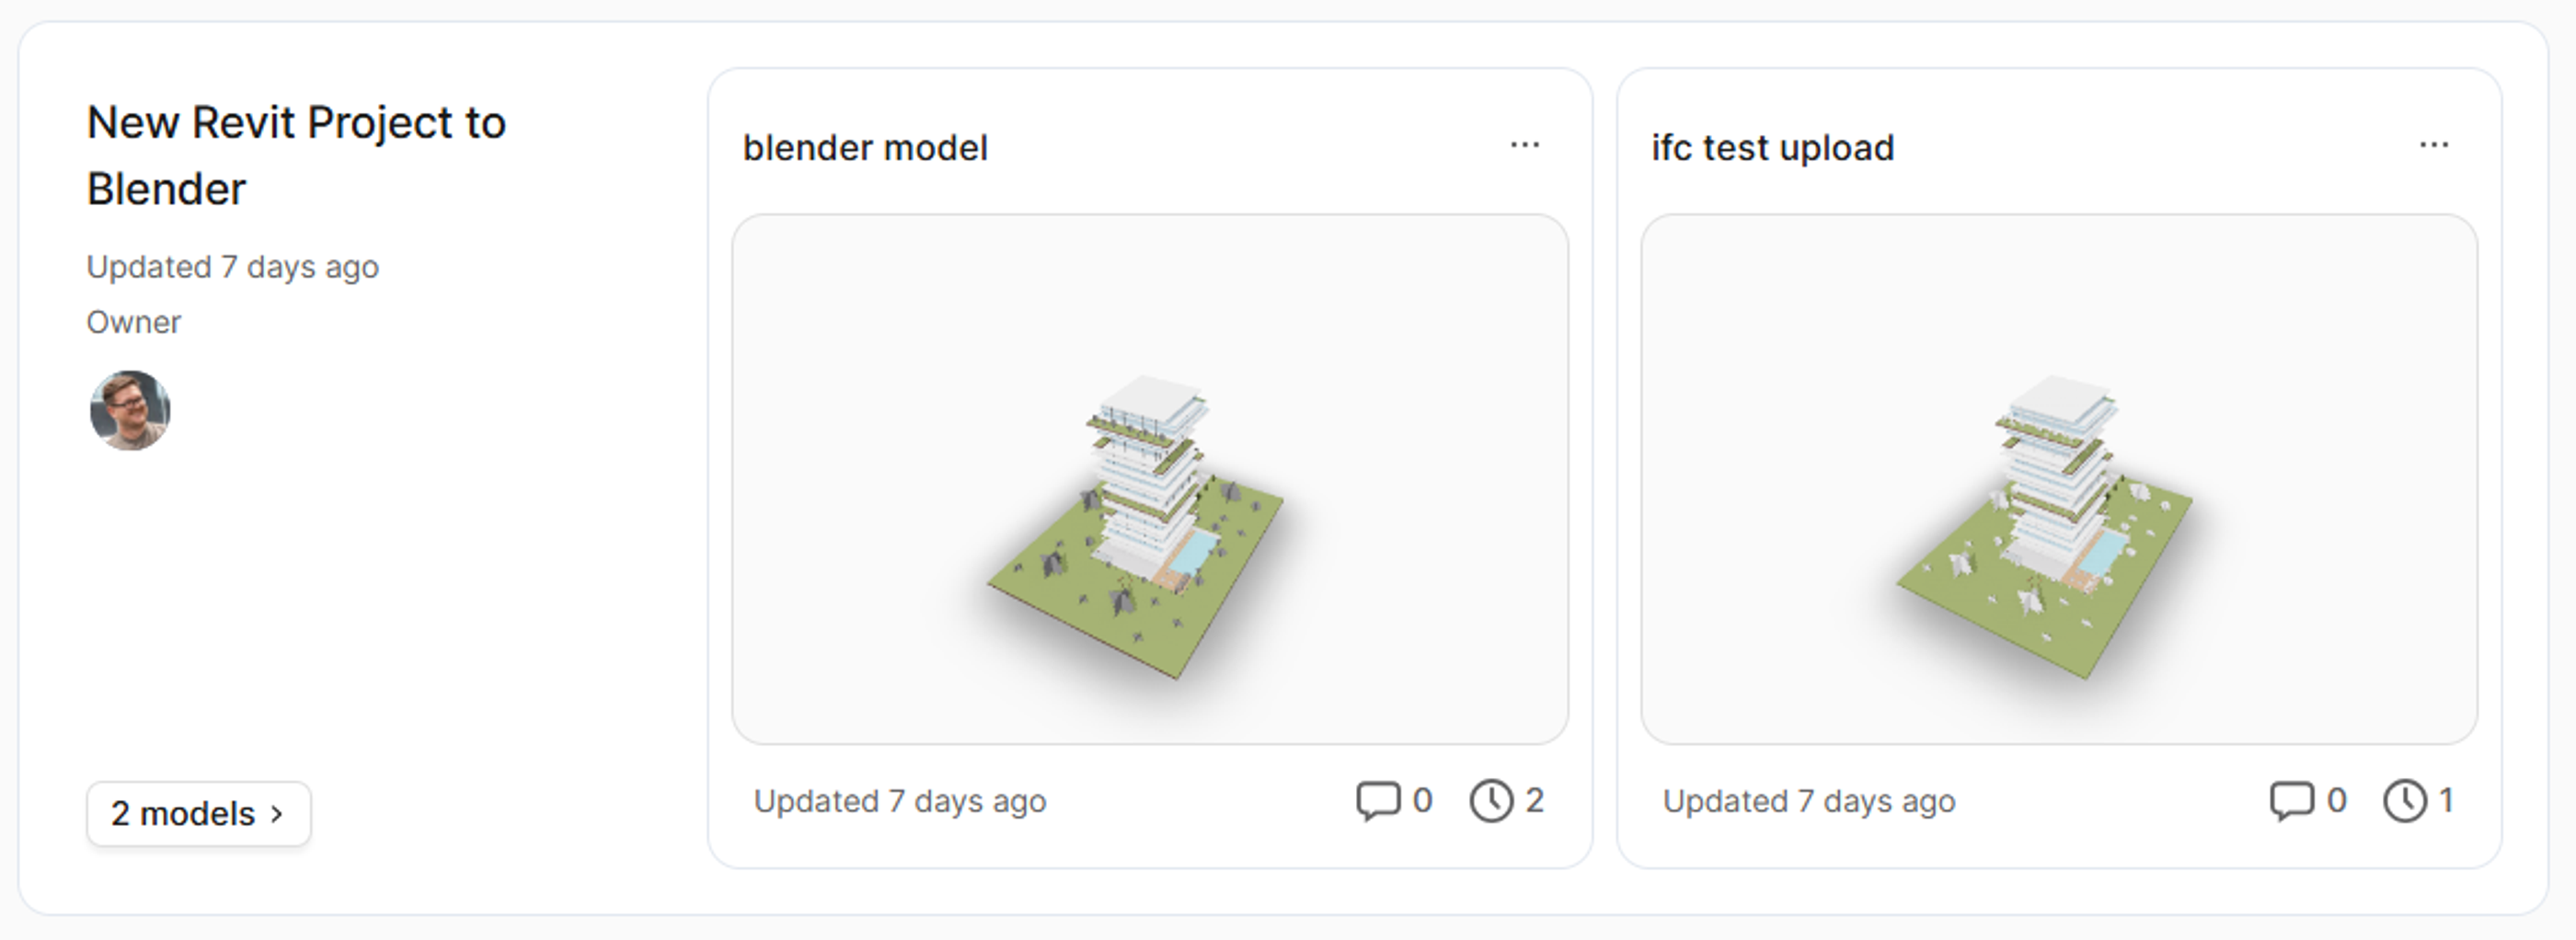
Creating a New Model for IFC Upload
- Click the "New Model" button in your selected project
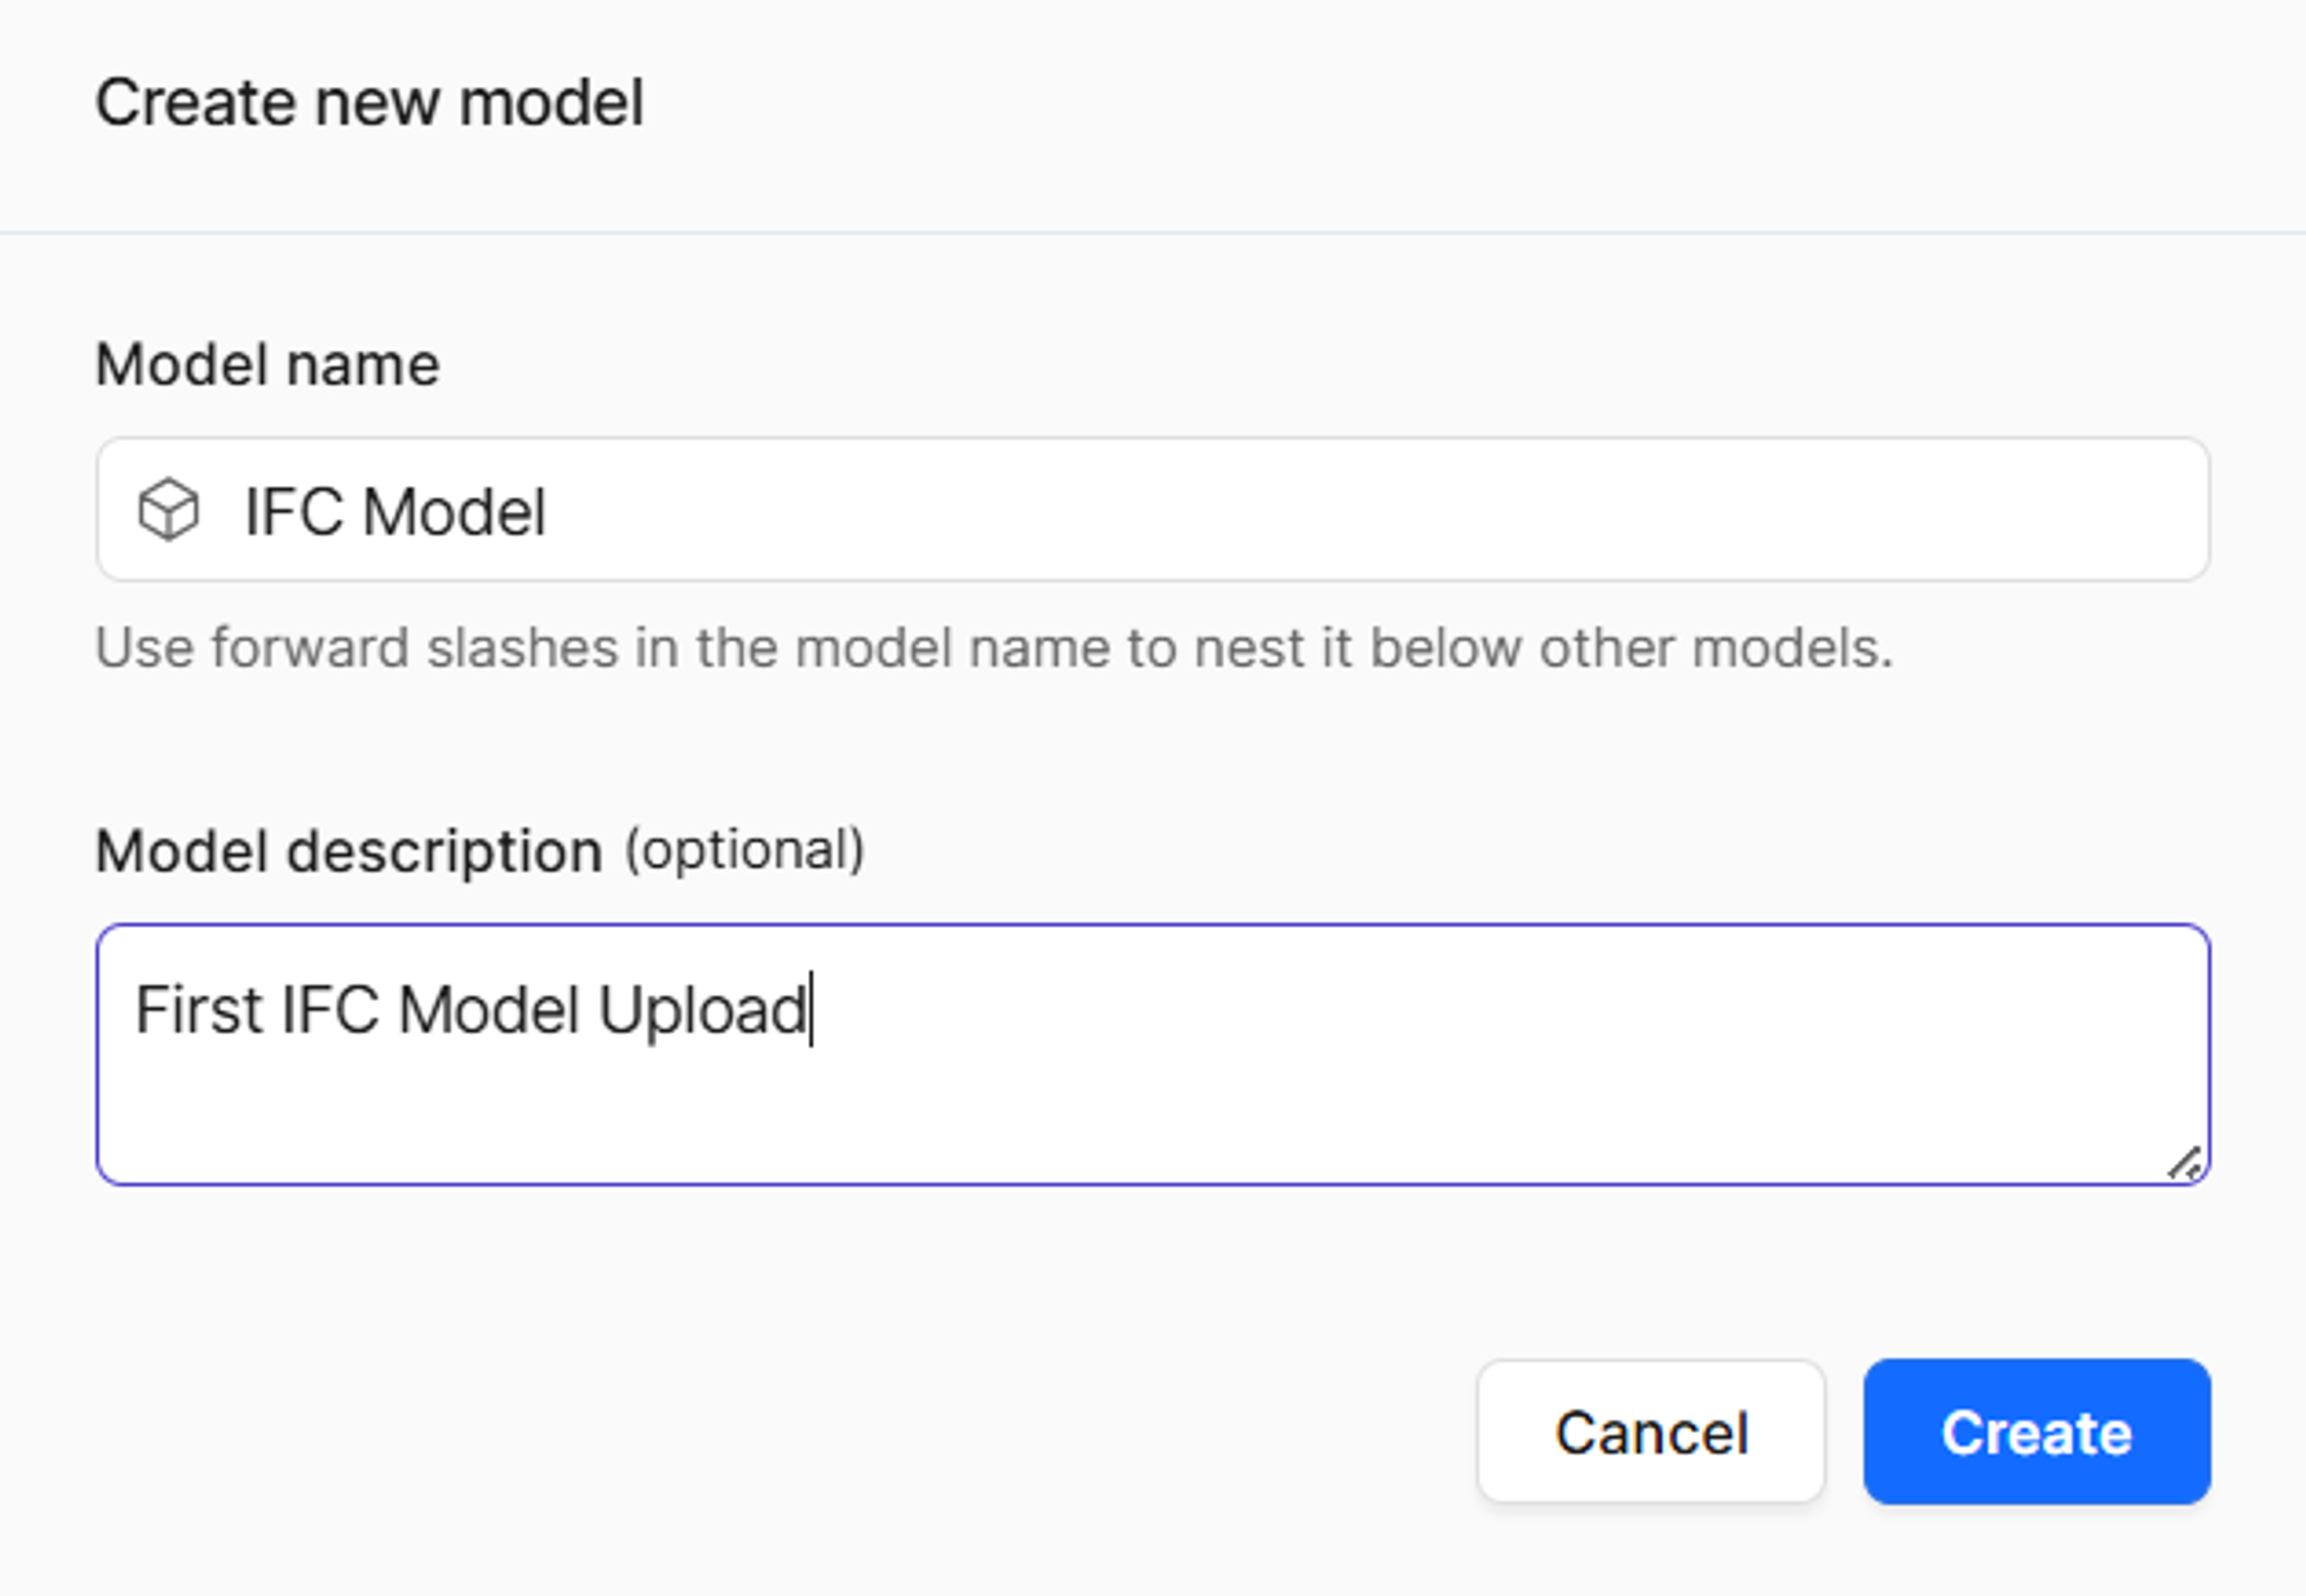
- Enter a descriptive model name (e.g., "IFC Model")
- Add a description (optional but recommended for project organization)
- Click "Create" to set up the empty model
Direct IFC File Upload
- Locate the IFC upload area - you'll see a drag-and-drop zone specifically for IFC files
- Drag and drop your IFC file directly into the upload area
- Wait for the file to process - Speckle will convert the IFC data into its native format
- Click on the processed model once upload is complete to view it

Stage 2: Loading into Blender
Preparing Blender
- Open Blender and start with a clean workspace
- Delete default objects (cube, camera, lamp) by pressing A to select all, then Delete
- Open the N-panel by pressing N to access the Speckle tools

Enabling the Speckle connector
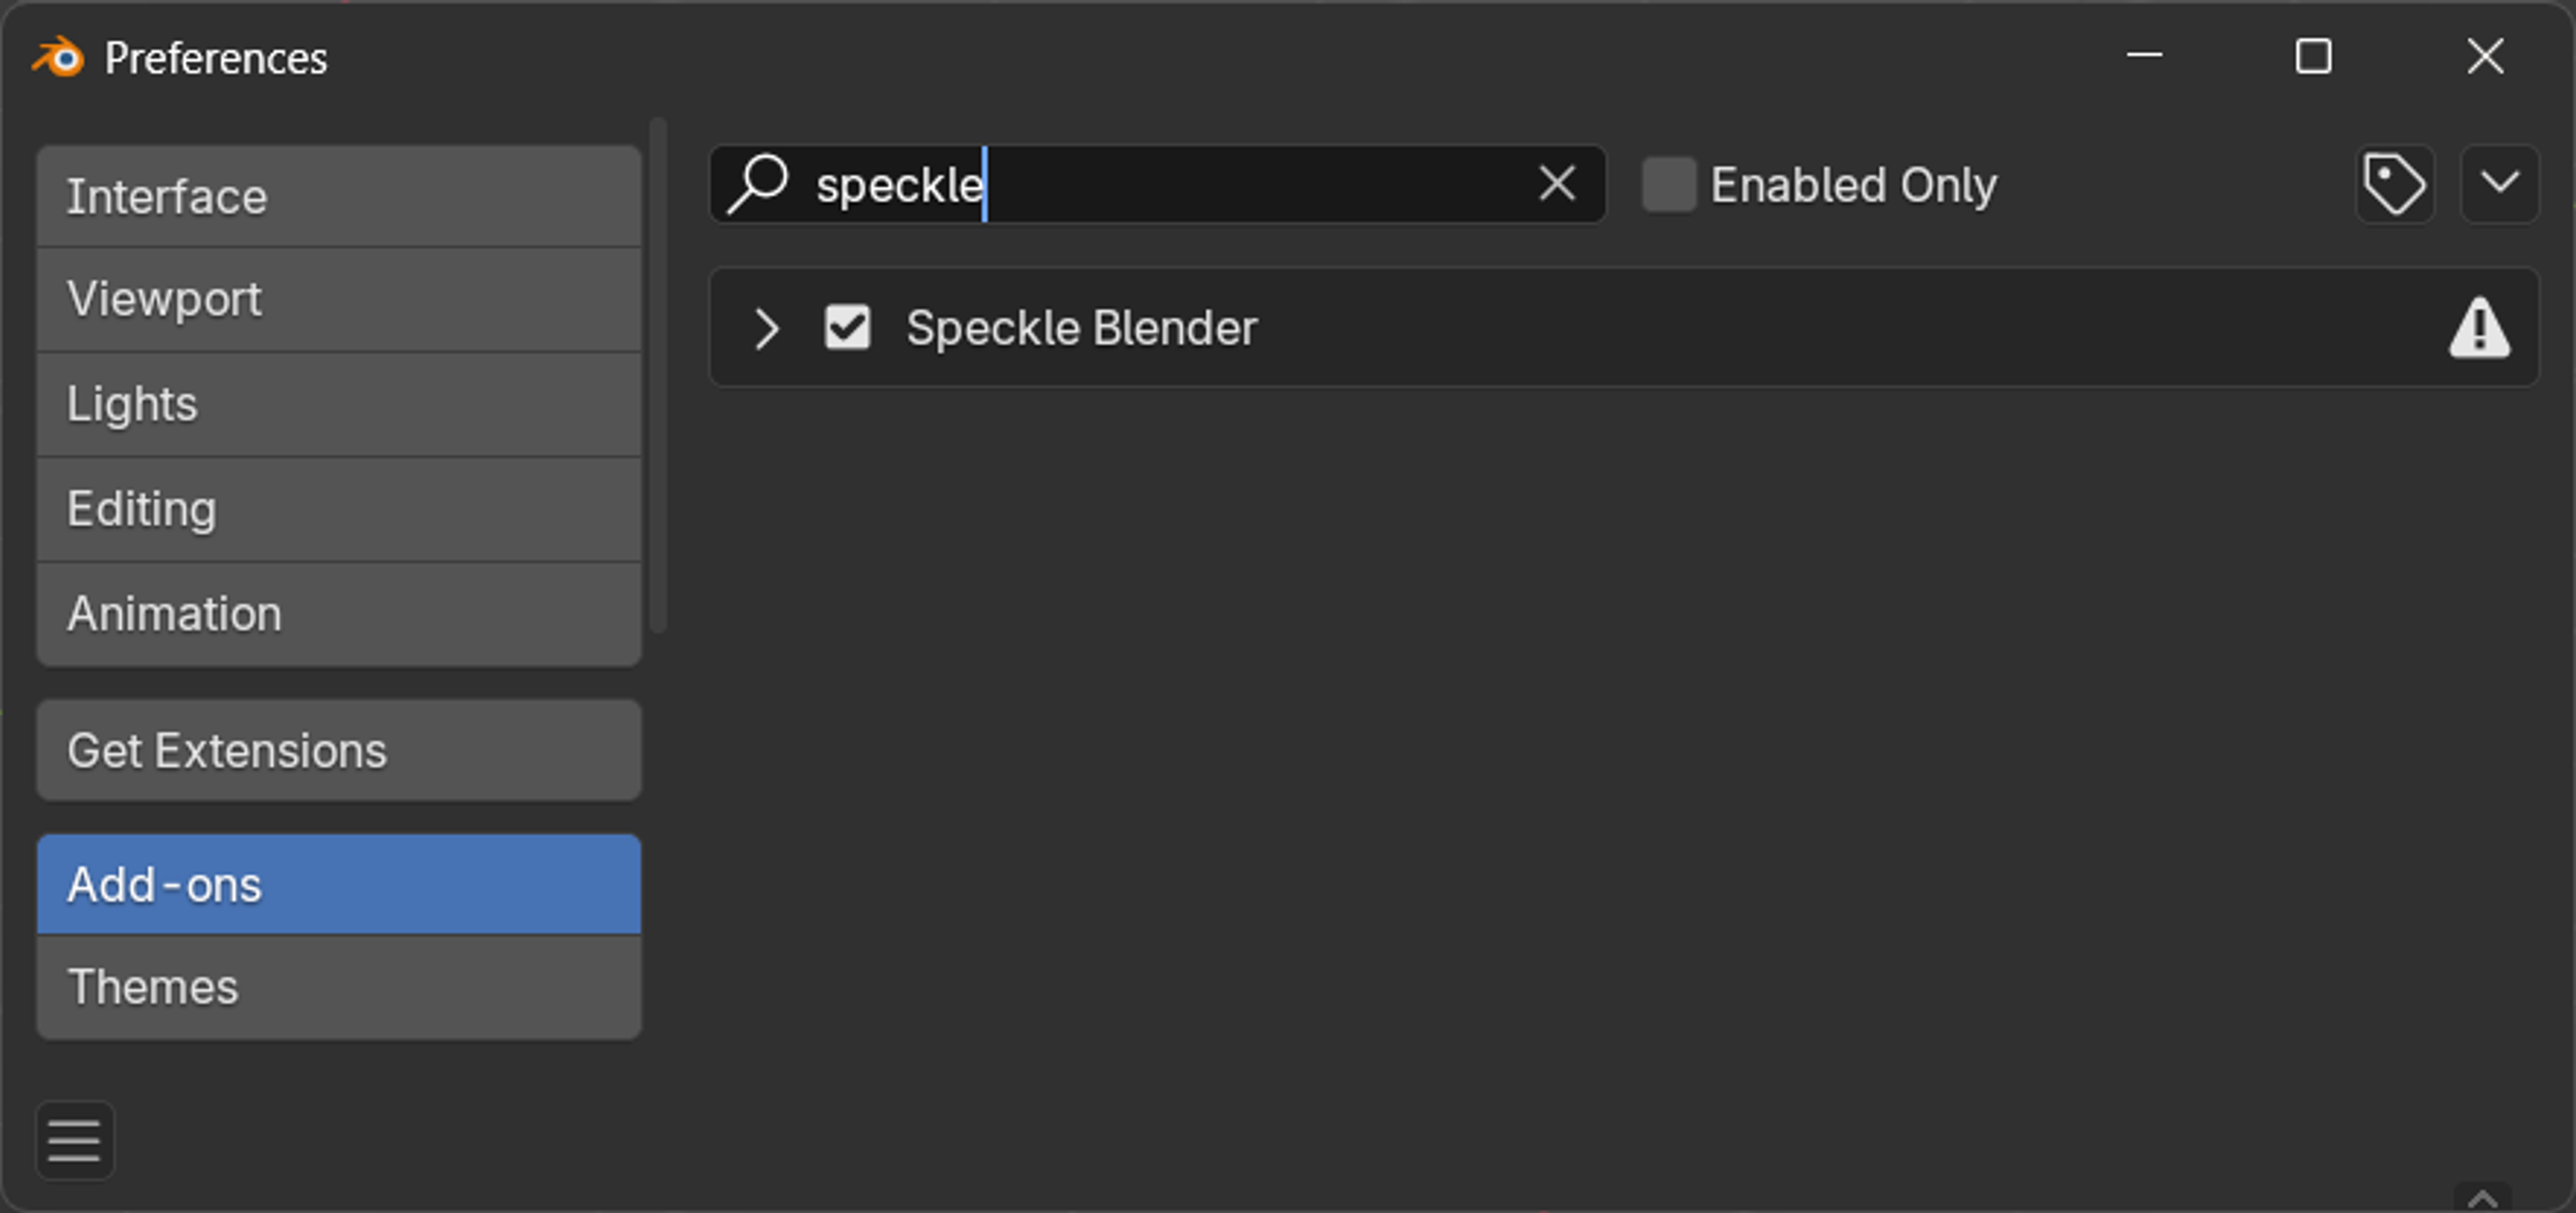
If Speckle isn't visible in the N-panel:
- Go to Edit > Preferences
- Navigate to Add-ons
- Search for "Speckle"
- Check the box to enable the Speckle Blender add-on
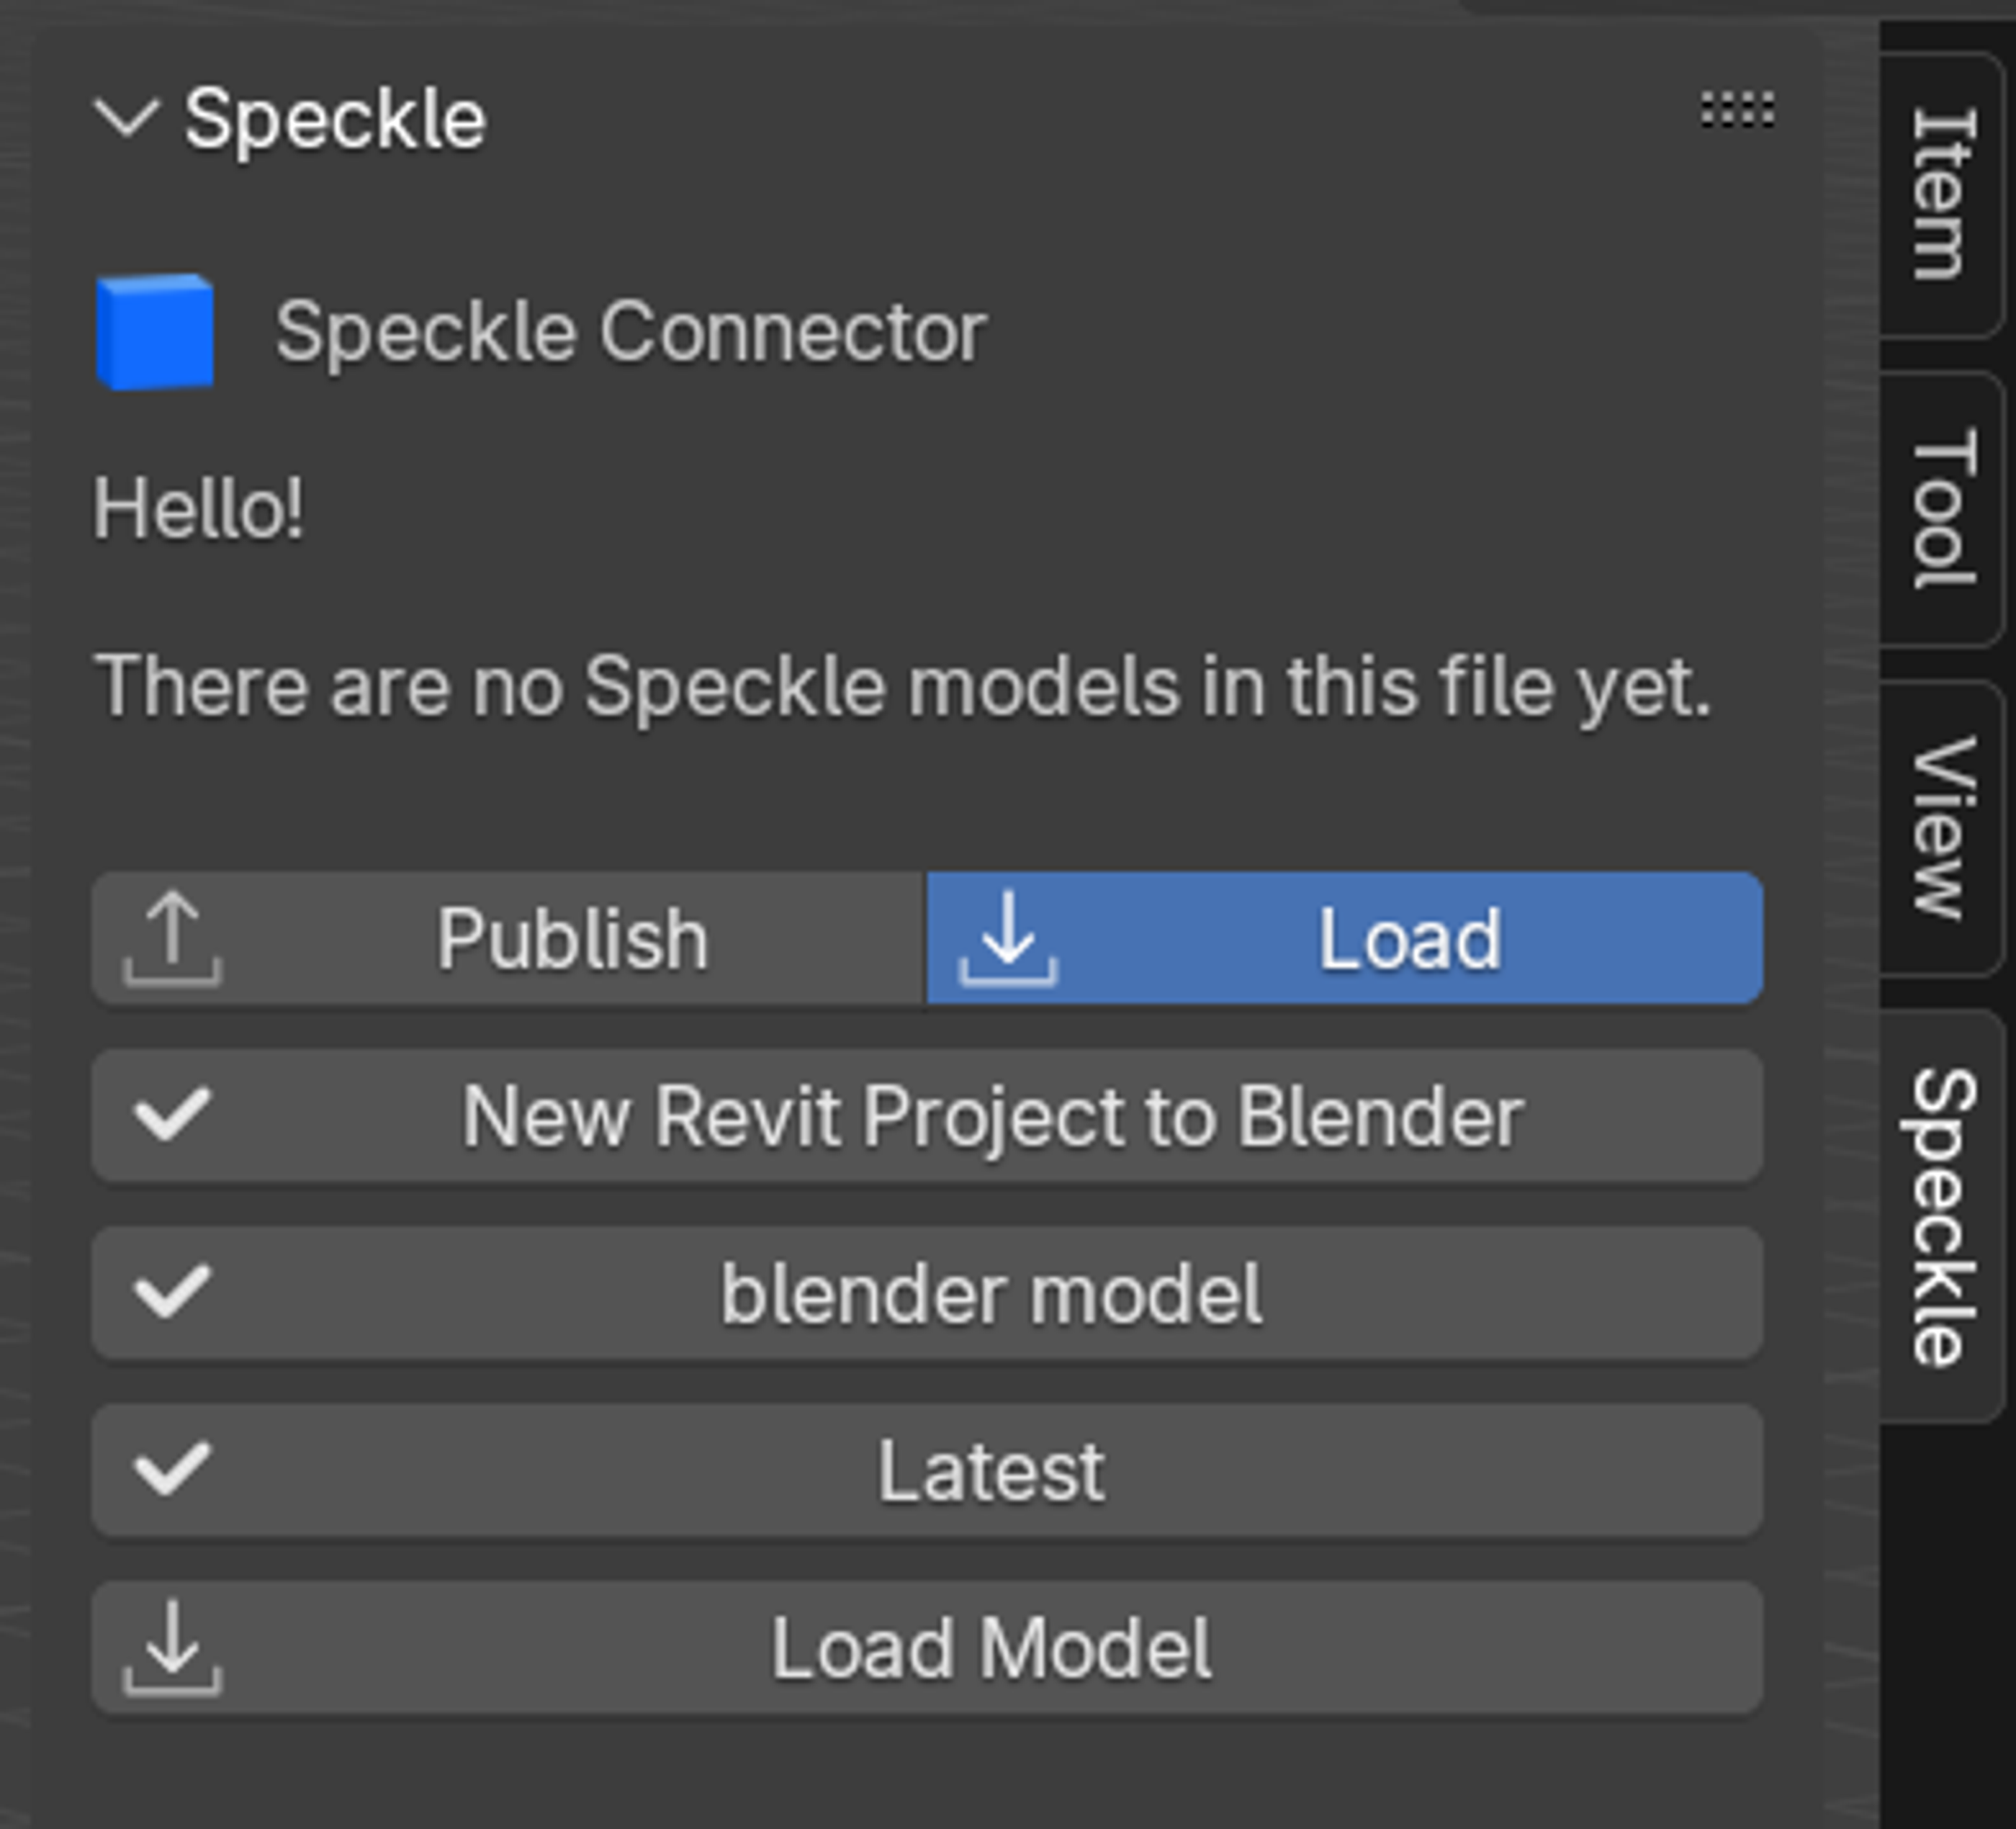
Loading your Speckle model
- Click the "Load" button in the Speckle panel
- Select your project by clicking the project selection button
- Choose your workspace and navigate to your project (e.g., "New IFC Project to Blender")
- Select your model (e.g., "Blender Model") and click OK
- Choose a version - default is latest, or select a specific version
- Click OK to proceed to import options
Understanding import options
You'll see two import methods:
Collection instances
- Best for: Clean organization and performance
- Pros: Cleaner hierarchy
- Cons: Harder to edit individual instances
- Use when: You won't be modifying the imported geometry
Linked duplicates
- Best for: Editable workflows
- Pros: Easy to edit, modifications affect all linked copies
- Cons: Can be messy
- Use when: You plan to modify the imported geometry
Choose your preferred method and click OK to complete the import.
Stage 3: Working with imported models
Understanding model organization
Your imported model will maintain the organizational structure from your IFC:
- Models are organized by building levels (matching the IFC structure)
- Scene Explorer hierarchy mirrors the Speckle web viewer organization
Material preservation
One of Speckle's key features is automatic material preservation:
- Original materials from the IFC are automatically imported
- Material properties are maintained during the transfer
- Ready for further enhancement with Blender's advanced material tools
Updating model versions
- Click the version button in the Speckle panel
- Select a newer version when available
- Click OK to update the model
- Your material overrides remain intact so long as the geometry has not changed
Conclusion
The IFC-to-Blender workflow via Speckle provides a robust, vendor-neutral approach to architectural visualization. By supporting the open IFC standard, this workflow ensures maximum compatibility across different BIM platforms while maintaining the advanced visualization capabilities of Blender.
Key advantages include preserved model organization, persistent material overrides, and the ability to work with standardized building data regardless of the original authoring software. This makes it an ideal solution for visualization teams working in multi-vendor environments or with external consultants using different BIM platforms.