How to transfer Rhino models to Blender via Speckle
This tutorial demonstrates how to seamlessly transfer your Rhino 3D models into Blender using Speckle, creating an efficient workflow for architectural visualization and cross-platform collaboration between NURBS modeling and polygon-based rendering.
Prerequisites
Before starting, ensure you have:
- A Speckle account
- Speckle Rhino connector installed
- Speckle Blender connector installed
- Rhino installed on your computer
- Blender installed on your computer
Connect up Rhino to Blender with Speckle
Stage 1: Publishing from Rhino to Speckle
Accessing the Speckle panel in Rhino
- Open your Rhino model with the geometry you want to visualize
- Locate the Speckle panel in the Rhino interface
- If not visible, type "Speckle" in the command bar and press Enter
- The Speckle panel should appear in your workspace
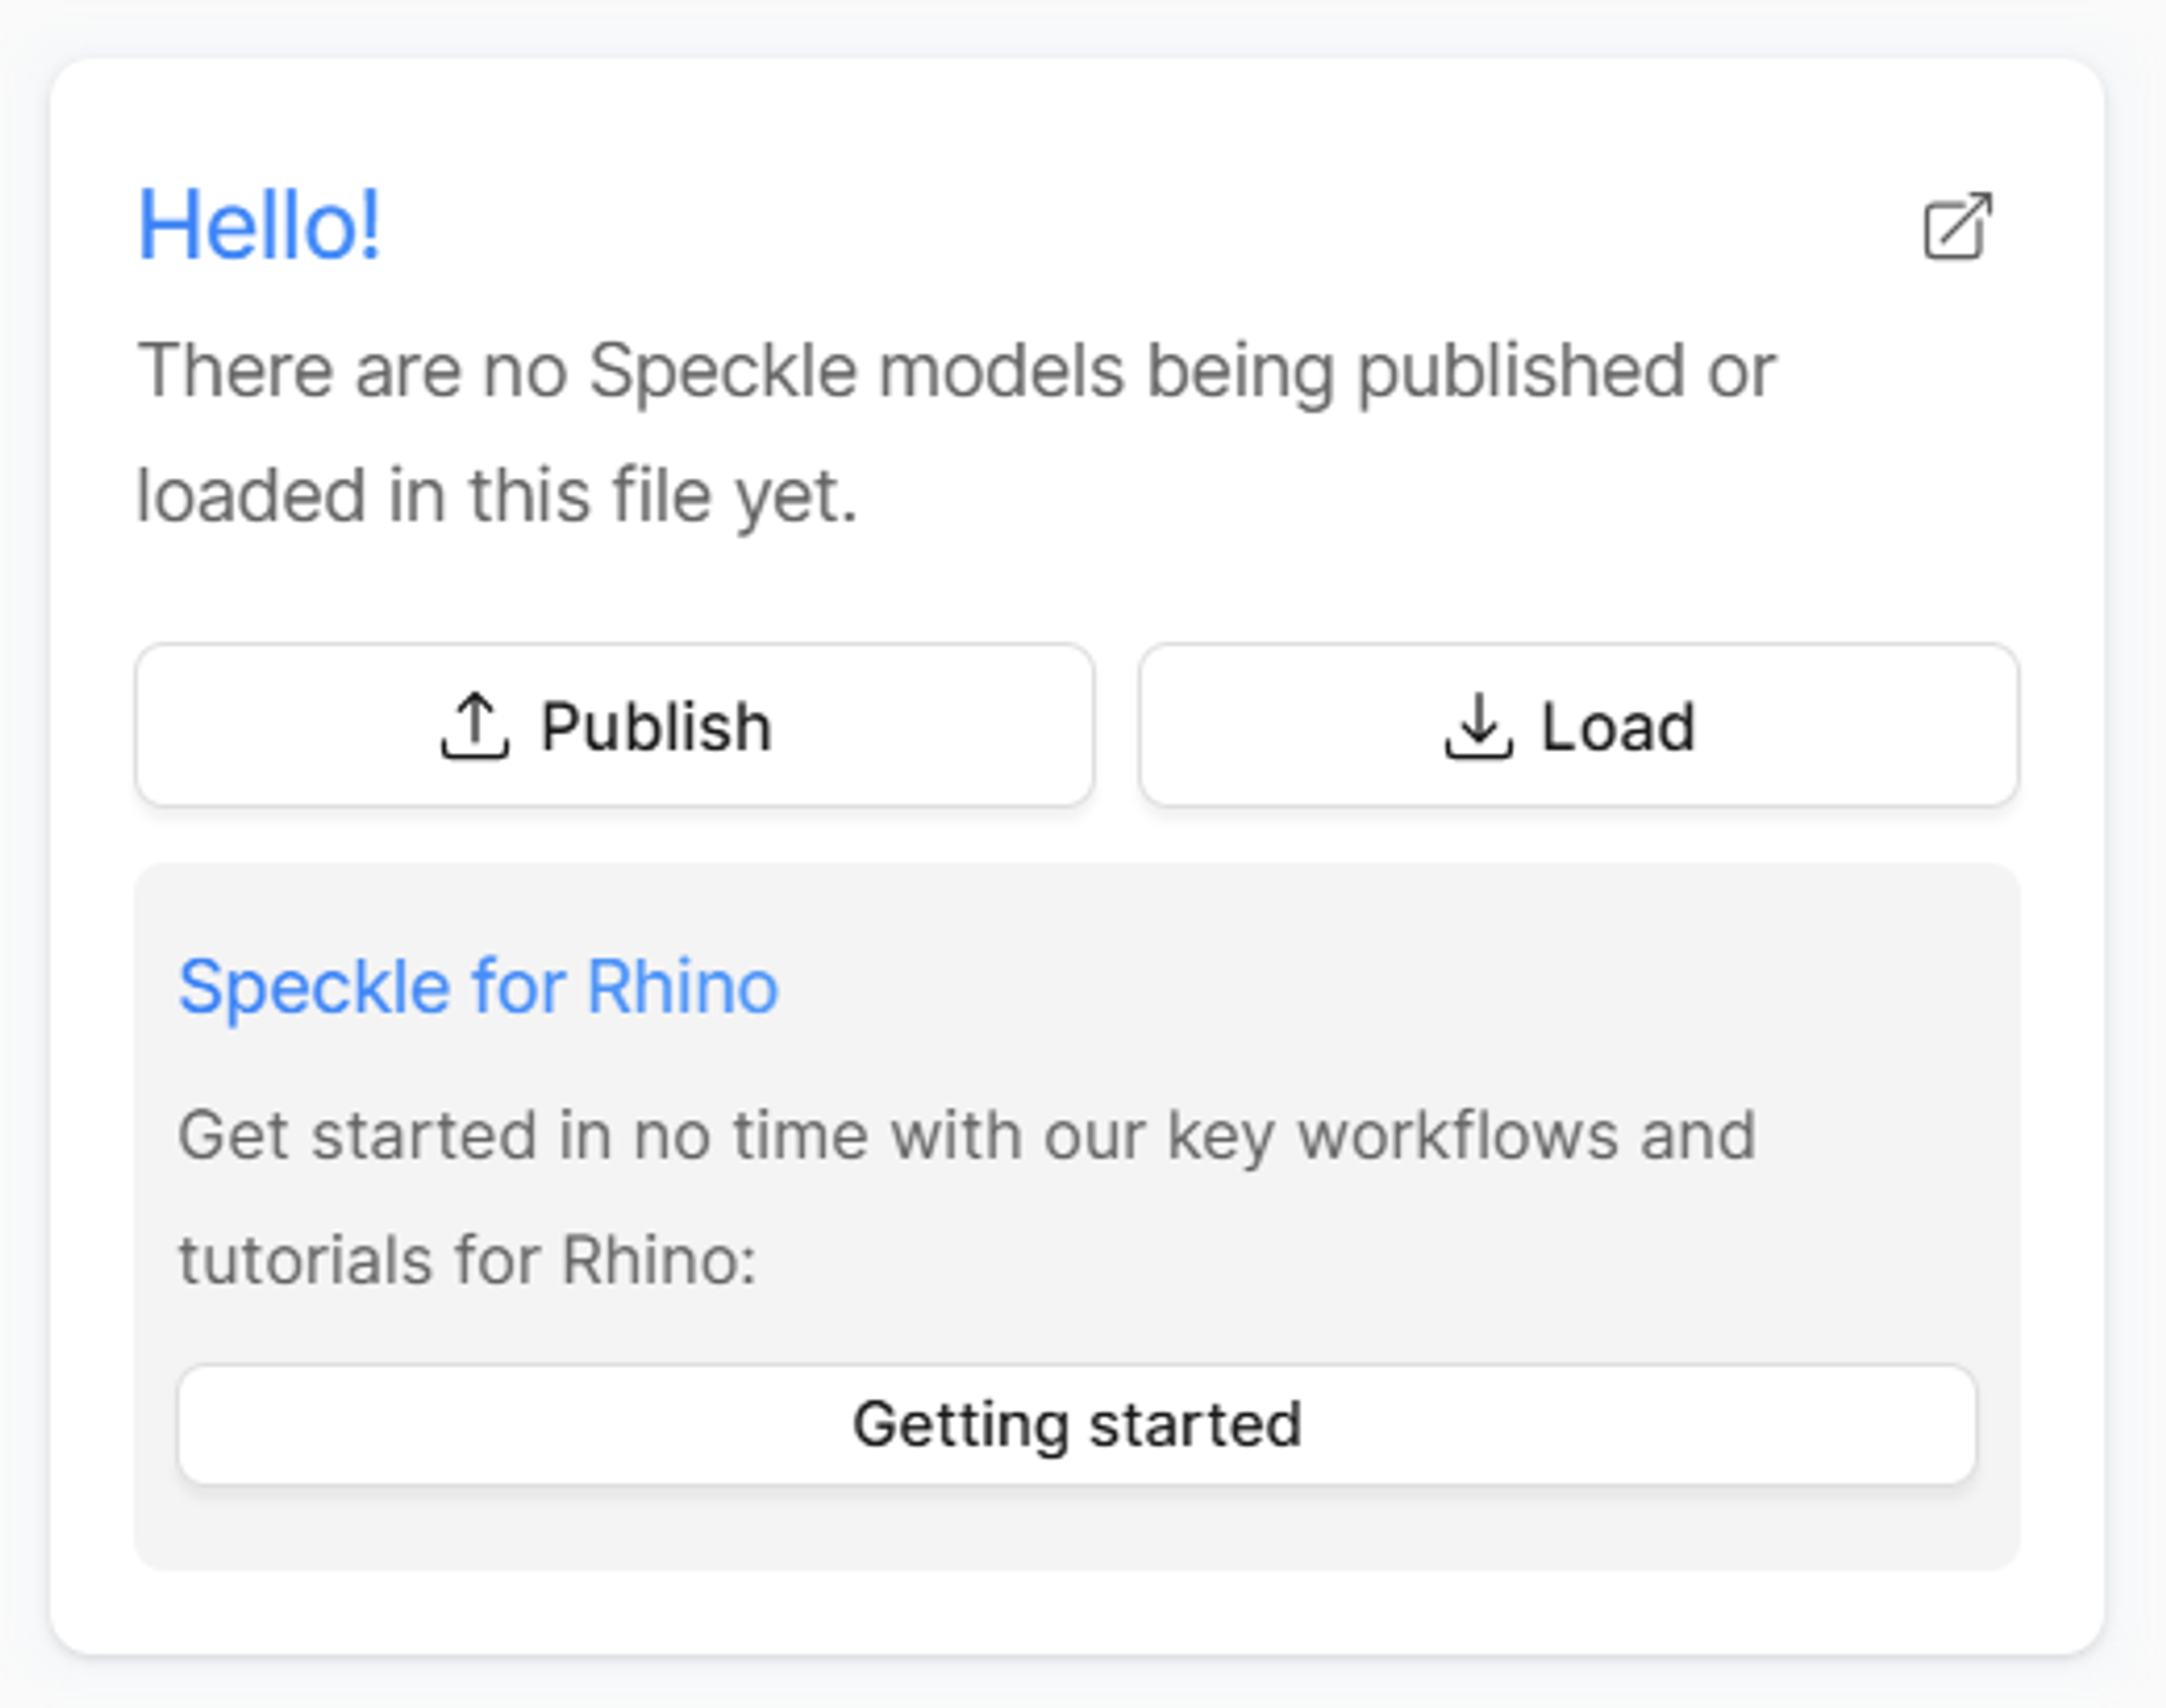
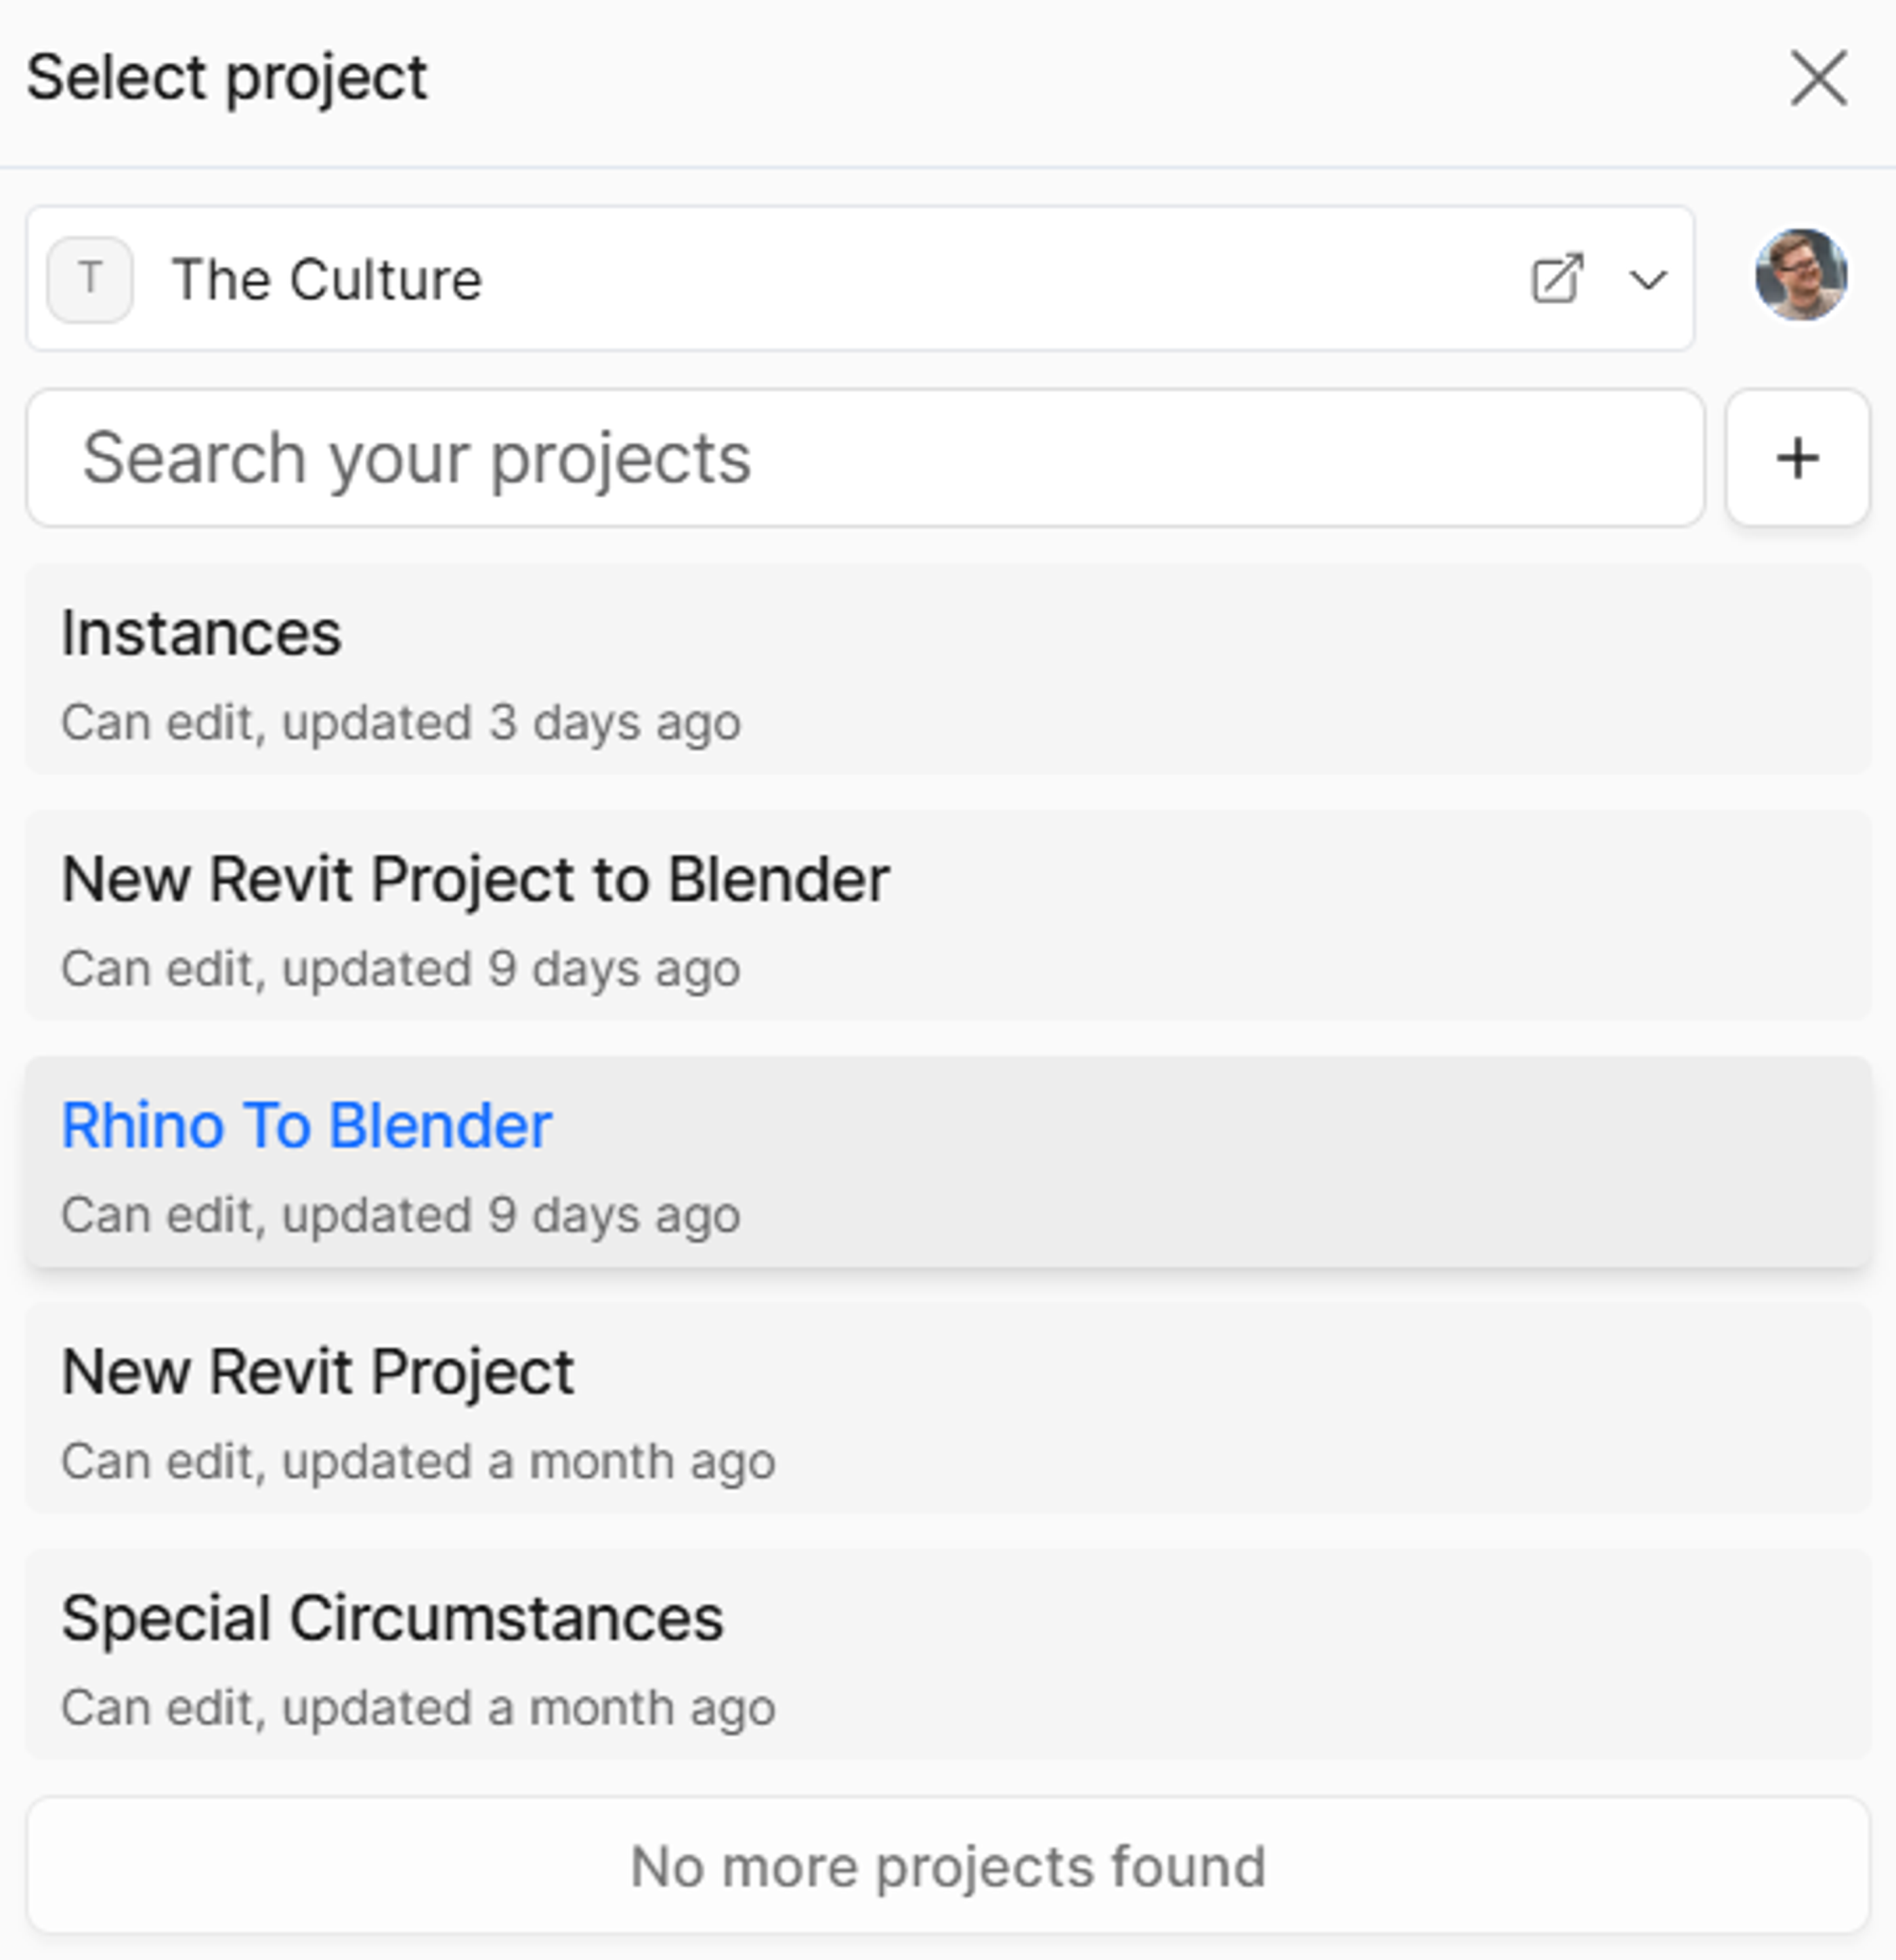
Creating a new project
- Click the "Publish" button in the Speckle panel
- Create a new project by selecting "Create New Project"
- Name your project (e.g., "Rhino to Blender")
- Click "Create" to establish the project
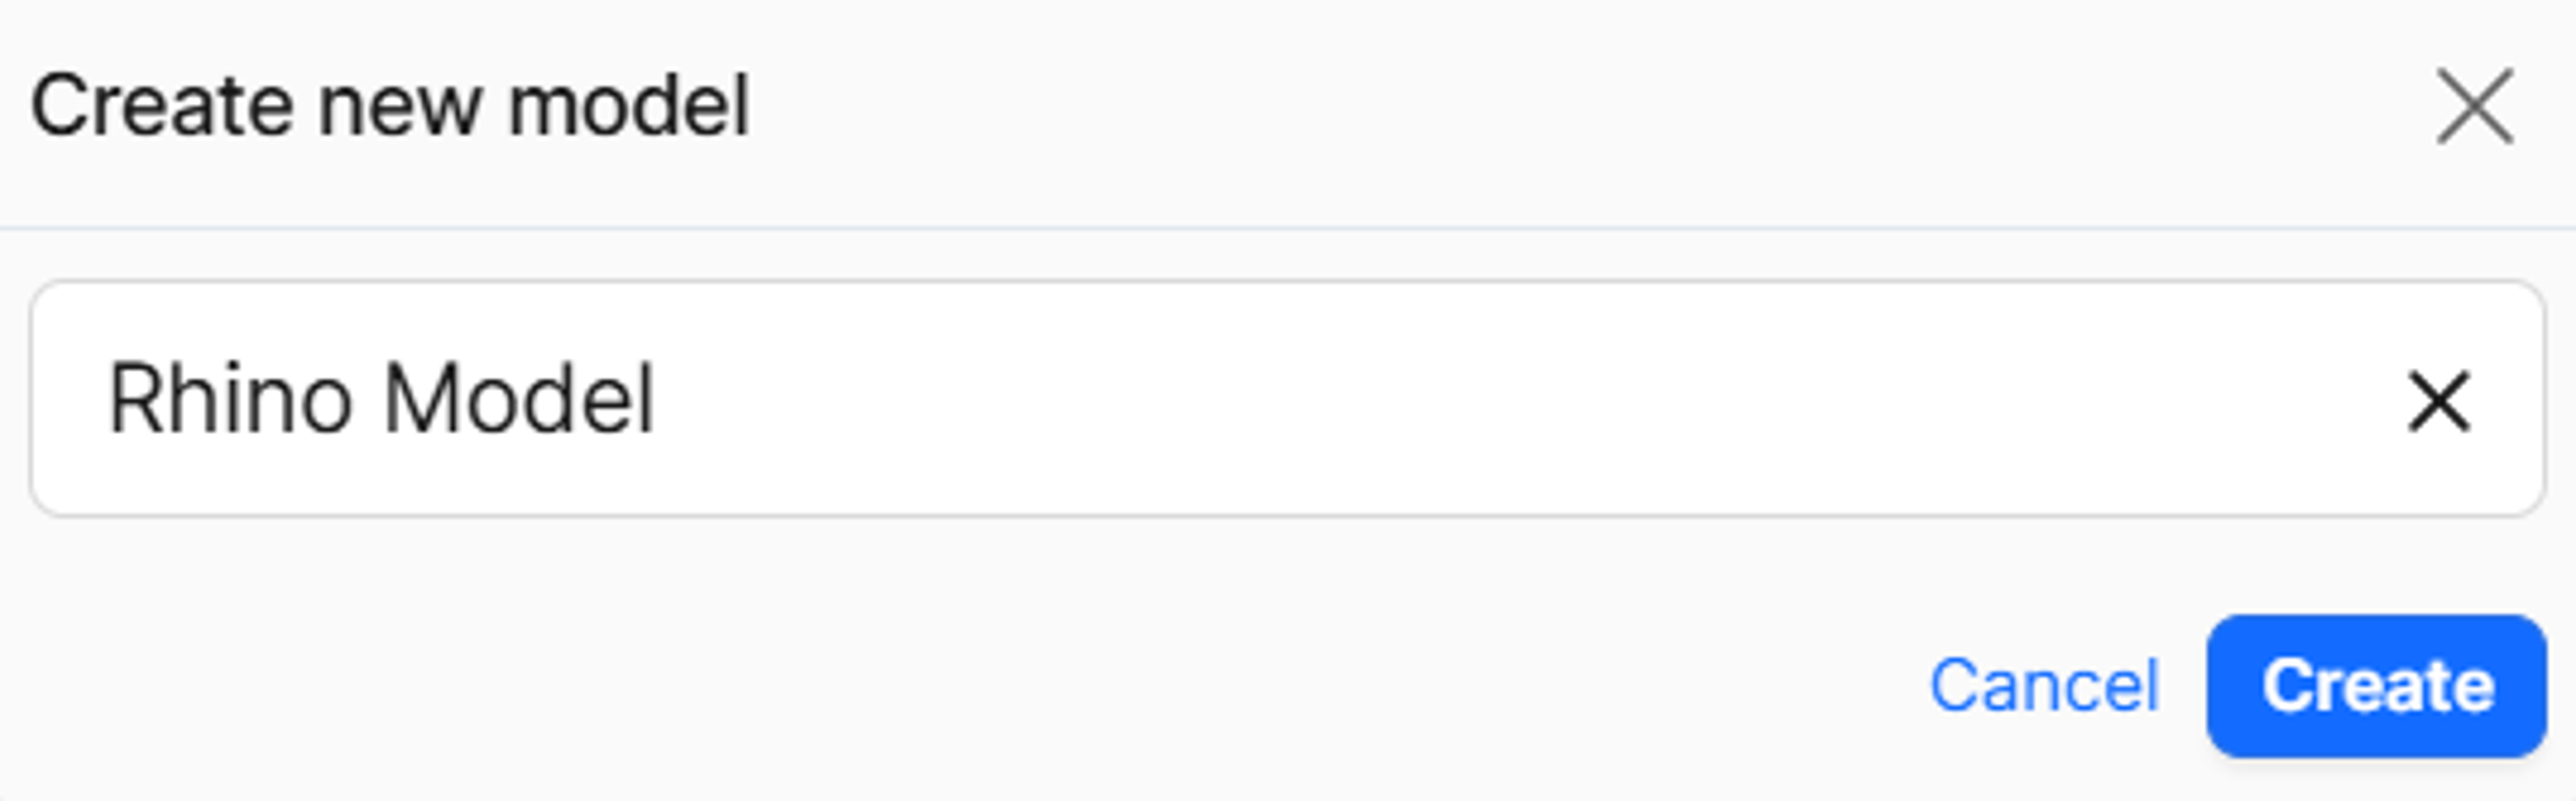
Setting up your model
- Name your model (e.g., "Rhino Model") for easy identification
- Click "Create Rhino Model" to set up the model container
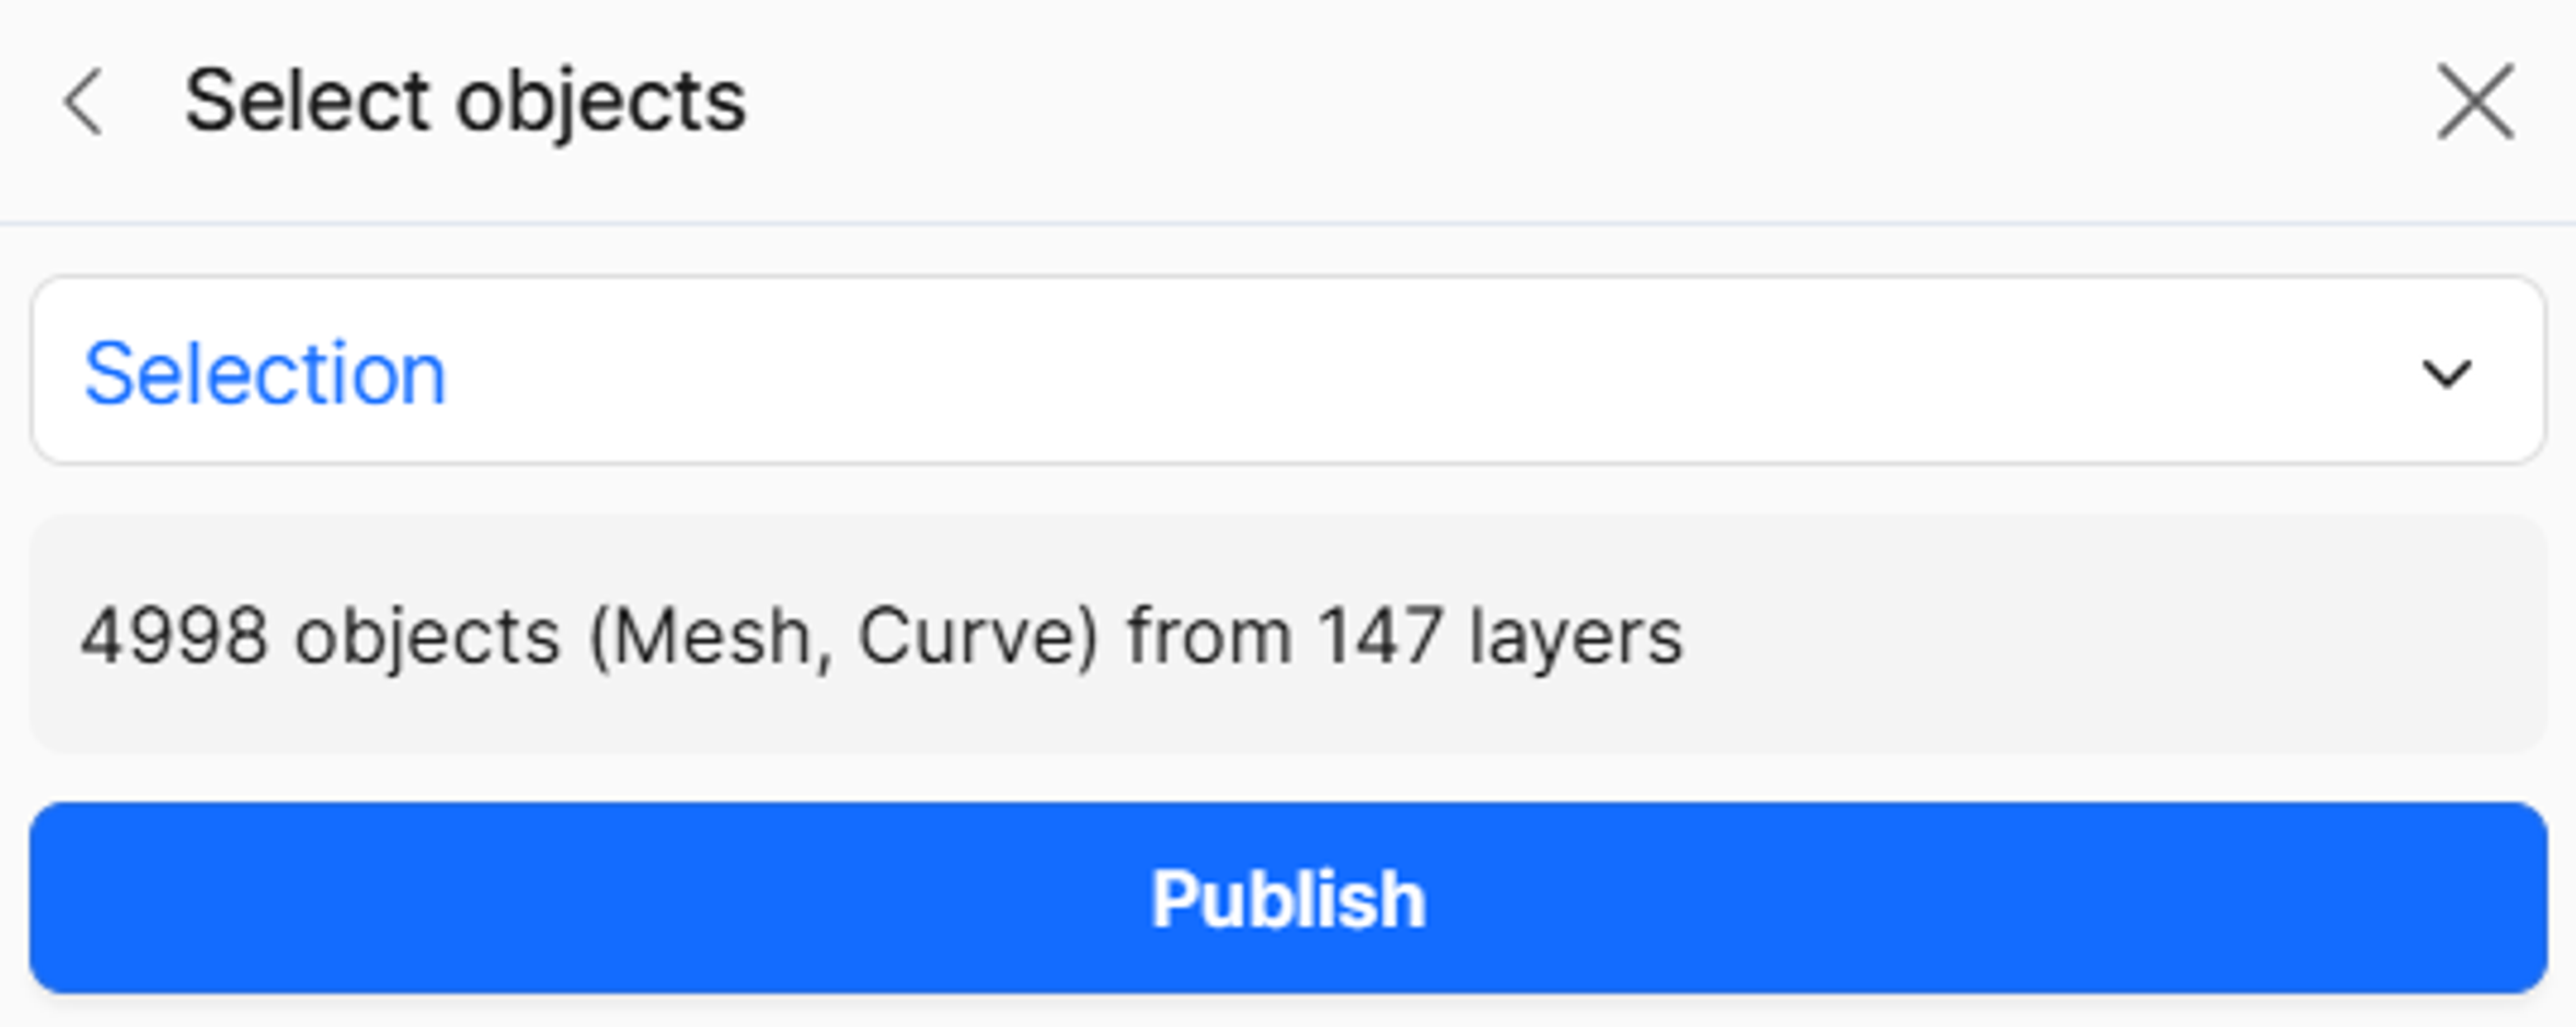
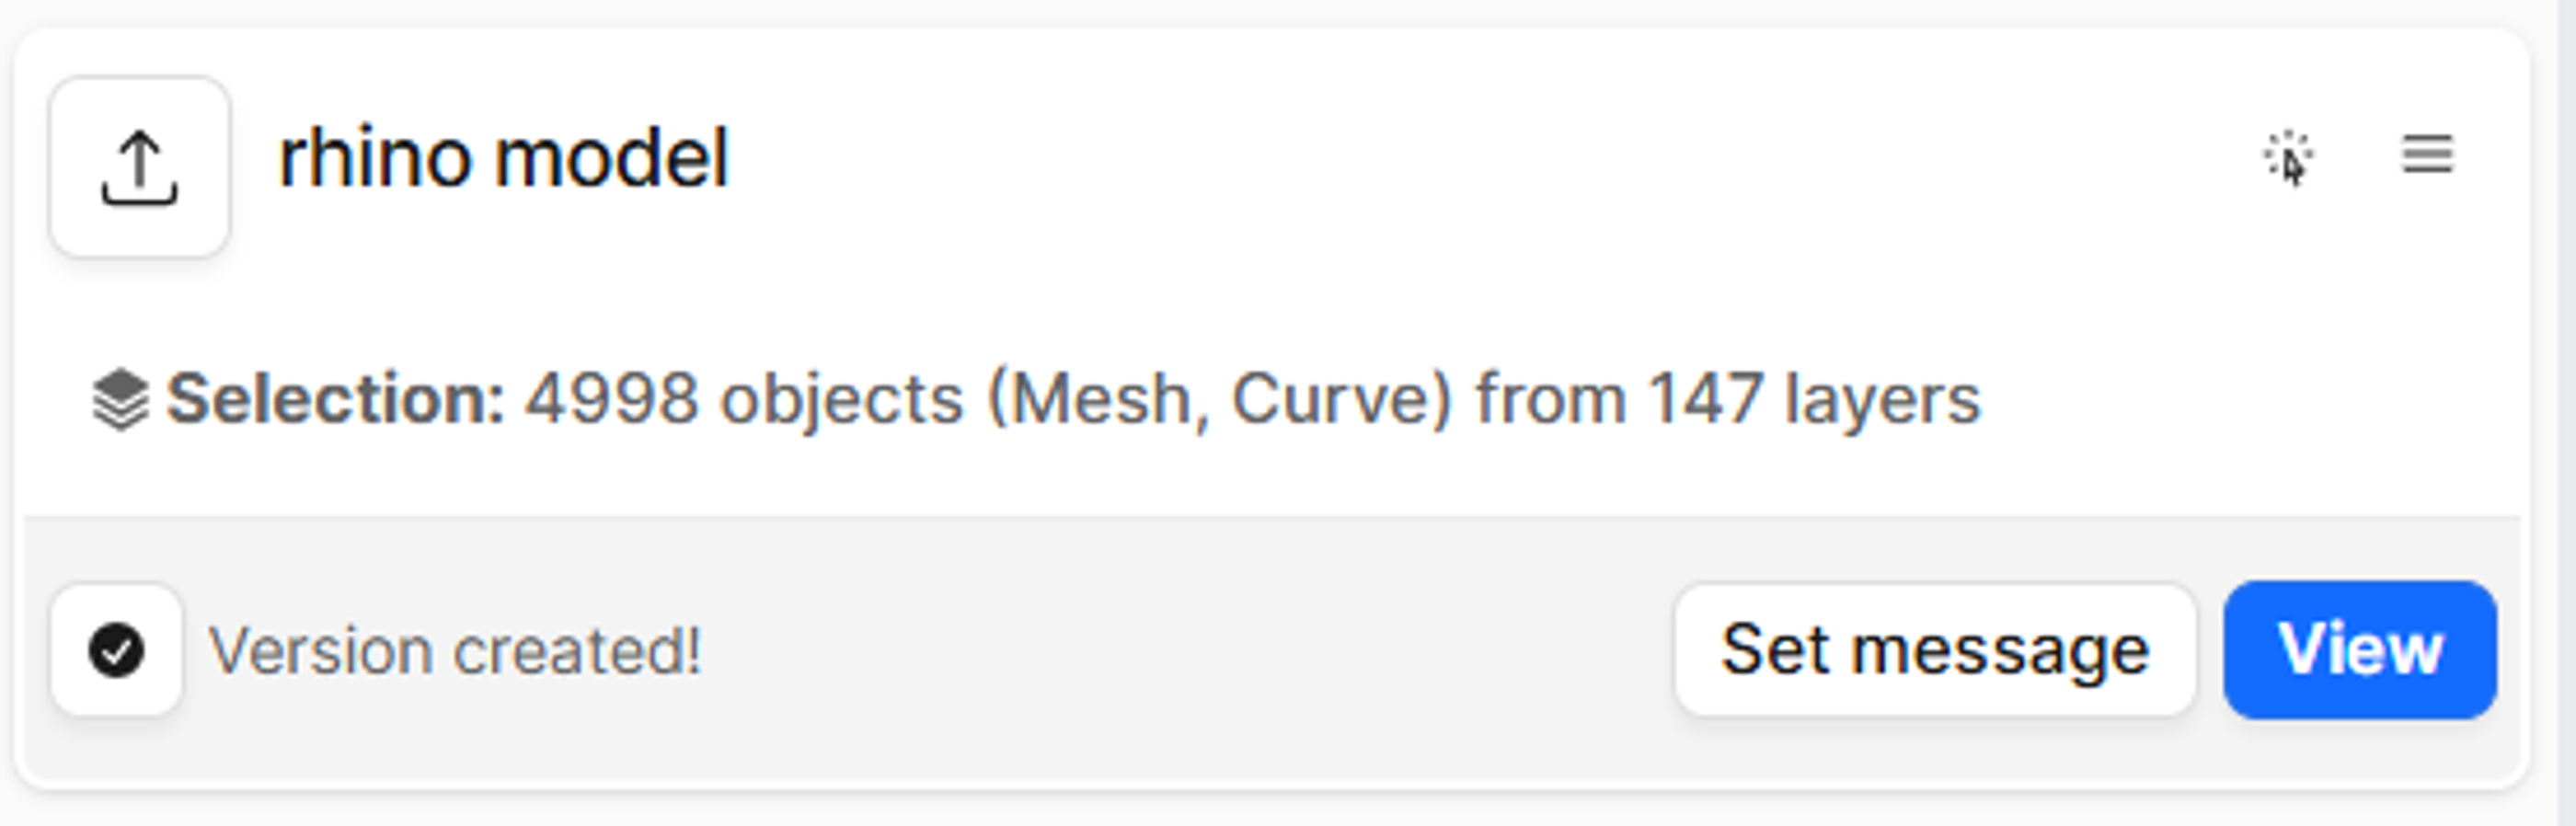
Selecting and publishing geometry
- Choose geometry to publish:
- Press Ctrl+A to select all objects for complete transfer
- Or select specific objects for partial publishing
- Review the object count displayed in the publish dialog
- Click "Publish" to begin the conversion and upload process
- Wait for processing as Rhino geometry is published to Speckle
Viewing your published model
- Click "View" when upload completes to open the Speckle web viewer
- Review your model in the browser interface
- Share with collaborators using the web link for feedback and comments
- Add comments and annotations directly in the web viewer for project communication
Stage 2: Loading into Blender
Preparing Blender
- Open Blender and start with a clean workspace
- Delete default objects (cube, camera, lamp) by pressing A to select all, then Delete
- Open the N-panel by pressing N to access the Speckle tools

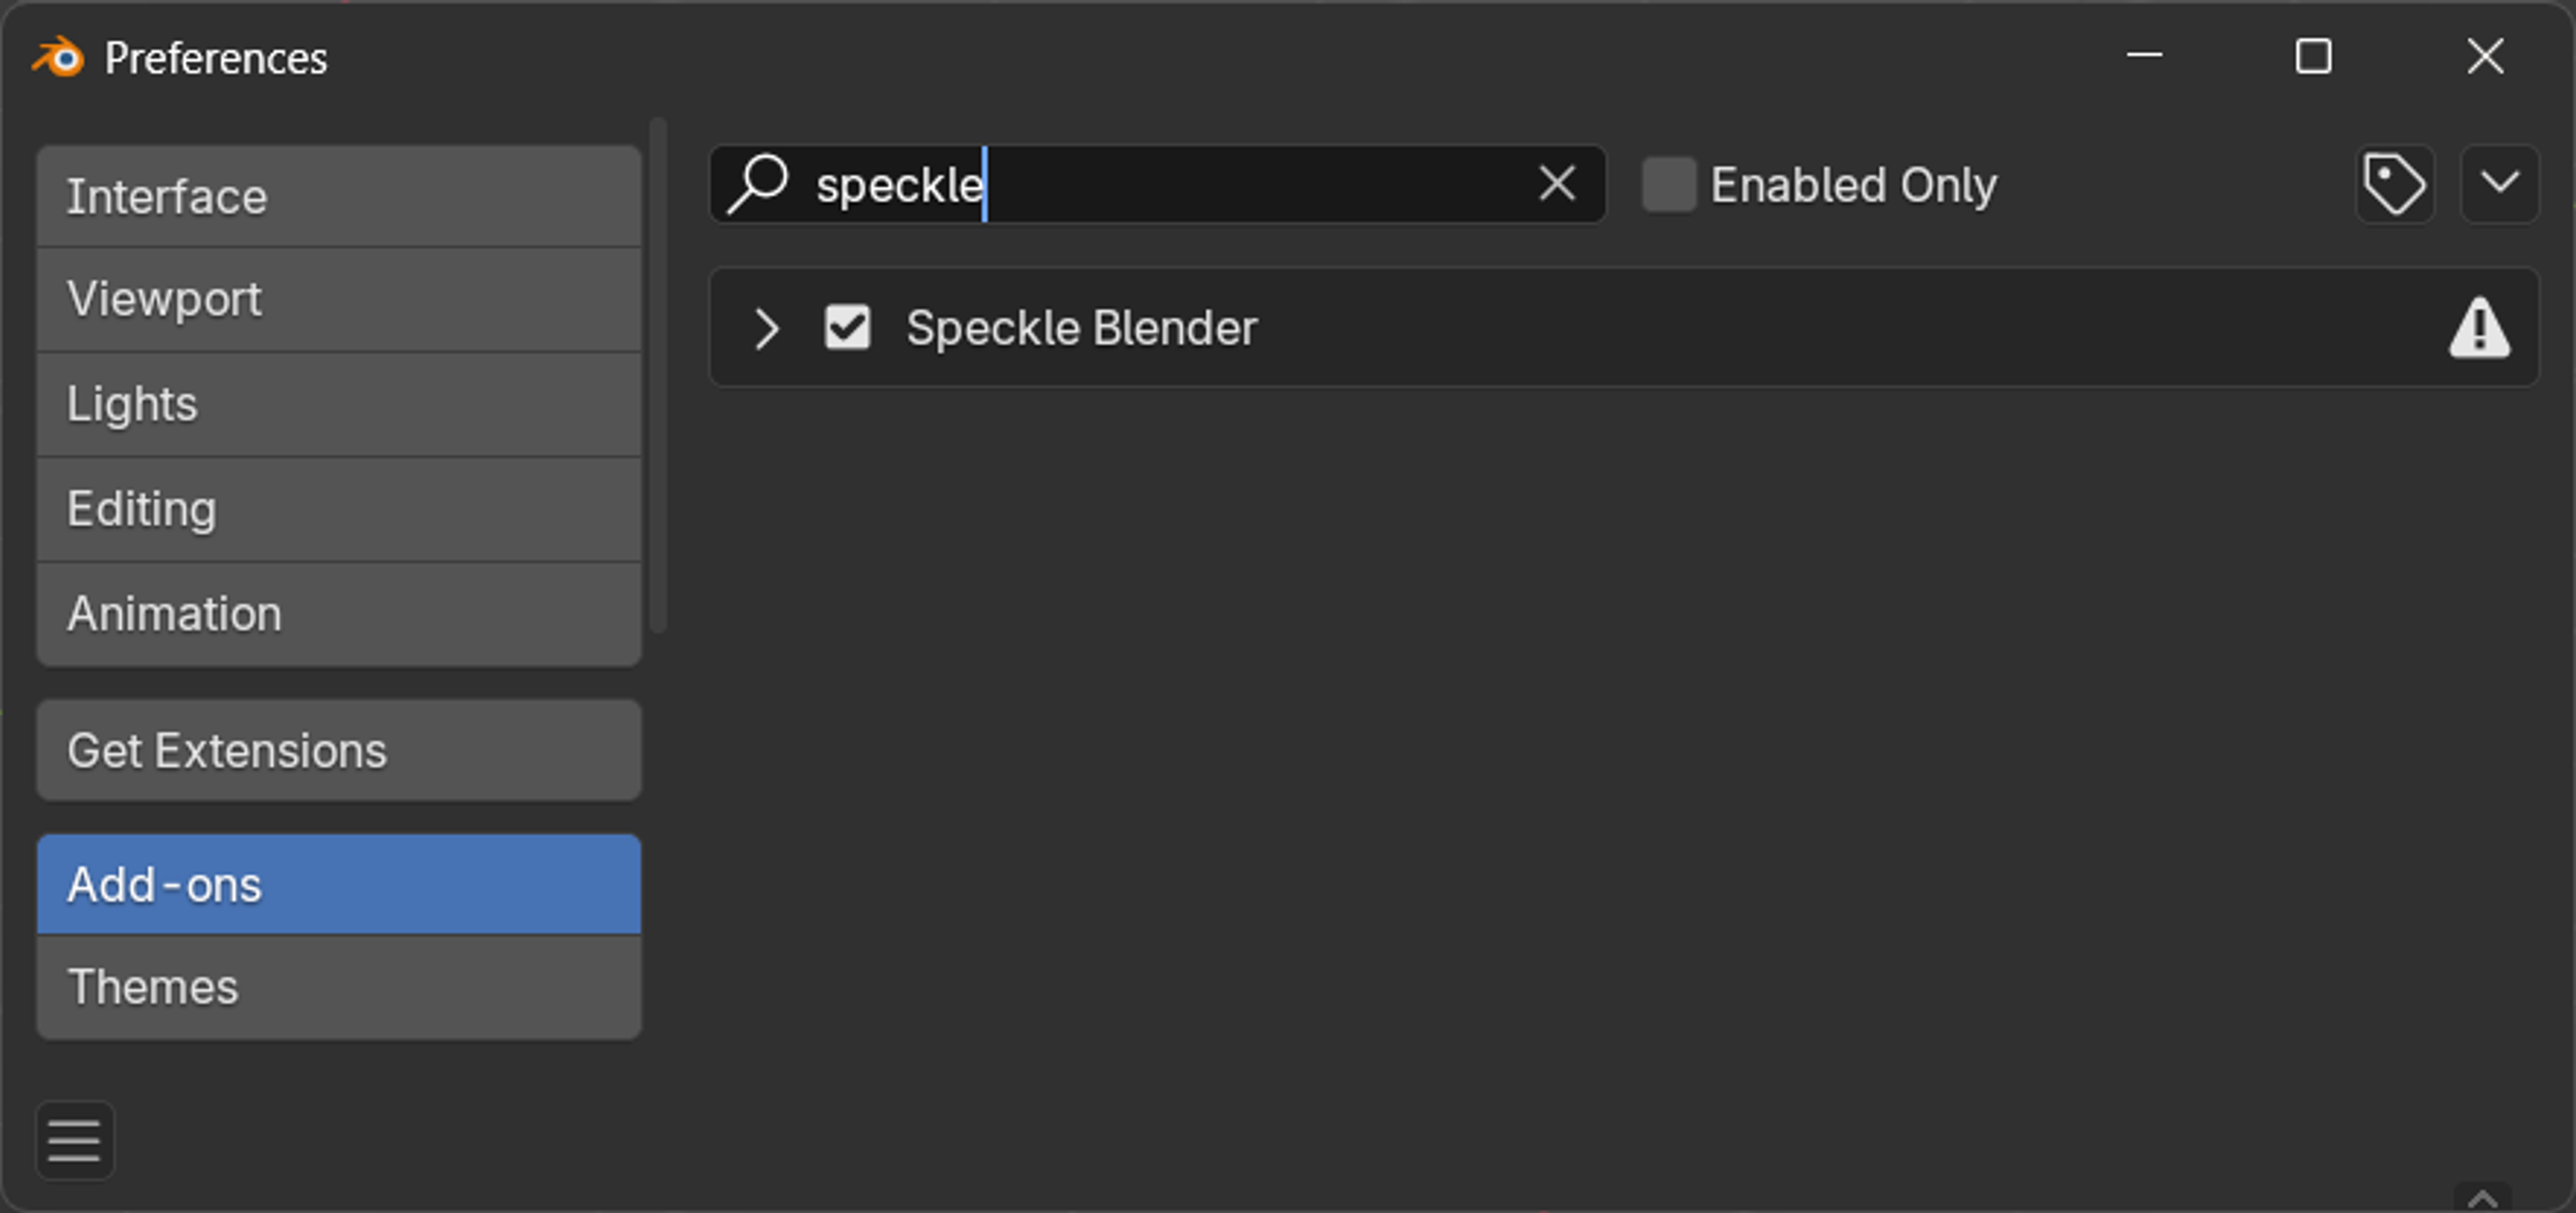
Enabling the Speckle add-on
If Speckle isn't visible in the N-panel:
- Go to Edit > Preferences
- Navigate to Add-ons
- Search for "Speckle"
- Check the box to enable the Speckle Blender add-on
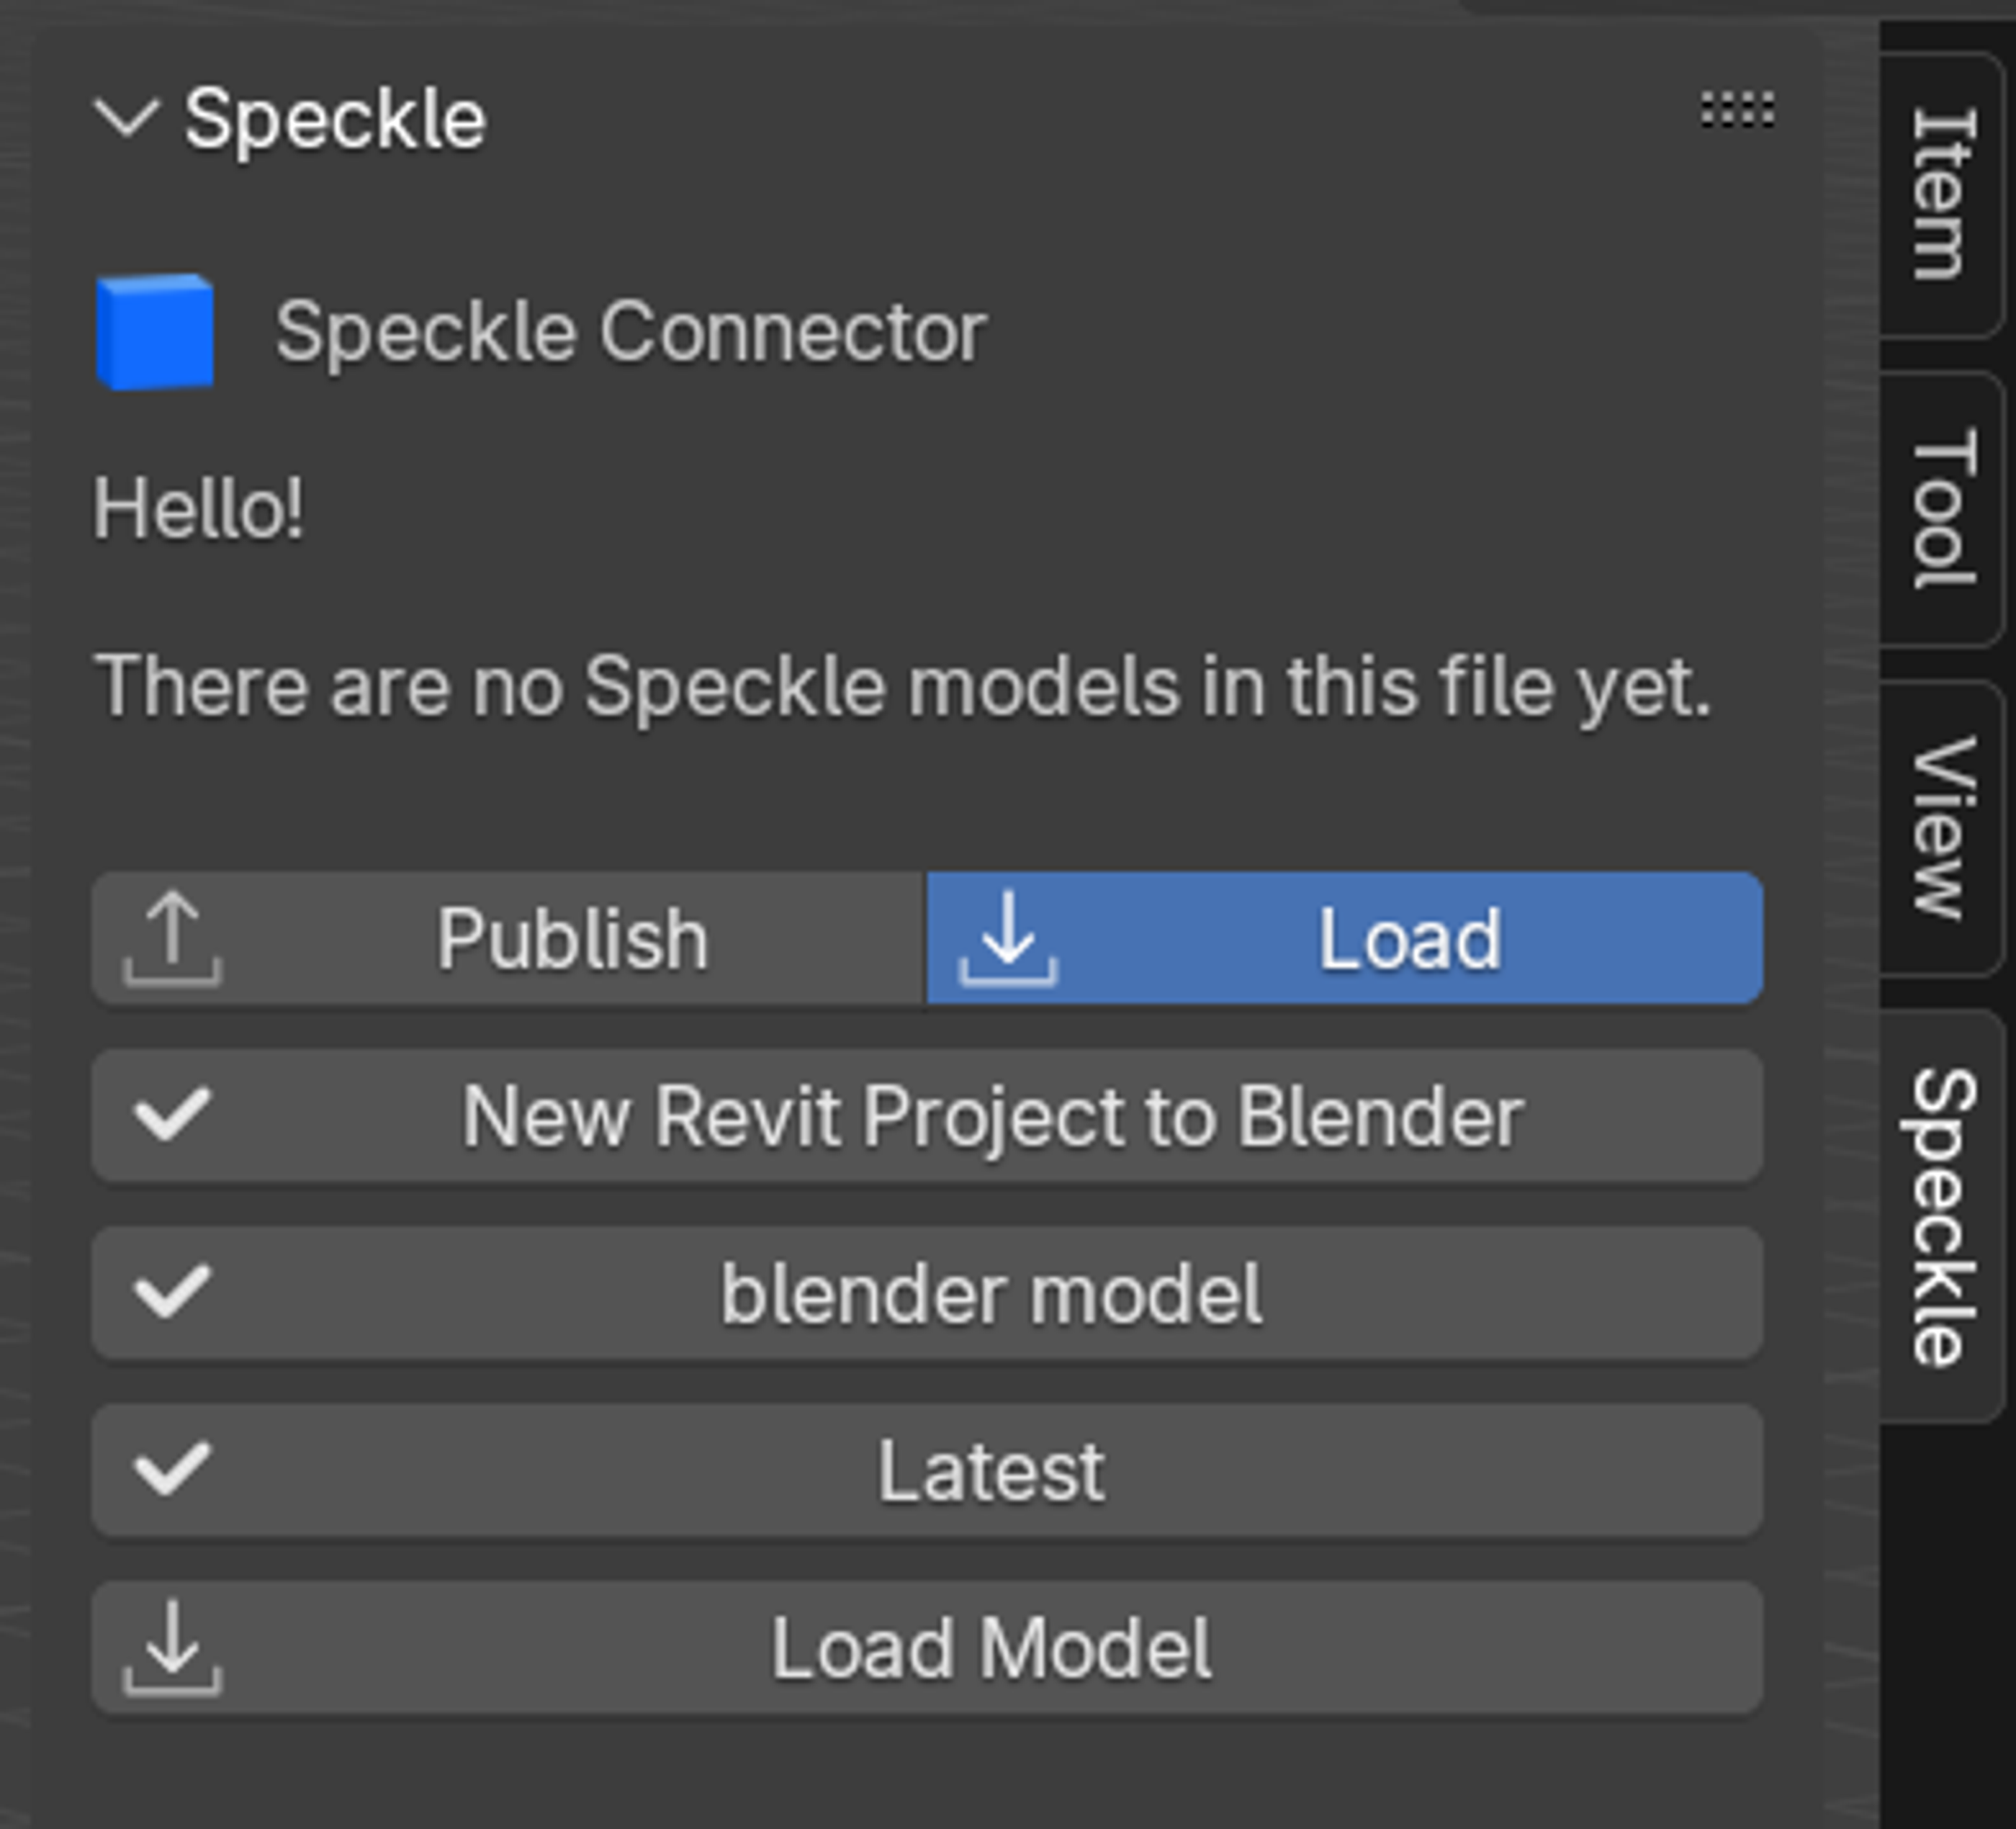
Loading your Speckle model
- Click the "Load" button in the Speckle panel
- Select your project by clicking the project selection button
- Choose your workspace and navigate to your project (e.g., "New Rhino Project to Blender")
- Select your model (e.g., "Blender Model") and click OK
- Choose a version - default is latest, or select a specific version
- Click OK to proceed to import options
Understanding import options
You'll see two import methods:
Collection instances
- Best for: Clean organization and performance
- Pros: Cleaner hierarchy
- Cons: Harder to edit individual instances
- Use when: You won't be modifying the imported geometry
Linked duplicates
- Best for: Editable workflows
- Pros: Easy to edit, modifications affect all linked copies
- Cons: Can be messy
- Use when: You plan to modify the imported geometry
Choose your preferred method and click OK to complete the import.
Stage 3: working with imported models
Material preservation
One of Speckle's key features is automatic material preservation:
- Original materials from Rhino are automatically imported
- Material properties are maintained during the transfer
- Ready for further enhancement with Blender's advanced material tools
Updating model versions
- Click the version button in the Speckle panel
- Select a newer version when available
- Click OK to update the model
- Your material overrides remain intact so long as the geometry has not changed
Conclusion
The Rhino-to-Blender workflow via Speckle creates a powerful bridge between precision NURBS modeling and advanced polygon-based visualization. This integration maintains geometric accuracy while providing access to Blender's sophisticated rendering and material systems.
This makes it an ideal solution for design teams that leverage Rhino's precision modeling capabilities while requiring Blender's advanced visualization and rendering features. The persistent material system ensures that visualization investments are protected through design iterations, creating an efficient and sustainable workflow for high-quality architectural and product visualization.
Ready to get started? Supercharge your workflow!