From Rhino concept to Revit documentation in minutes with Speckle
If you’re a Rhino connoisseur like me, you probably wish you could stay in Rhino-Land longer and with less friction with your more sober colleagues in Revit-Land. It can become quite challenging to balance the designer's need to iterate and move freely in their design process with the requirement for early-stage scheduling and documentation to facilitate effective communication with clients and early forecasting. This is where Speckle can rebalance the scales to keep your whole team happily humming along using categorized direct Shapes!
Using categorized direct shapes strikes a healthy balance between being OTT and being way too casual. It suits the Architectural conceptual stage by not requiring a considerable amount of time investment to tag your Rhino geometry, while still enabling you to get your geometry into Revit in a way it can understand, such as Doors or Windows. Letting you filter your views, sections, and generally avoid a complete mess of a Revit model.
This tutorial will guide you through how you can use Speckle to have your Rhino cake and eat it too.
Prerequisites
Before starting this tutorial, ensure you have:
- Speckle Account: Set up and ready to use (create one at app.speckle.systems)
- Software Installations:
- Autodesk Revit (with Speckle Revit connector installed)
- McNeel Rhino (with Speckle Rhino connector installed)
- Knowledge Level: Basic familiarity with Revit and Rhino interfaces
- Project Setup: A base Rhino model ready to share
Stage 1: Preparing your Rhino model for mapping
The foundation of successful Rhino-to-Revit workflows lies in proper model organization. Rather than relying on manual object selection, establishing a systematic layer structure creates a scalable and maintainable mapping system.
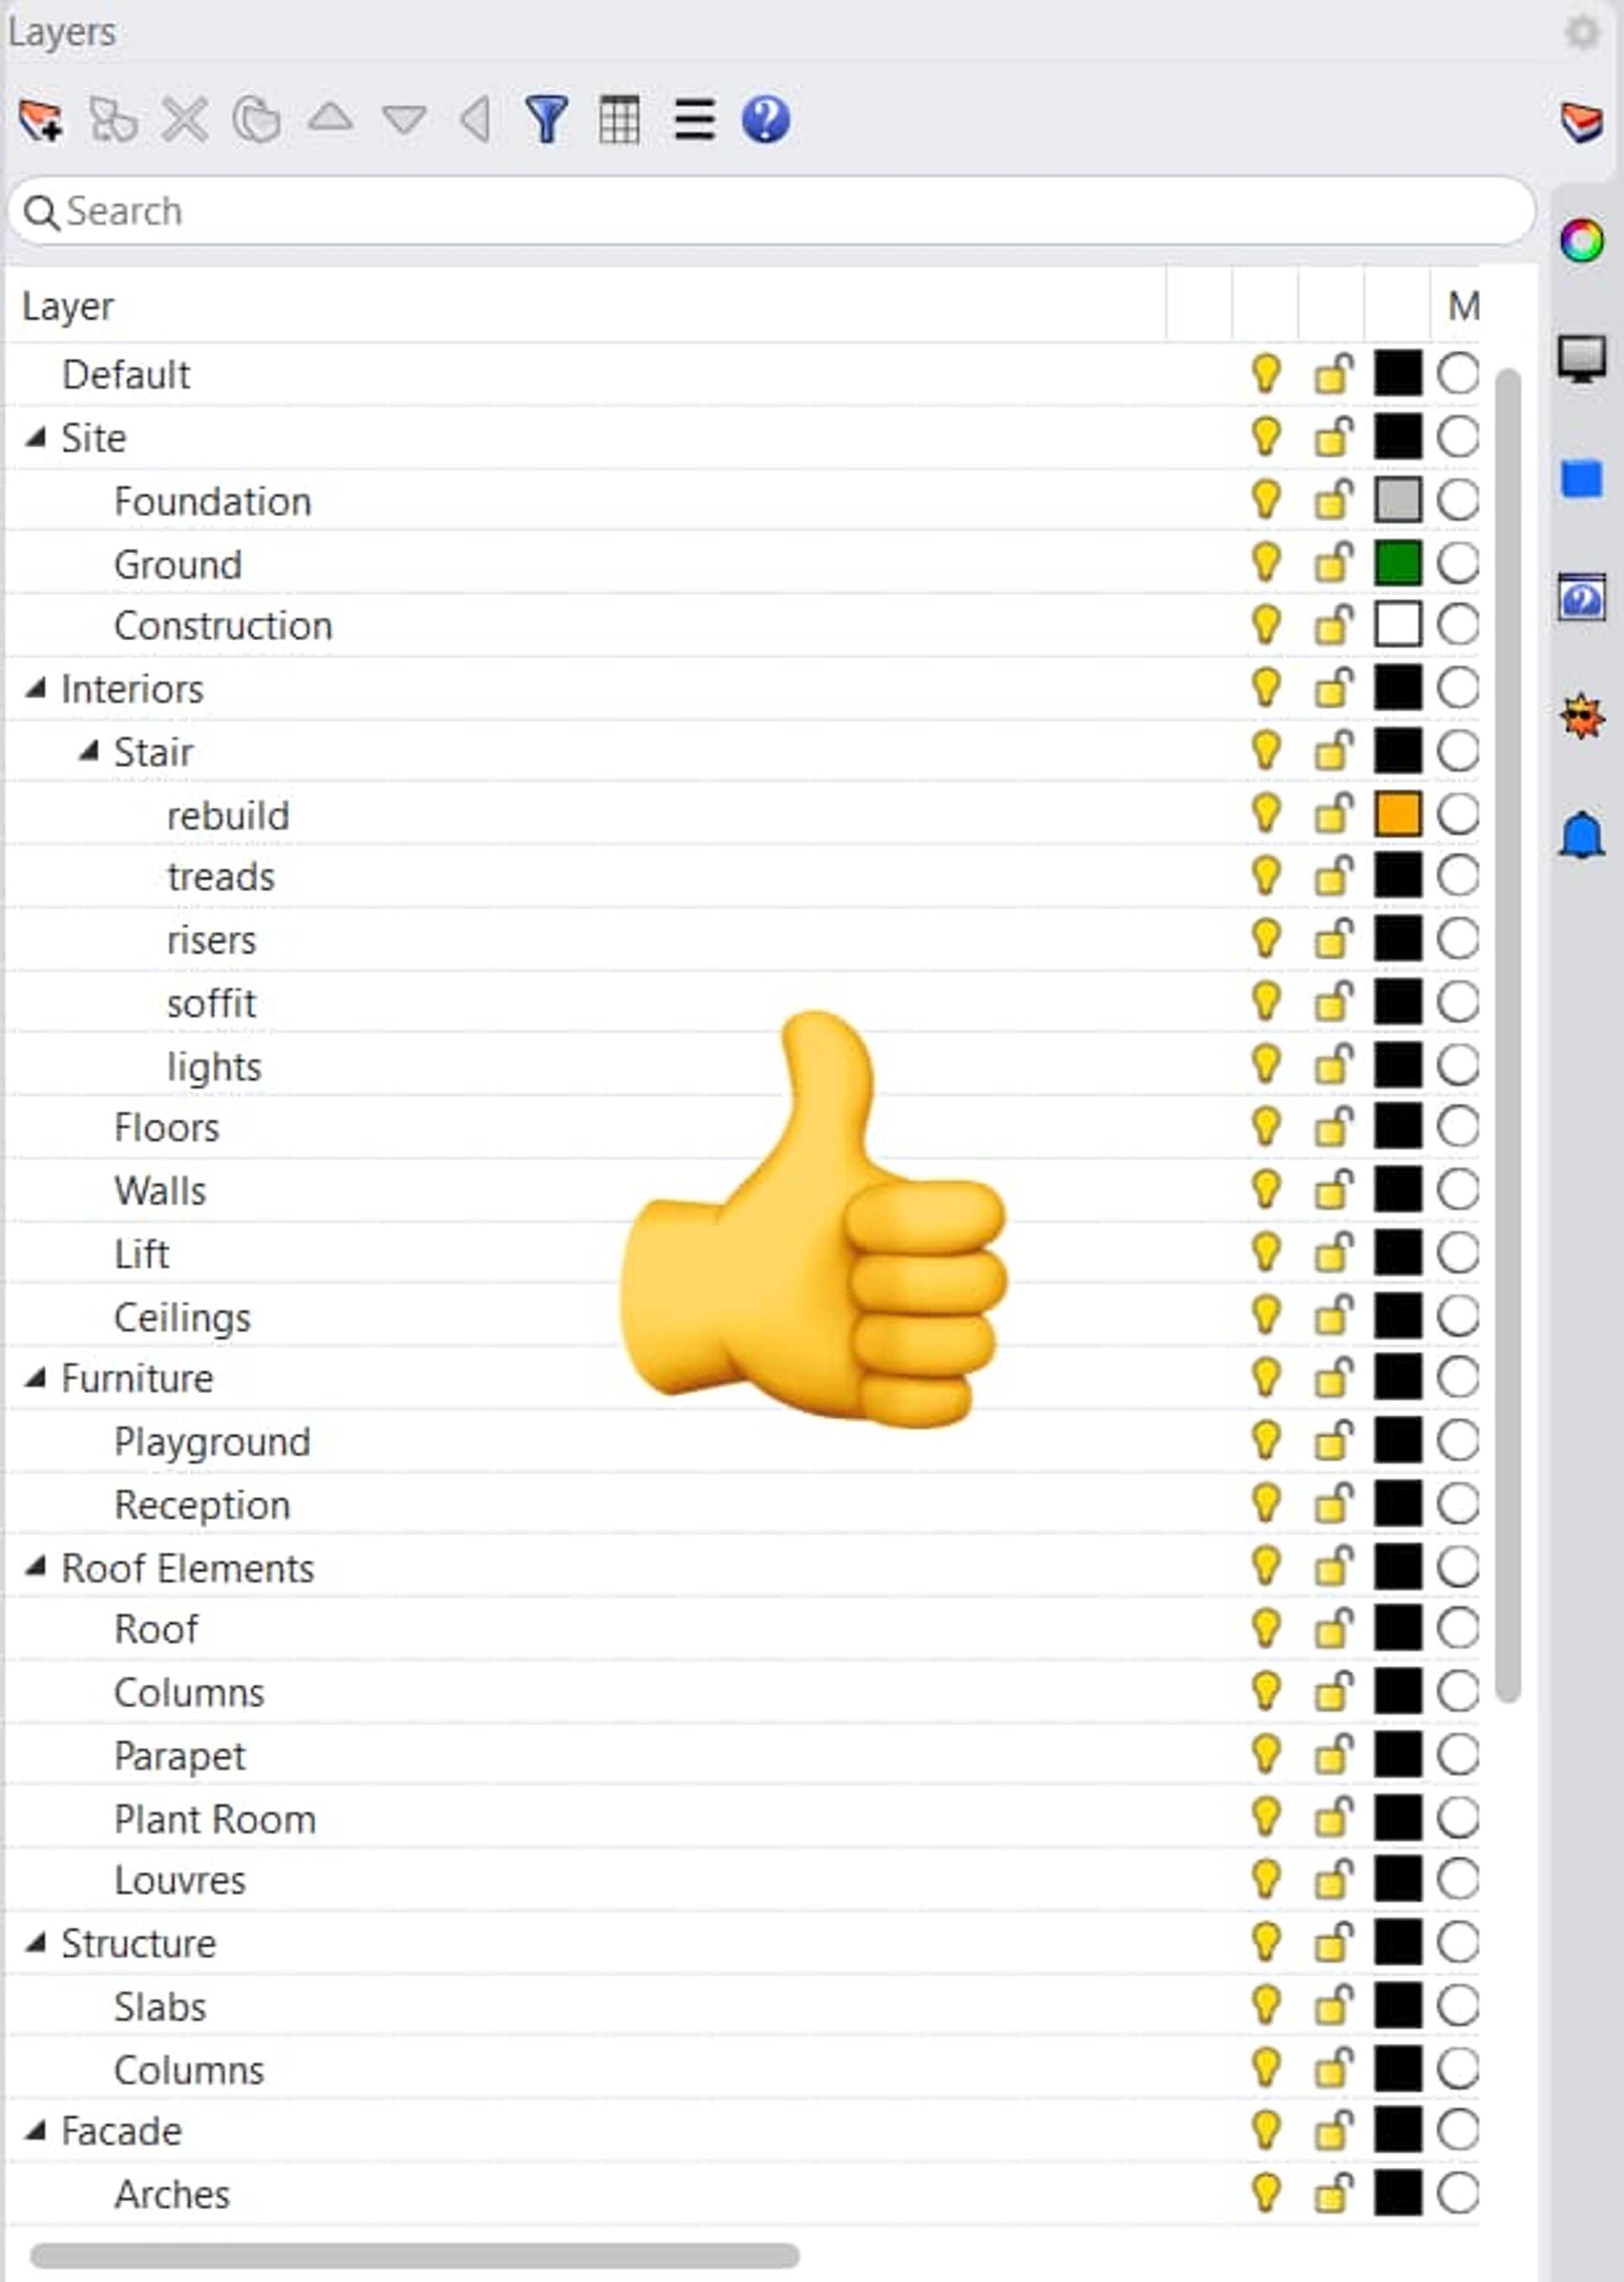
A Nicely Organised Rhino Model
Setting up dedicated category layers
Create dedicated layers in Rhino for each Revit category you'll be working with, such as Walls, Windows, and Doors. Once this is organized you can assign these layers inside the Rhino Speckle Connector.
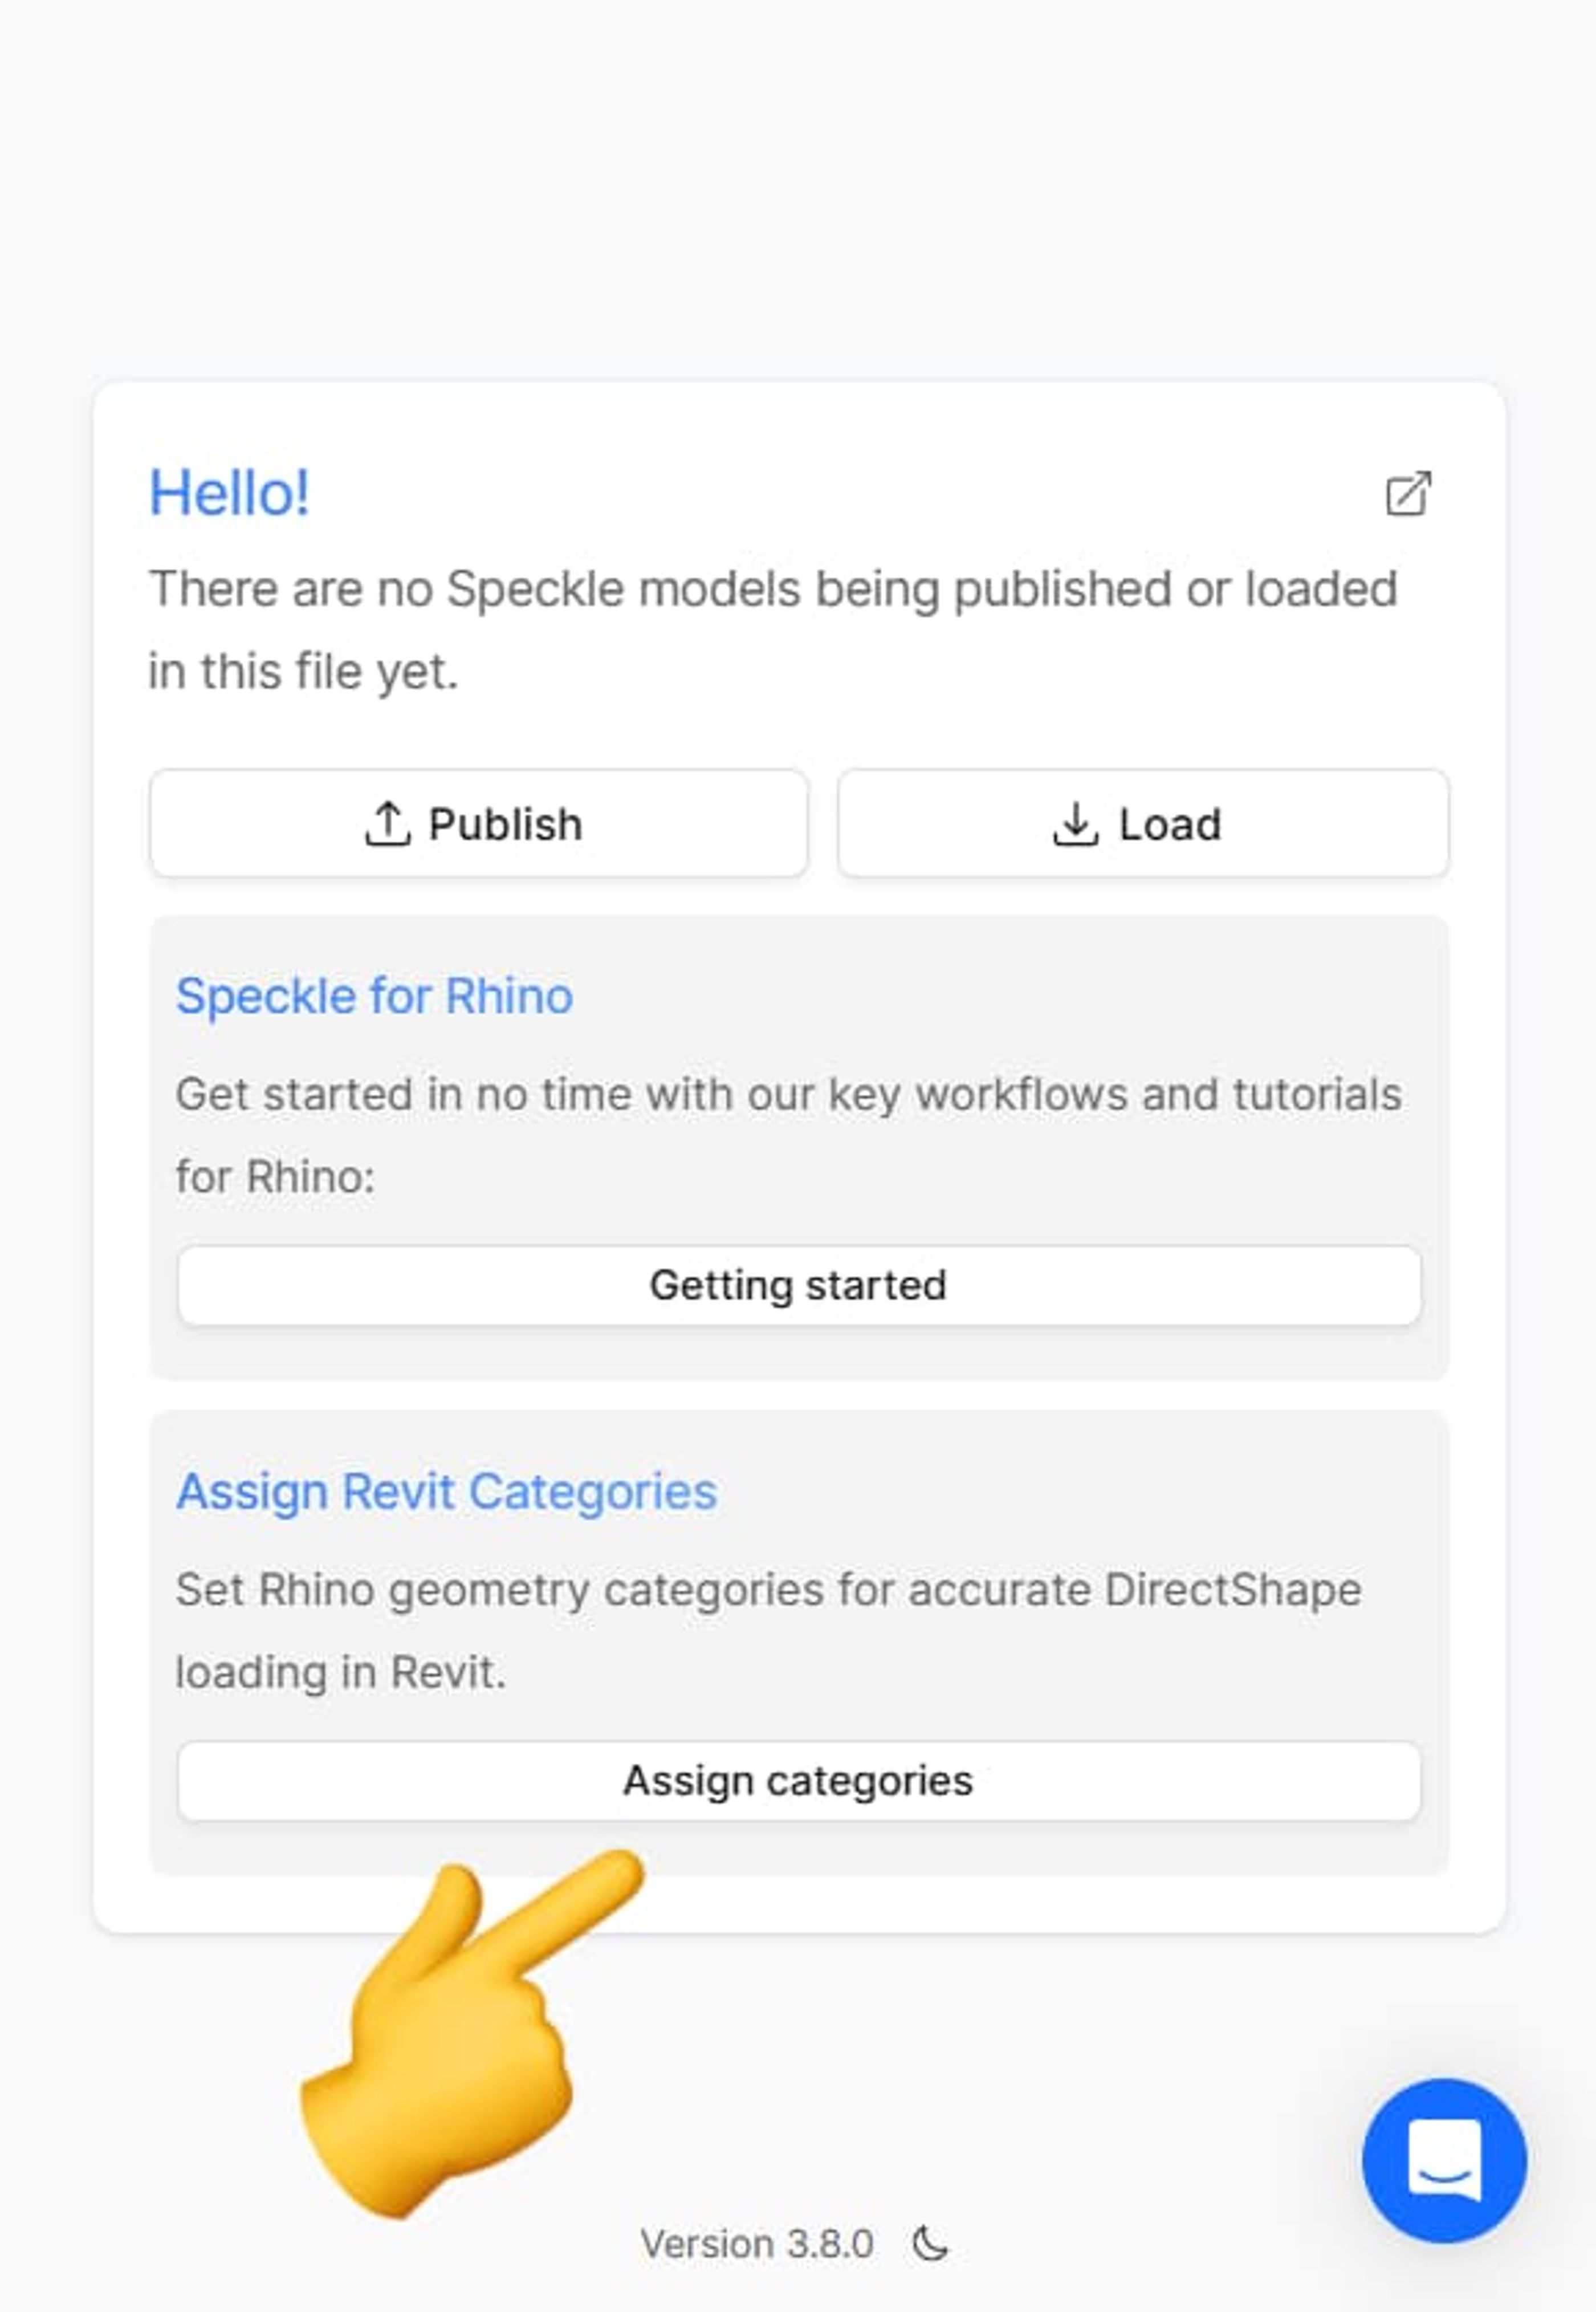
Assign categories
Why this matters: All future geometry created in these layers will now be published and loaded into the correct Direct Shape Category. This eliminates manual selection work in future iterations and creates a clear, readable model structure that benefits your entire team.
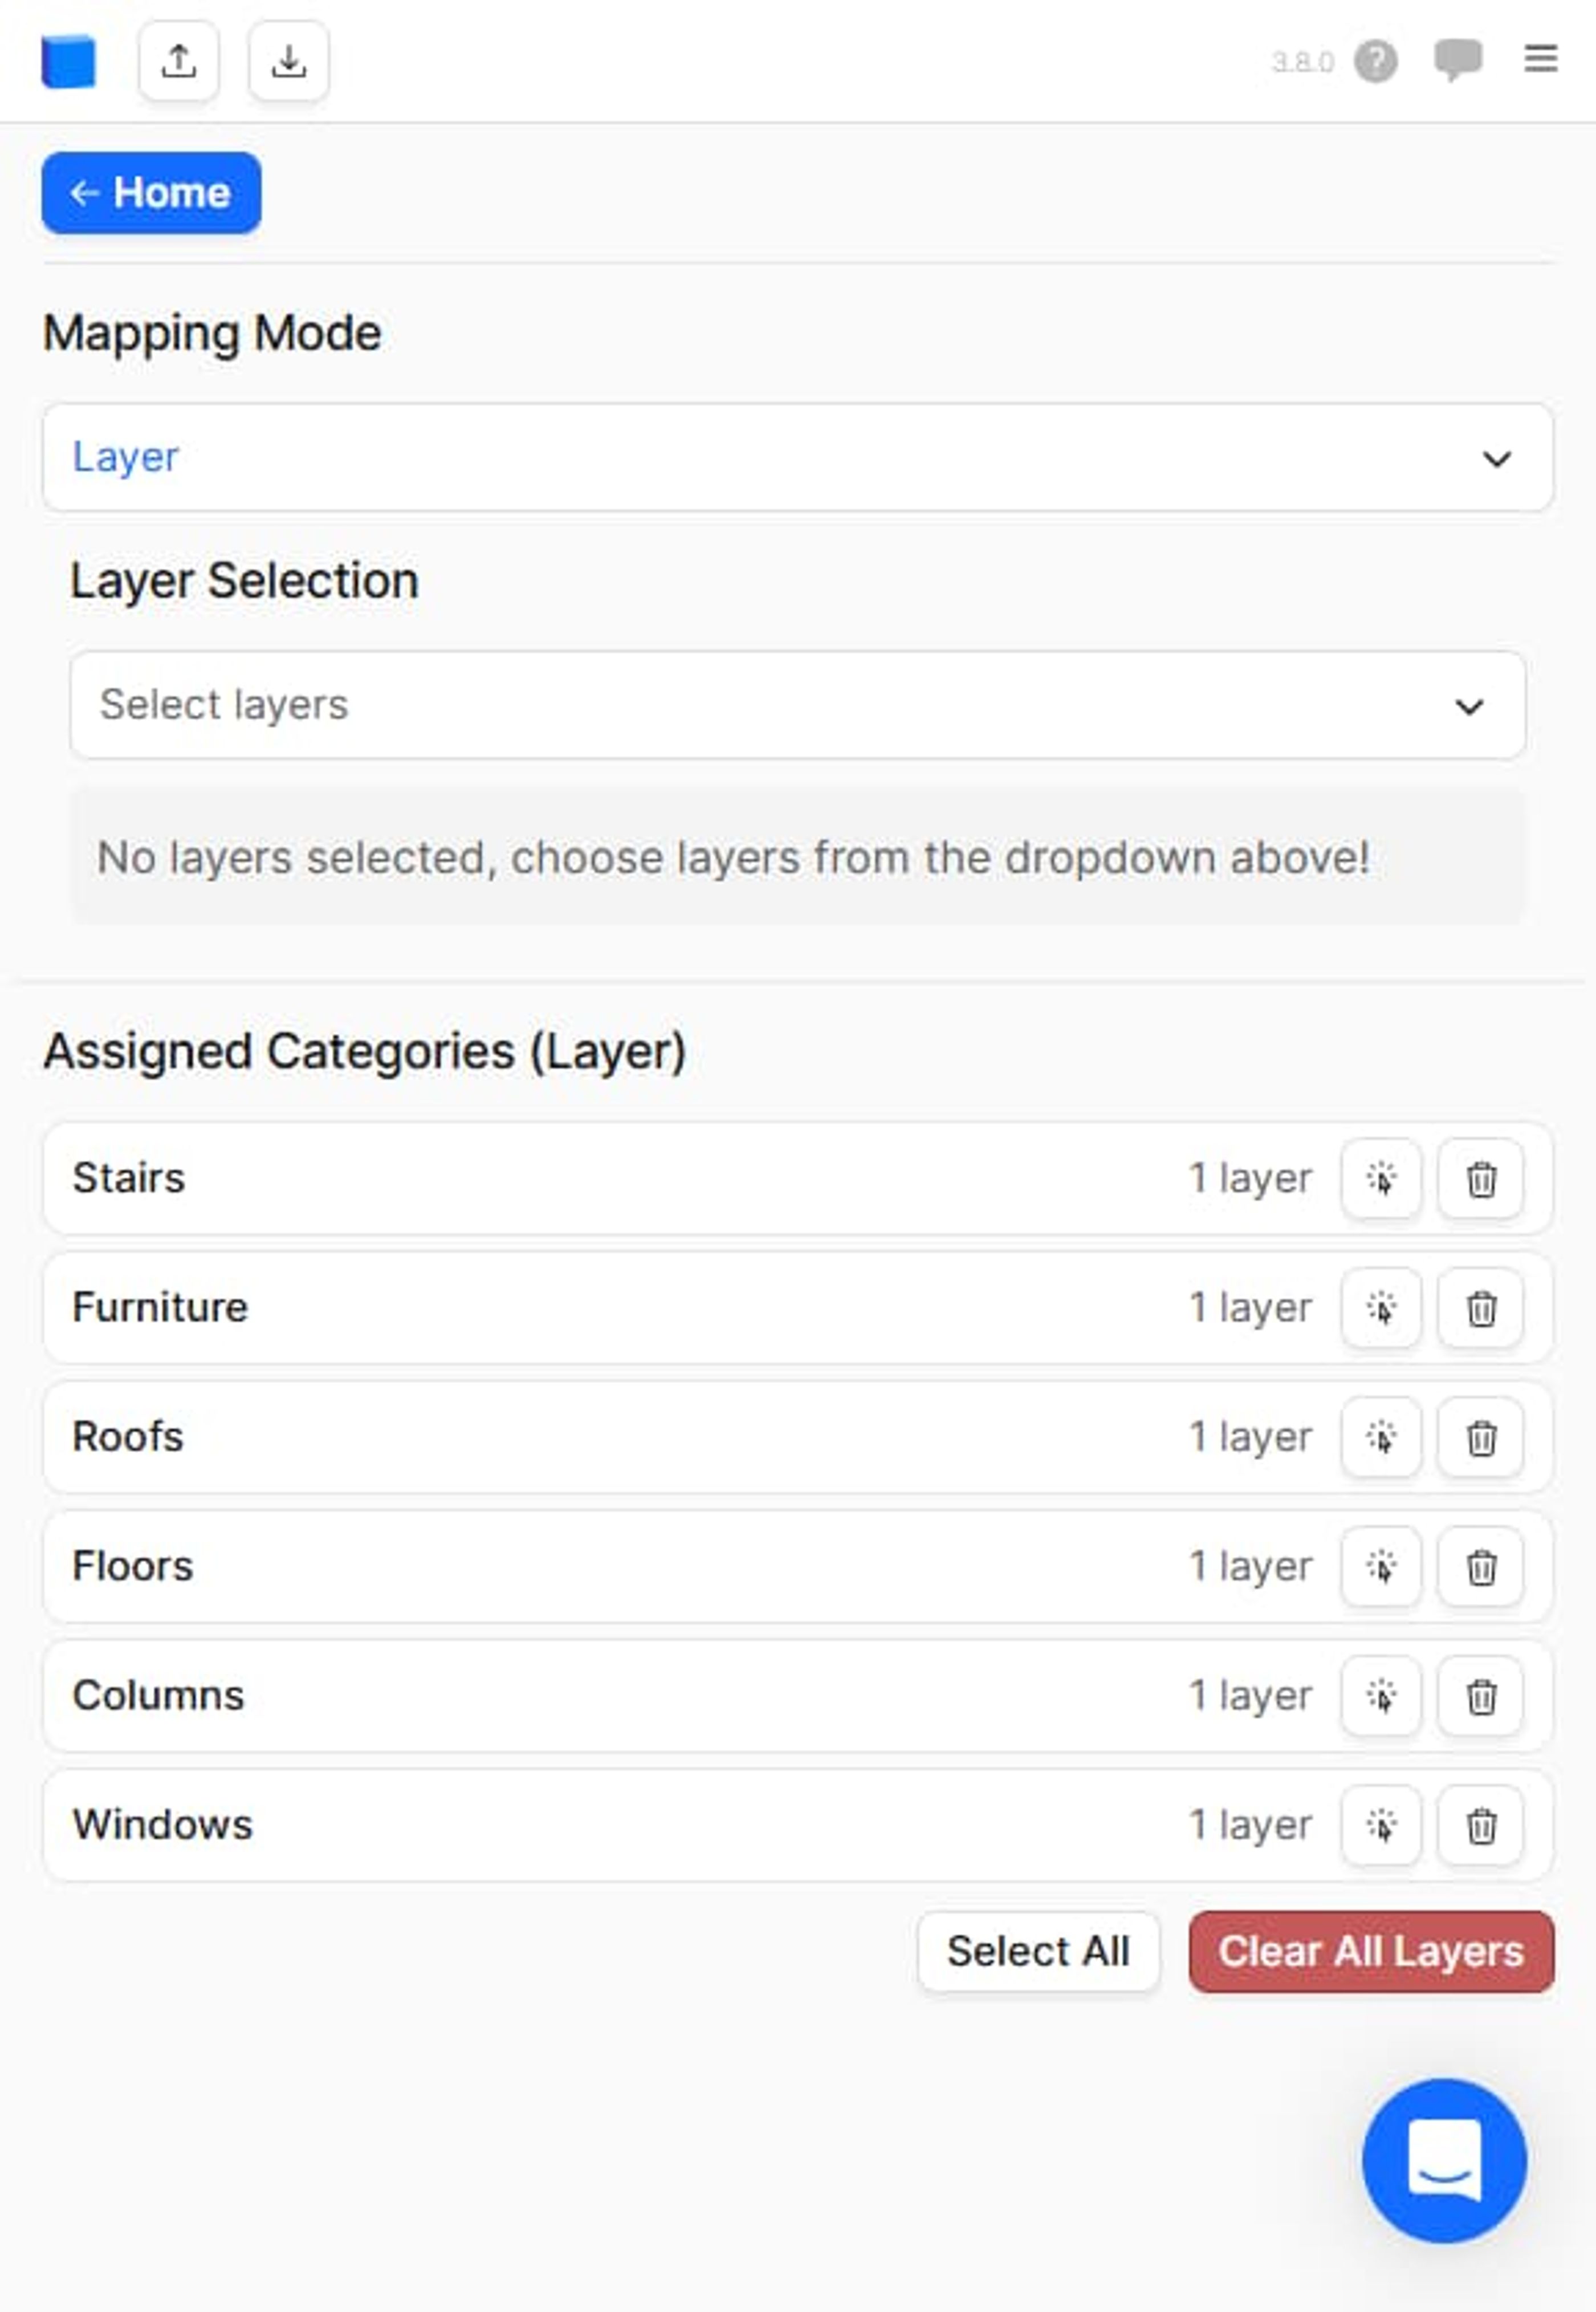
Assign categories
- Choose between Selection and Layer. Selection is preferred for its collaborative and organisational benefits.
- Assign each layer to a category.
Assign your Rhino layers in the Speckle Container
Stage 2: Publishing your model to Speckle
With your layers properly organized, you're ready to publish your model to Speckle! Making it accessible to your Revit team members.
Project setup and model publishing
Access the Speckle connector panel in Rhino and configure your project settings:
- Create or select a Speckle project - Think of projects as folders containing related models for a specific architectural project
- Name your model descriptively to help team members identify its purpose
- Select all geometry or choose specific layers to publish
- Initiate the publishing process
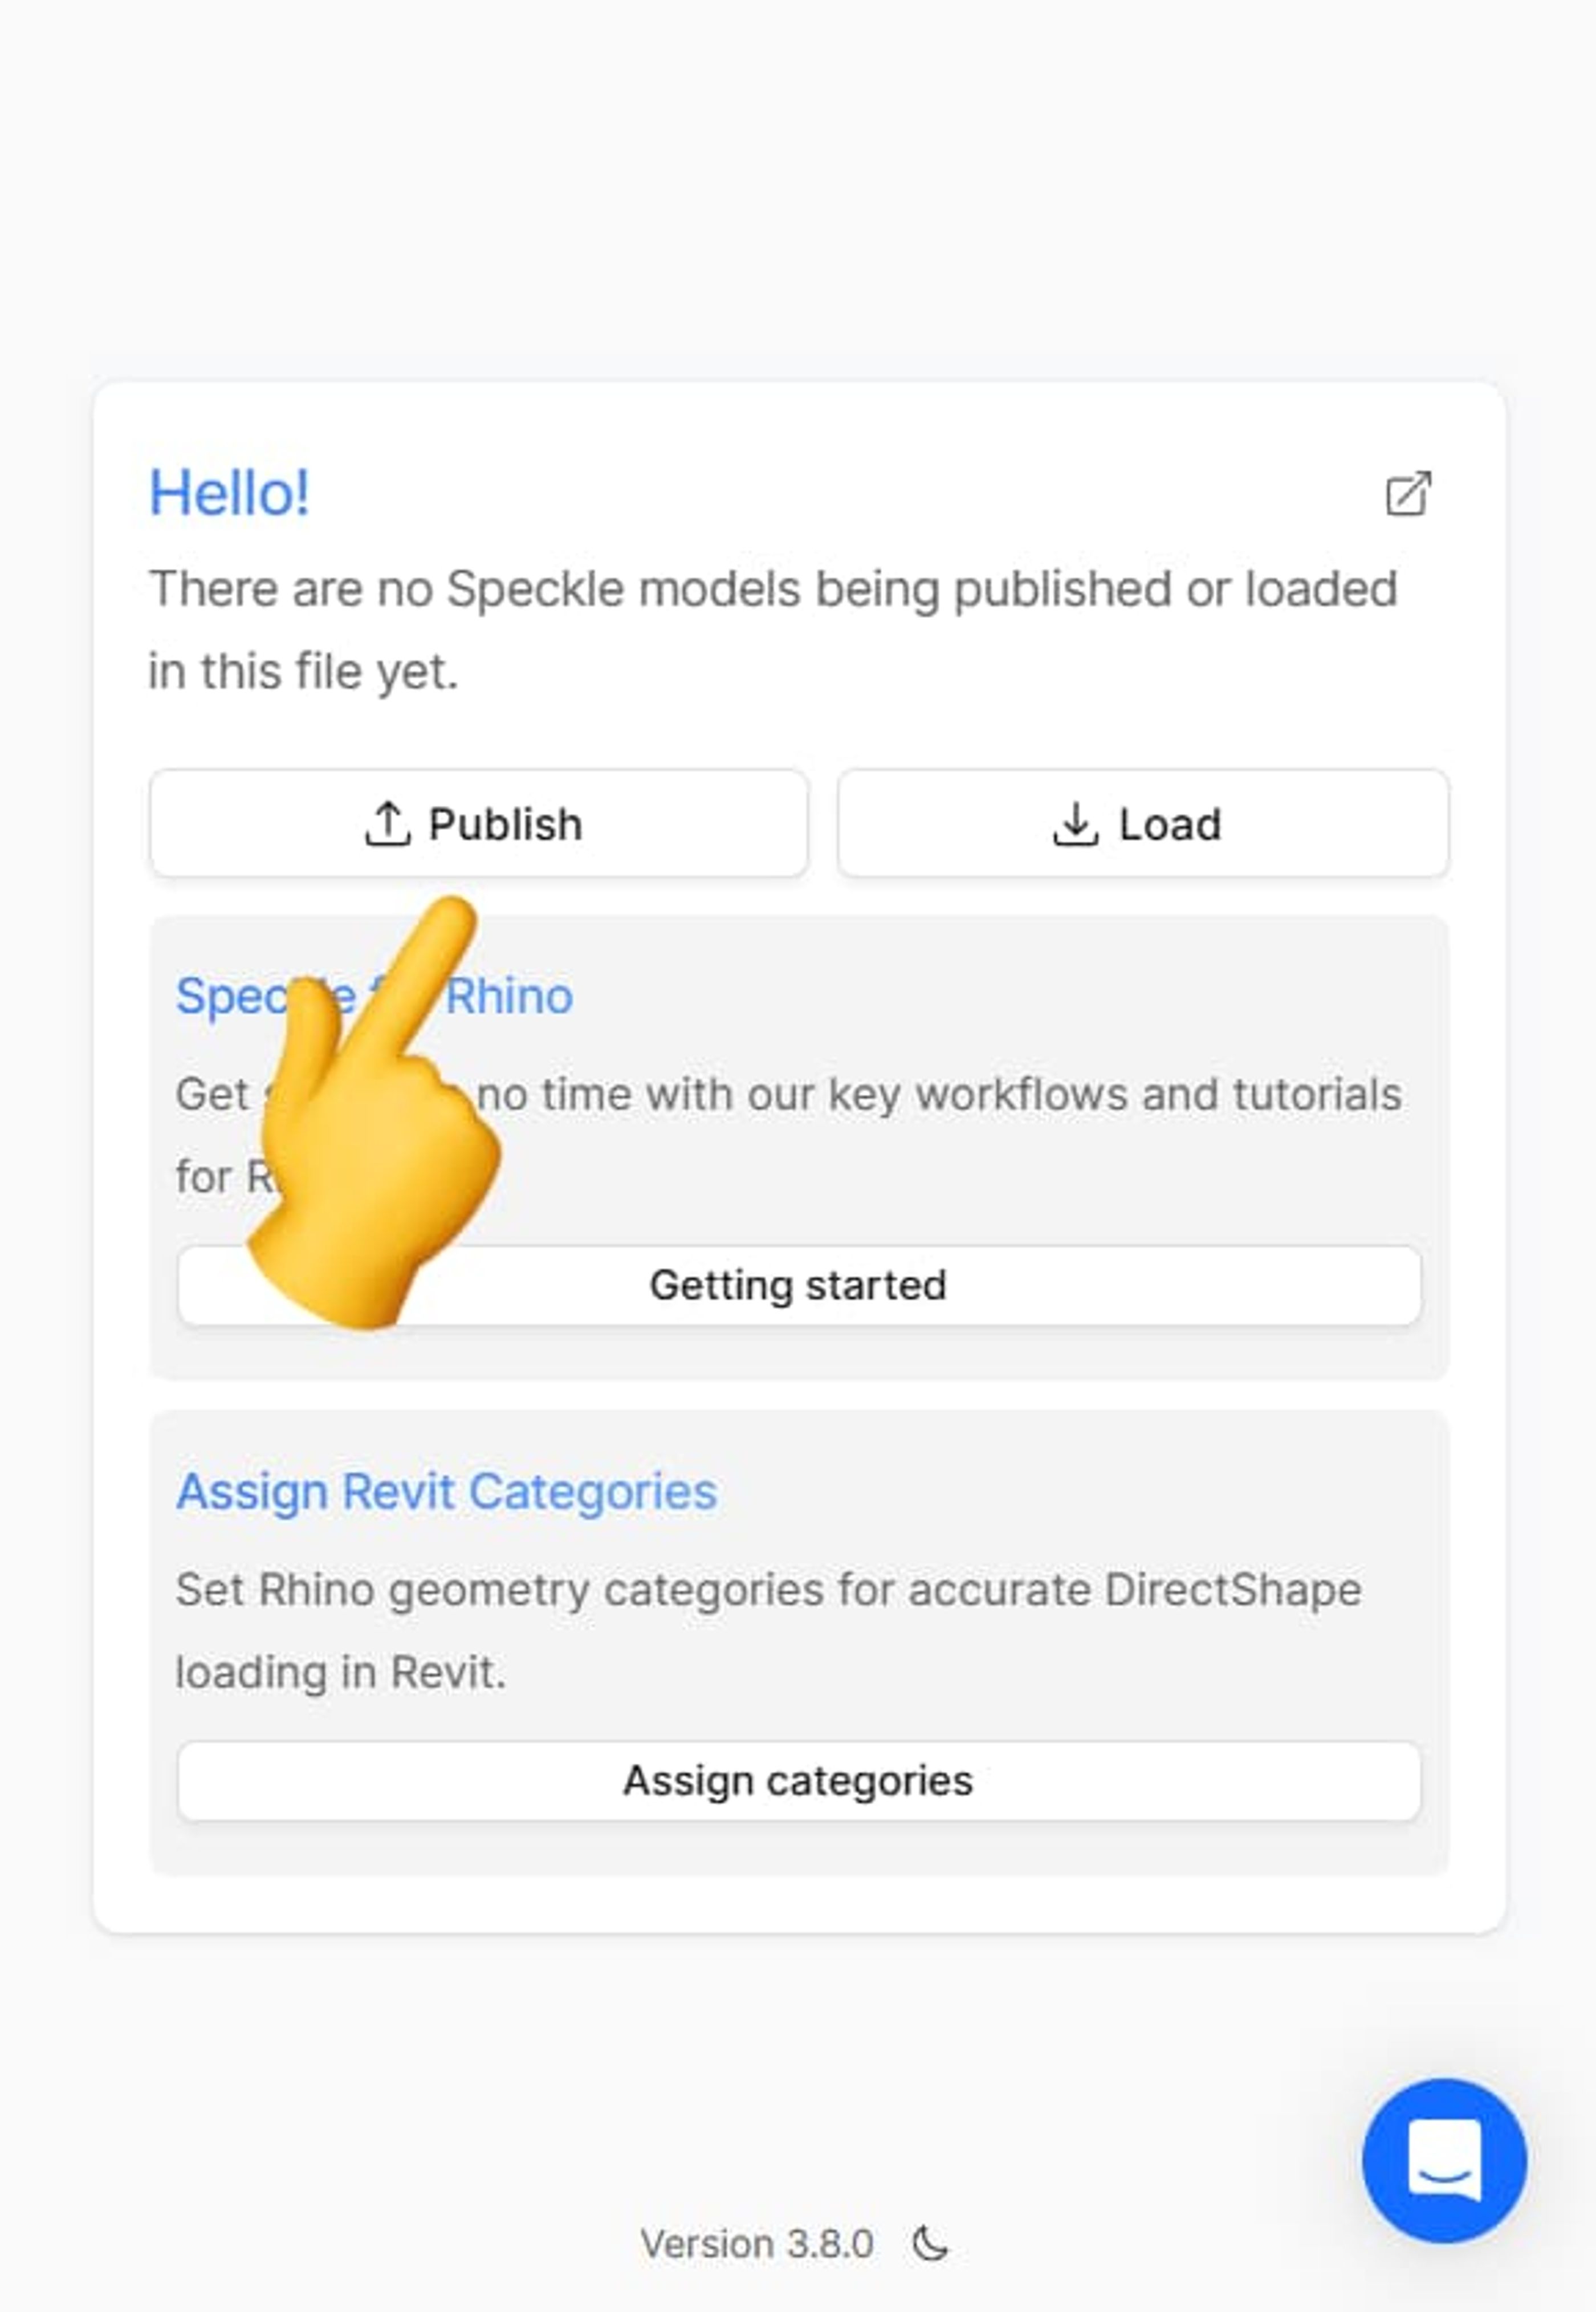
Hit that Publish Button!
Important Notes: The publishing process uploads your geometry to Speckle's cloud servers, where it becomes accessible to anyone invited to your project.
Version management and live updates
Once your initial model publishes successfully, Speckle establishes a live connection that enables seamless iteration workflows:
- Automatic category retention: Future publications remember your layer mappings
- Real-time notifications: Team members receive instant updates when new versions are available
- No file export required: Eliminates traditional file-passing workflows
When you make changes in Rhino and publish again, your Revit colleagues receive automatic notifications about the updated model version, streamlining collaboration without manual coordination.
Stage 3: Loading geometry into Revit
The Revit side of the workflow requires proper setup to maintain model organization and enable advanced BIM functionality.
Revit environment preparation
Create Dedicated Workset: Set up a specific workset for Speckle geometry to maintain clear separation between imported and native Revit elements. This organizational approach proves invaluable when managing complex models with multiple data sources.
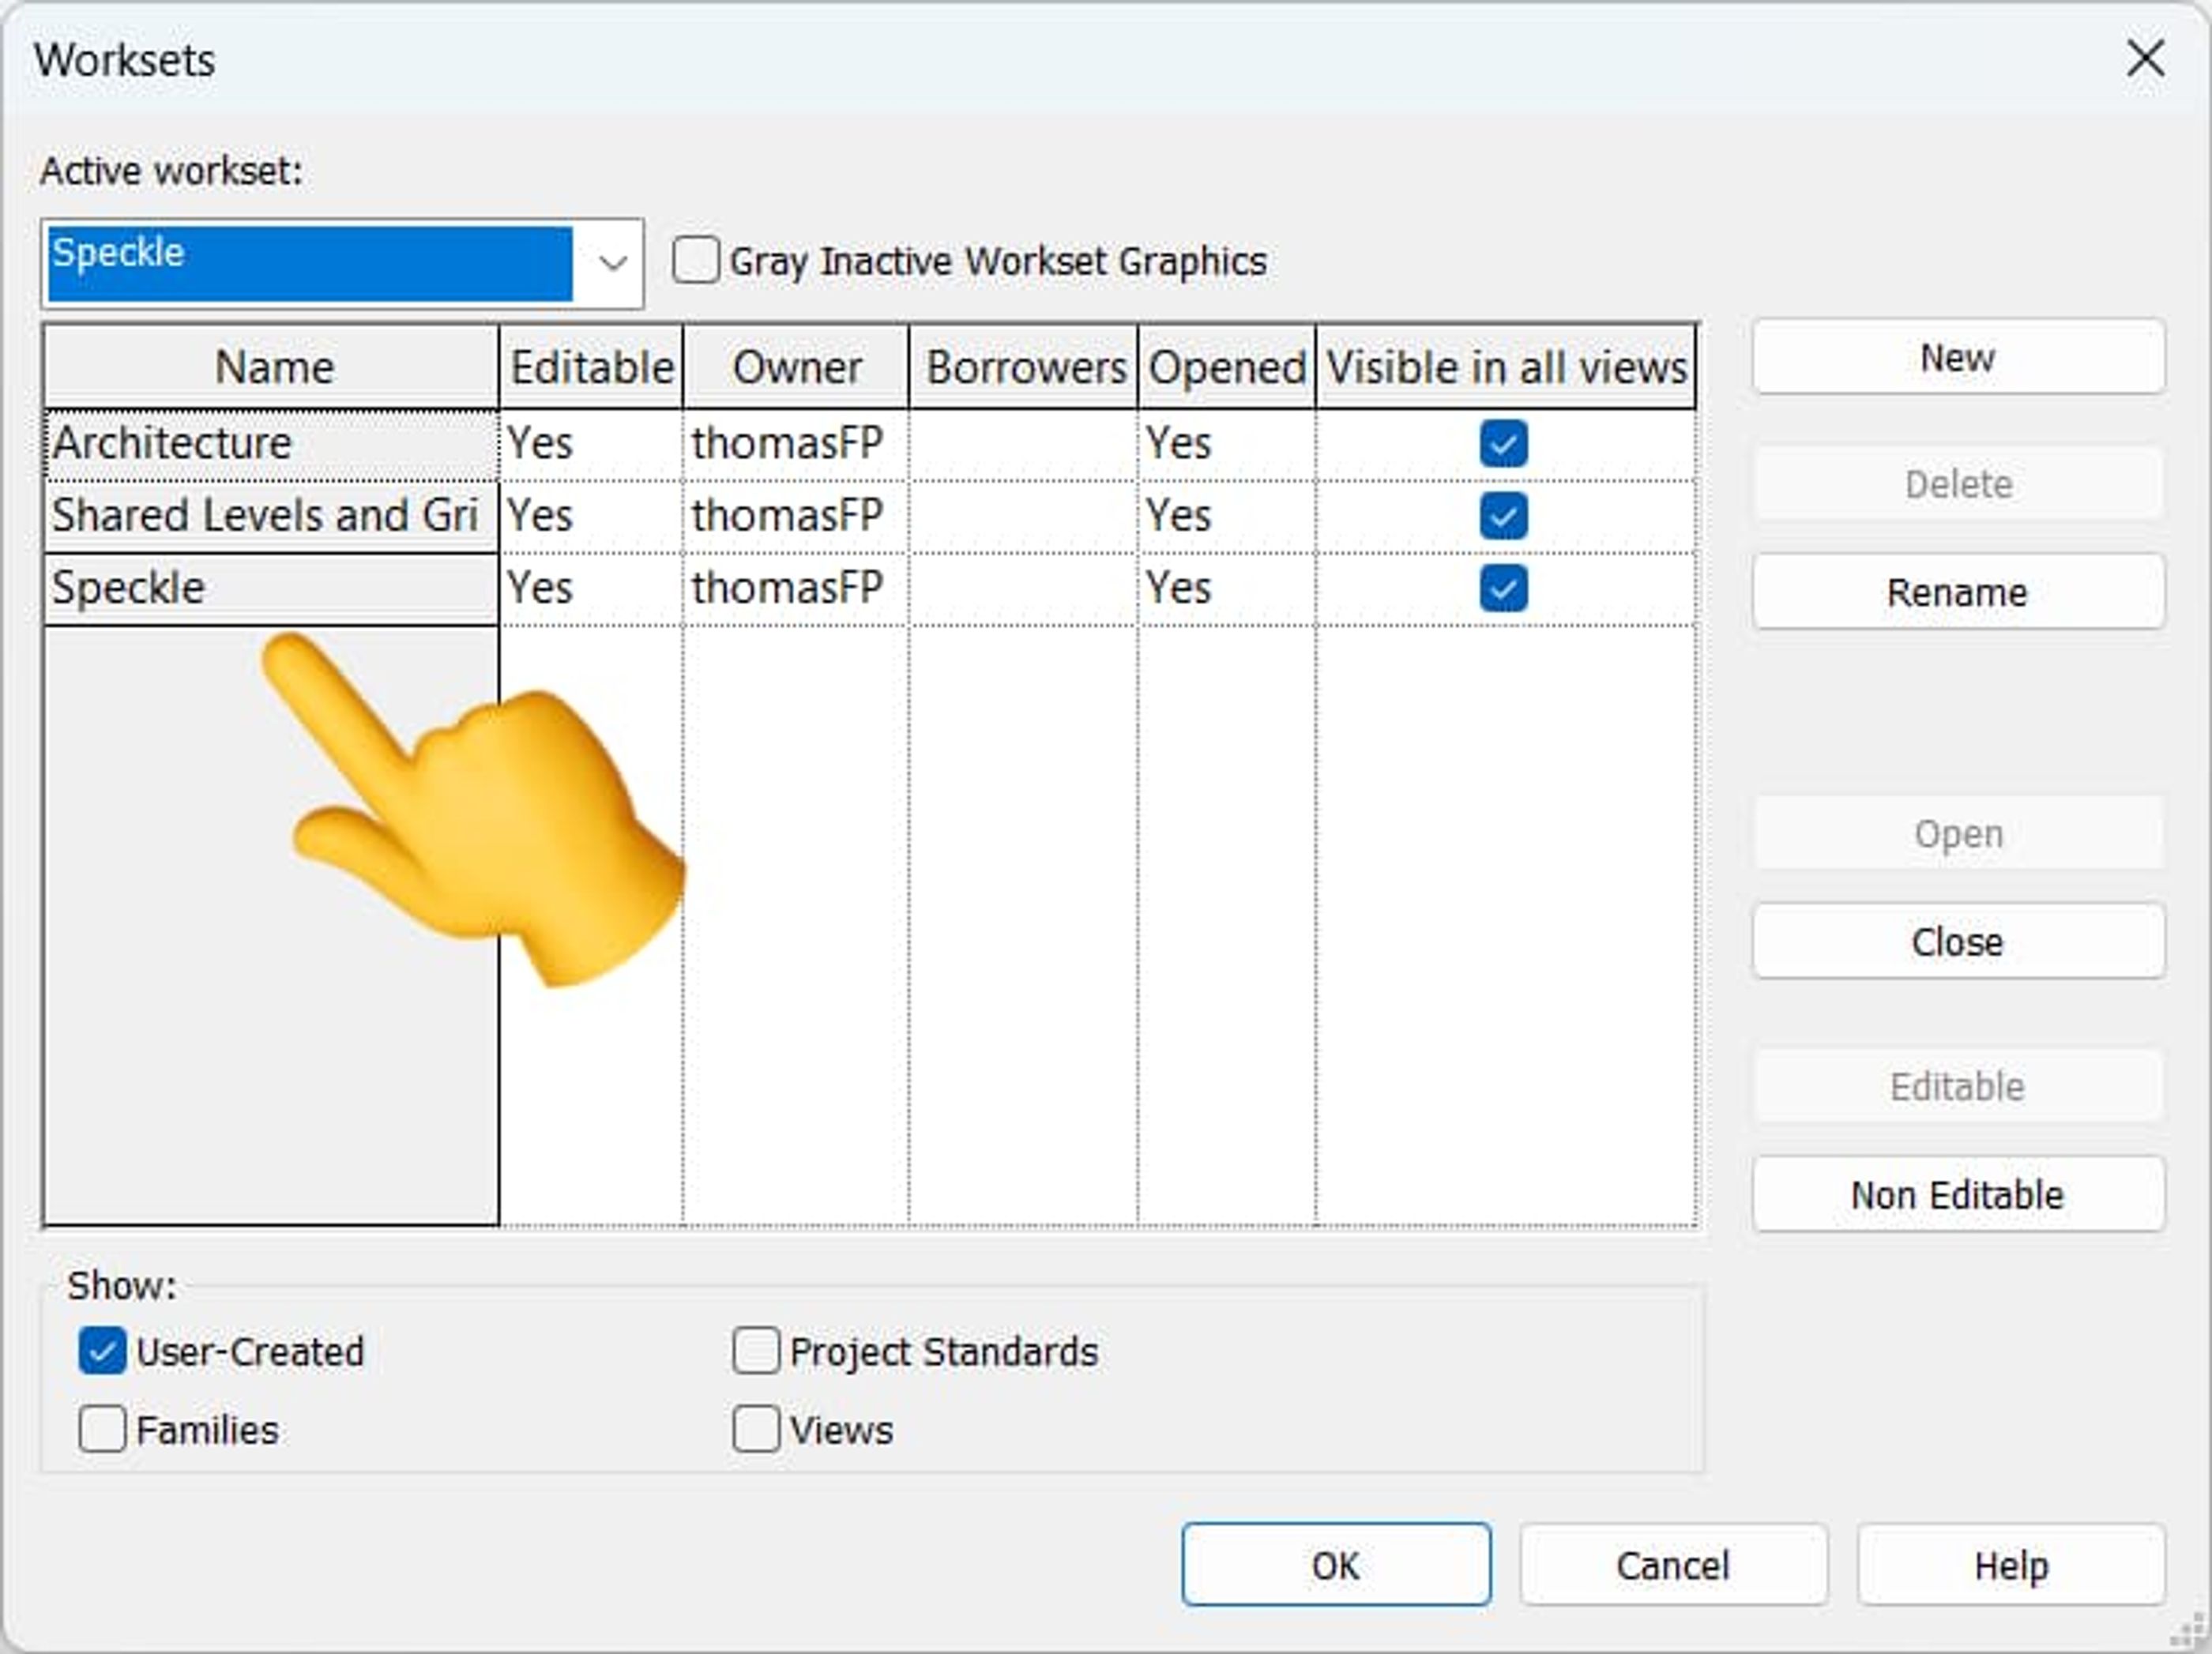
Create a dedicated Speckle Workset
Why worksets matter: The workset active during geometry loading determines where Speckle objects are placed. Dedicated worksets enable better model management, visibility control, and team coordination.
Loading and conversion process
The actual loading process transforms your Rhino geometry into Categorized Direct Shapes:
- Select your project and model from the Speckle connector interface
- Initiate the loading process - Speckle automatically converts geometry based on your layer mappings
- Review categorized direct shapes that result from the conversion
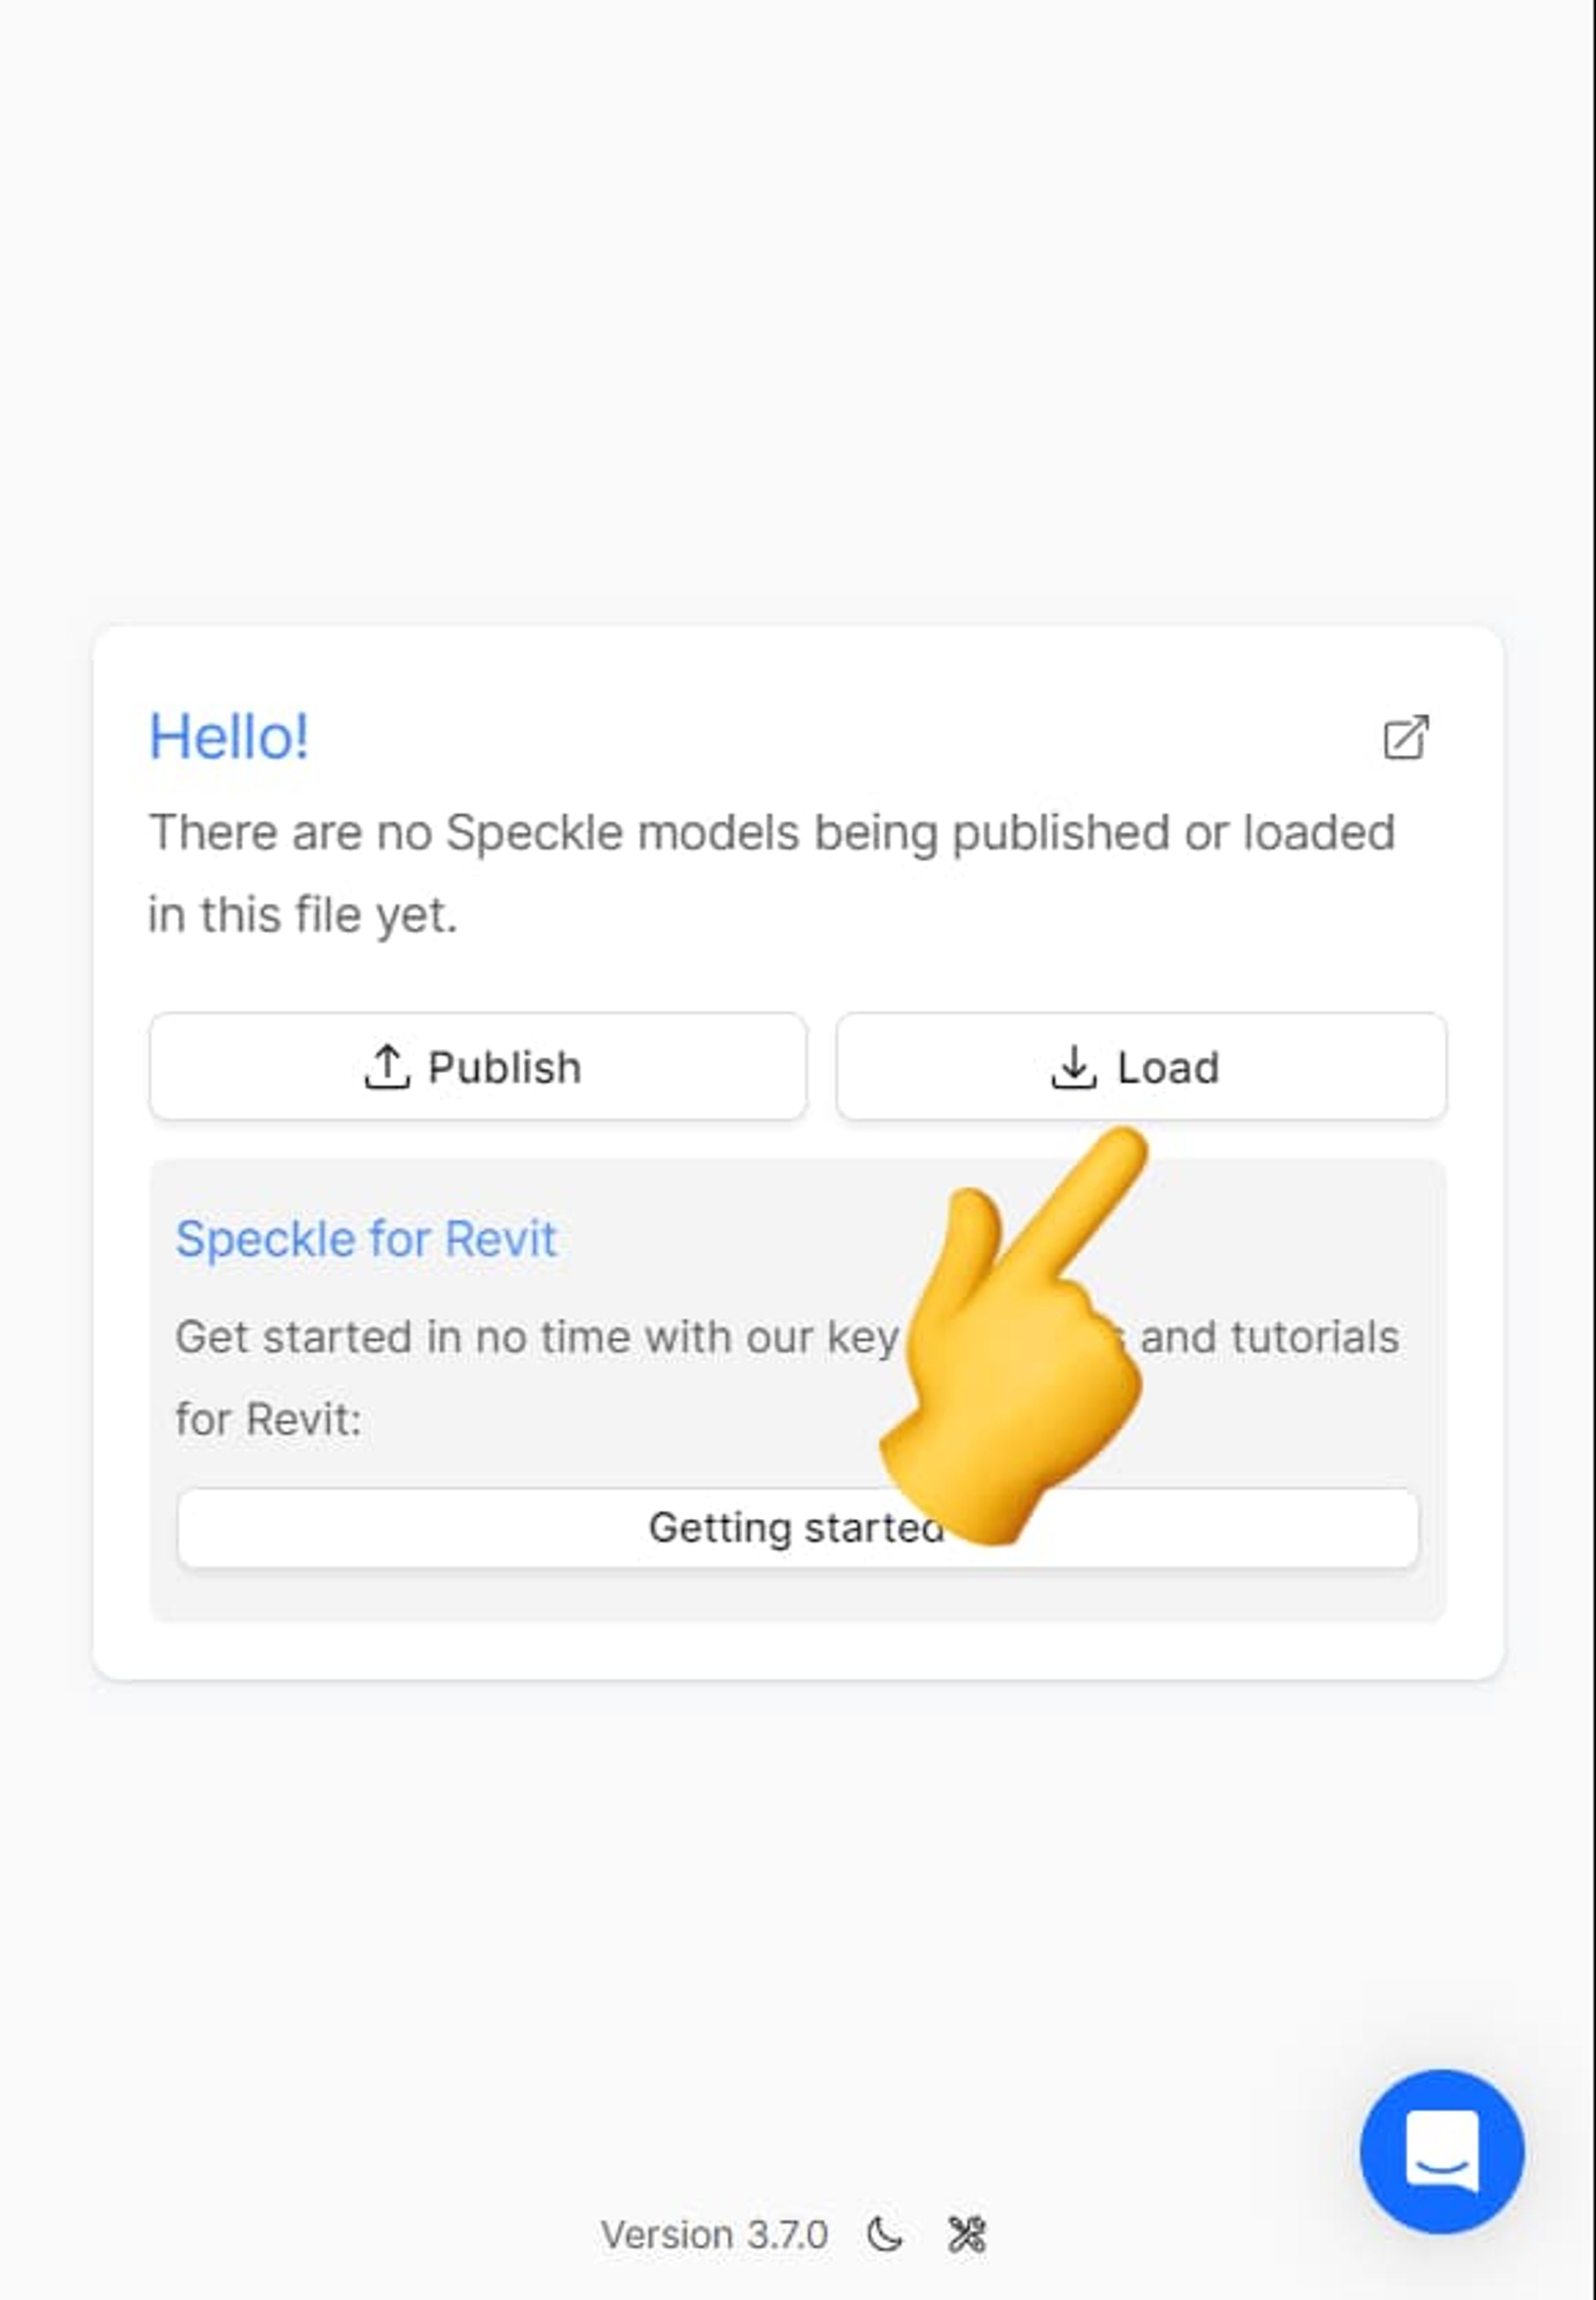
Load Your Rhino Model!
Technical advantage: Unlike generic models that typically result from direct geometry import, categorized direct shapes maintain their BIM intelligence, enabling advanced Revit functionality like scheduling, filtering, and proper sectioning behavior.
Stage 4: Leveraging categorized direct shapes
The true power of this workflow emerges when you begin using Revit's advanced BIM capabilities with your imported geometry.
Advanced filtering and documentation
Categorized direct shapes unlock sophisticated project documentation capabilities:
View Filtering: Create plan views with specific categories filtered out. For example, generate furniture plans by hiding furniture categories while maintaining walls, doors, and windows.
Scheduling Integration: Include imported geometry in quantity schedules, treating conceptual models as integral parts of your BIM workflow.
Section Behavior: Objects section properly according to their categories, producing clean, professional drawing outputs.
Real-world applications
This workflow enables several powerful use cases:
- Conceptual design teams can continue working in their preferred Rhino environment while delivering BIM-ready content
- Documentation teams receive live updates without interrupting their Revit-based workflows
- Mixed-skill teams can collaborate effectively, with Rhino specialists contributing meaningful BIM content without Revit expertise
Stage 5: Bidirectional workflows and team collaboration
Speckle's capabilities extend beyond one-way Rhino-to-Revit data flow, enabling sophisticated collaborative workflows.
Reverse data flow: Revit to Rhino
The workflow operates bidirectionally, allowing Revit content to inform Rhino modeling:
- Structural elements modeled in Revit (columns, beams) can be published to Speckle
- BIM data integrity is maintained when loading Revit geometry into Rhino
- Context modeling benefits from having accurate Revit elements as reference geometry
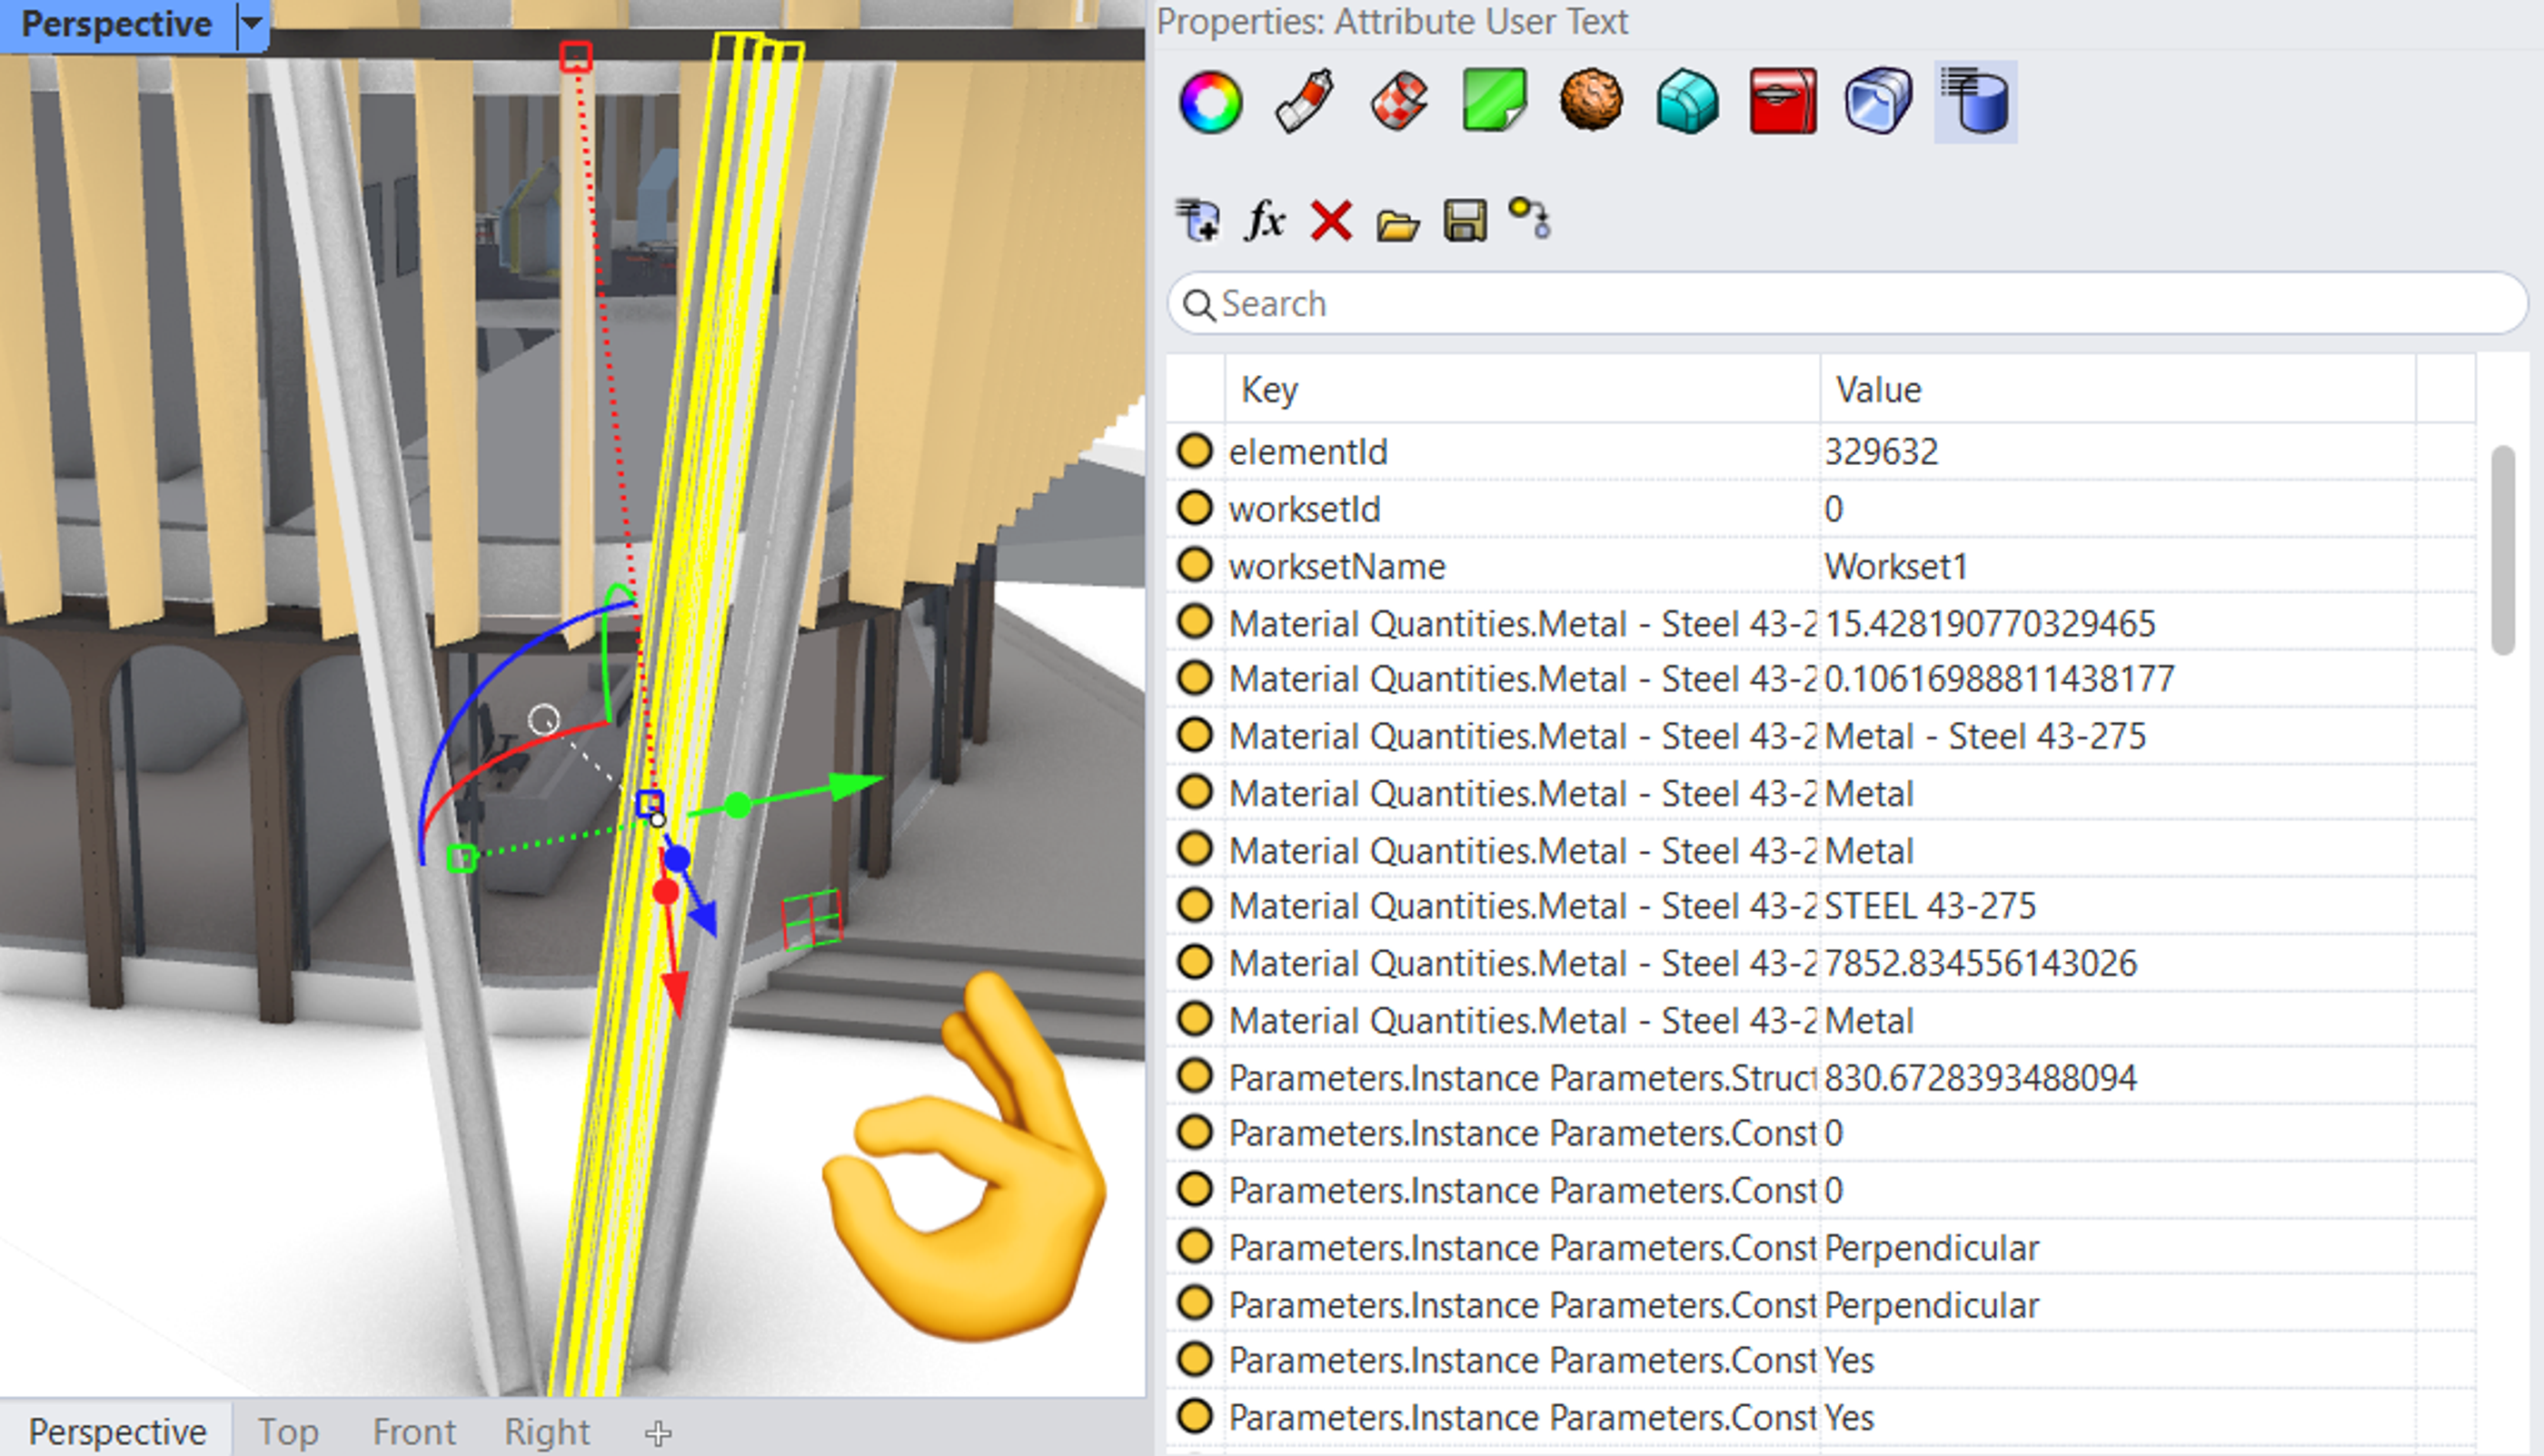
Bim data in Rhino!
Team collaboration at scale
Because Speckle operates as a live service, collaboration scales beyond individual workstations:
Asynchronous teamwork: Team members work in their preferred applications without requiring synchronized sessions or shared computing resources.
Global accessibility: The Speckle web viewer enables project review and collaboration regardless of software licenses or technical expertise.
Live version control: All team members receive real-time notifications about model updates, maintaining project coordination without manual communication overhead.
Conclusion
So, now you have everything you could need to smooth out your collaborative workflows. With Catergrorized Direct Shapes, you’re whole team will be able to contribute to the project at any stage, regardless of their working knowledge of either application. The key here, as is always the case, is to communicate and agree on layer structure and categorisation standards ahead of time. Once these details are ironed out between your teams, Speckle can take the collaborative reins and establish the necessary connections between each professional.
This is also not a solution suitable for every stage. Obviously, eventually you will have to leave the sweet embrace of Rhino and migrate to Revit, but this workflow means that the transition will not be so jarring; you will have already sent some of your luggage to Revit, ready for you to move in.
Next steps: Explore Speckle's additional connectors for other AEC applications to create even more comprehensive collaborative workflows.