Set up model data validation with Speckle
Introduction
Building Information Modeling (BIM) relies heavily on accurate and consistent data to ensure successful project delivery.
However, verifying that the properties and parameters of BIM elements meet project standards can be time-consuming and error-prone, even for the simplest checks.
Speckle streamlines this process by providing easy-to-use tools for validating BIM data while visually communicating the results, enabling real-time collaboration and immediate action.
Prerequisites
Before starting, make sure you’ve already created a project in a Speckle workspace and have at least one model uploaded.
The model can originate from any supported host application—such as Revit, Archicad, Civil3D, Rhino, Grasshopper, or others—or you can just drag and drop a supported file, like an IFC, directly into Speckle. The key point for this tutorial is that your model includes the data you'd like to review.
Trust your data at every stage.
Step 1: Connect a model and create your first check
Create Validation Check
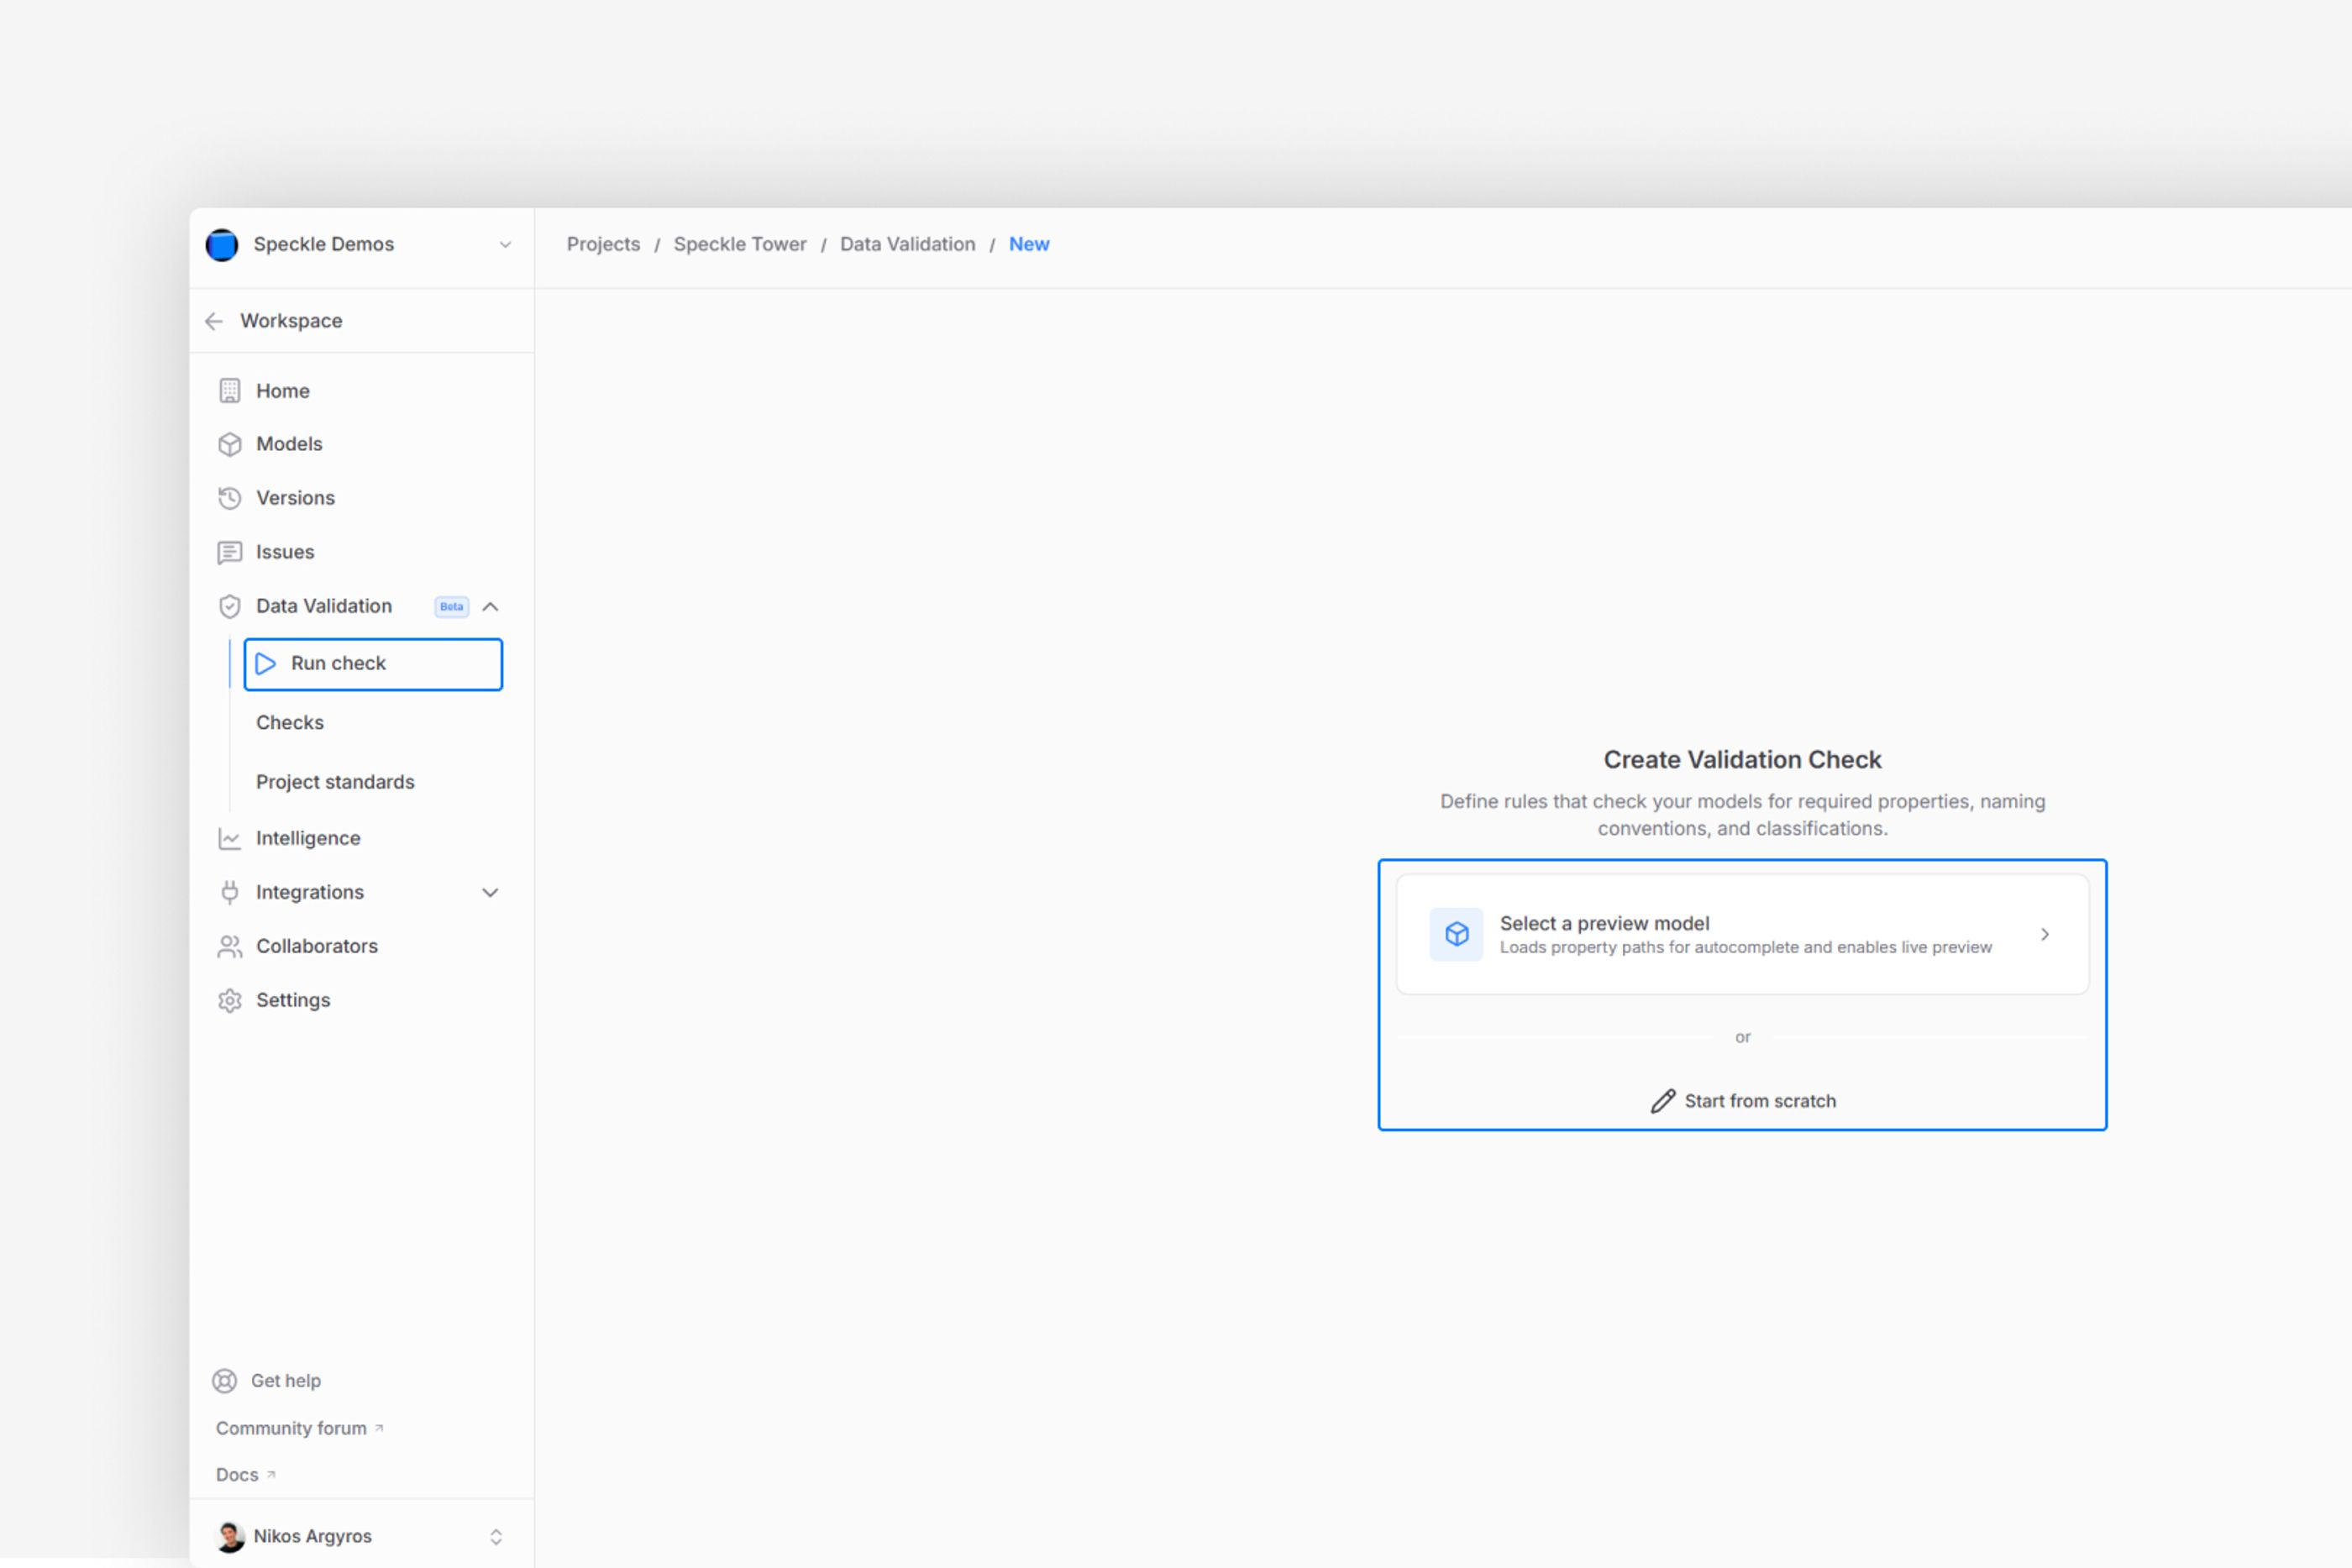
Open the project you want to use.
From the left sidebar, navigate to Data Validation and click Run Check.
Select a preview model and choose the specific version you want to validate.
Selecting the latest version ensures the dashboard updates automatically whenever the model changes, helping your team stay aligned with the most current project data.
Step 2: Add or import rules
Create your first validation rule
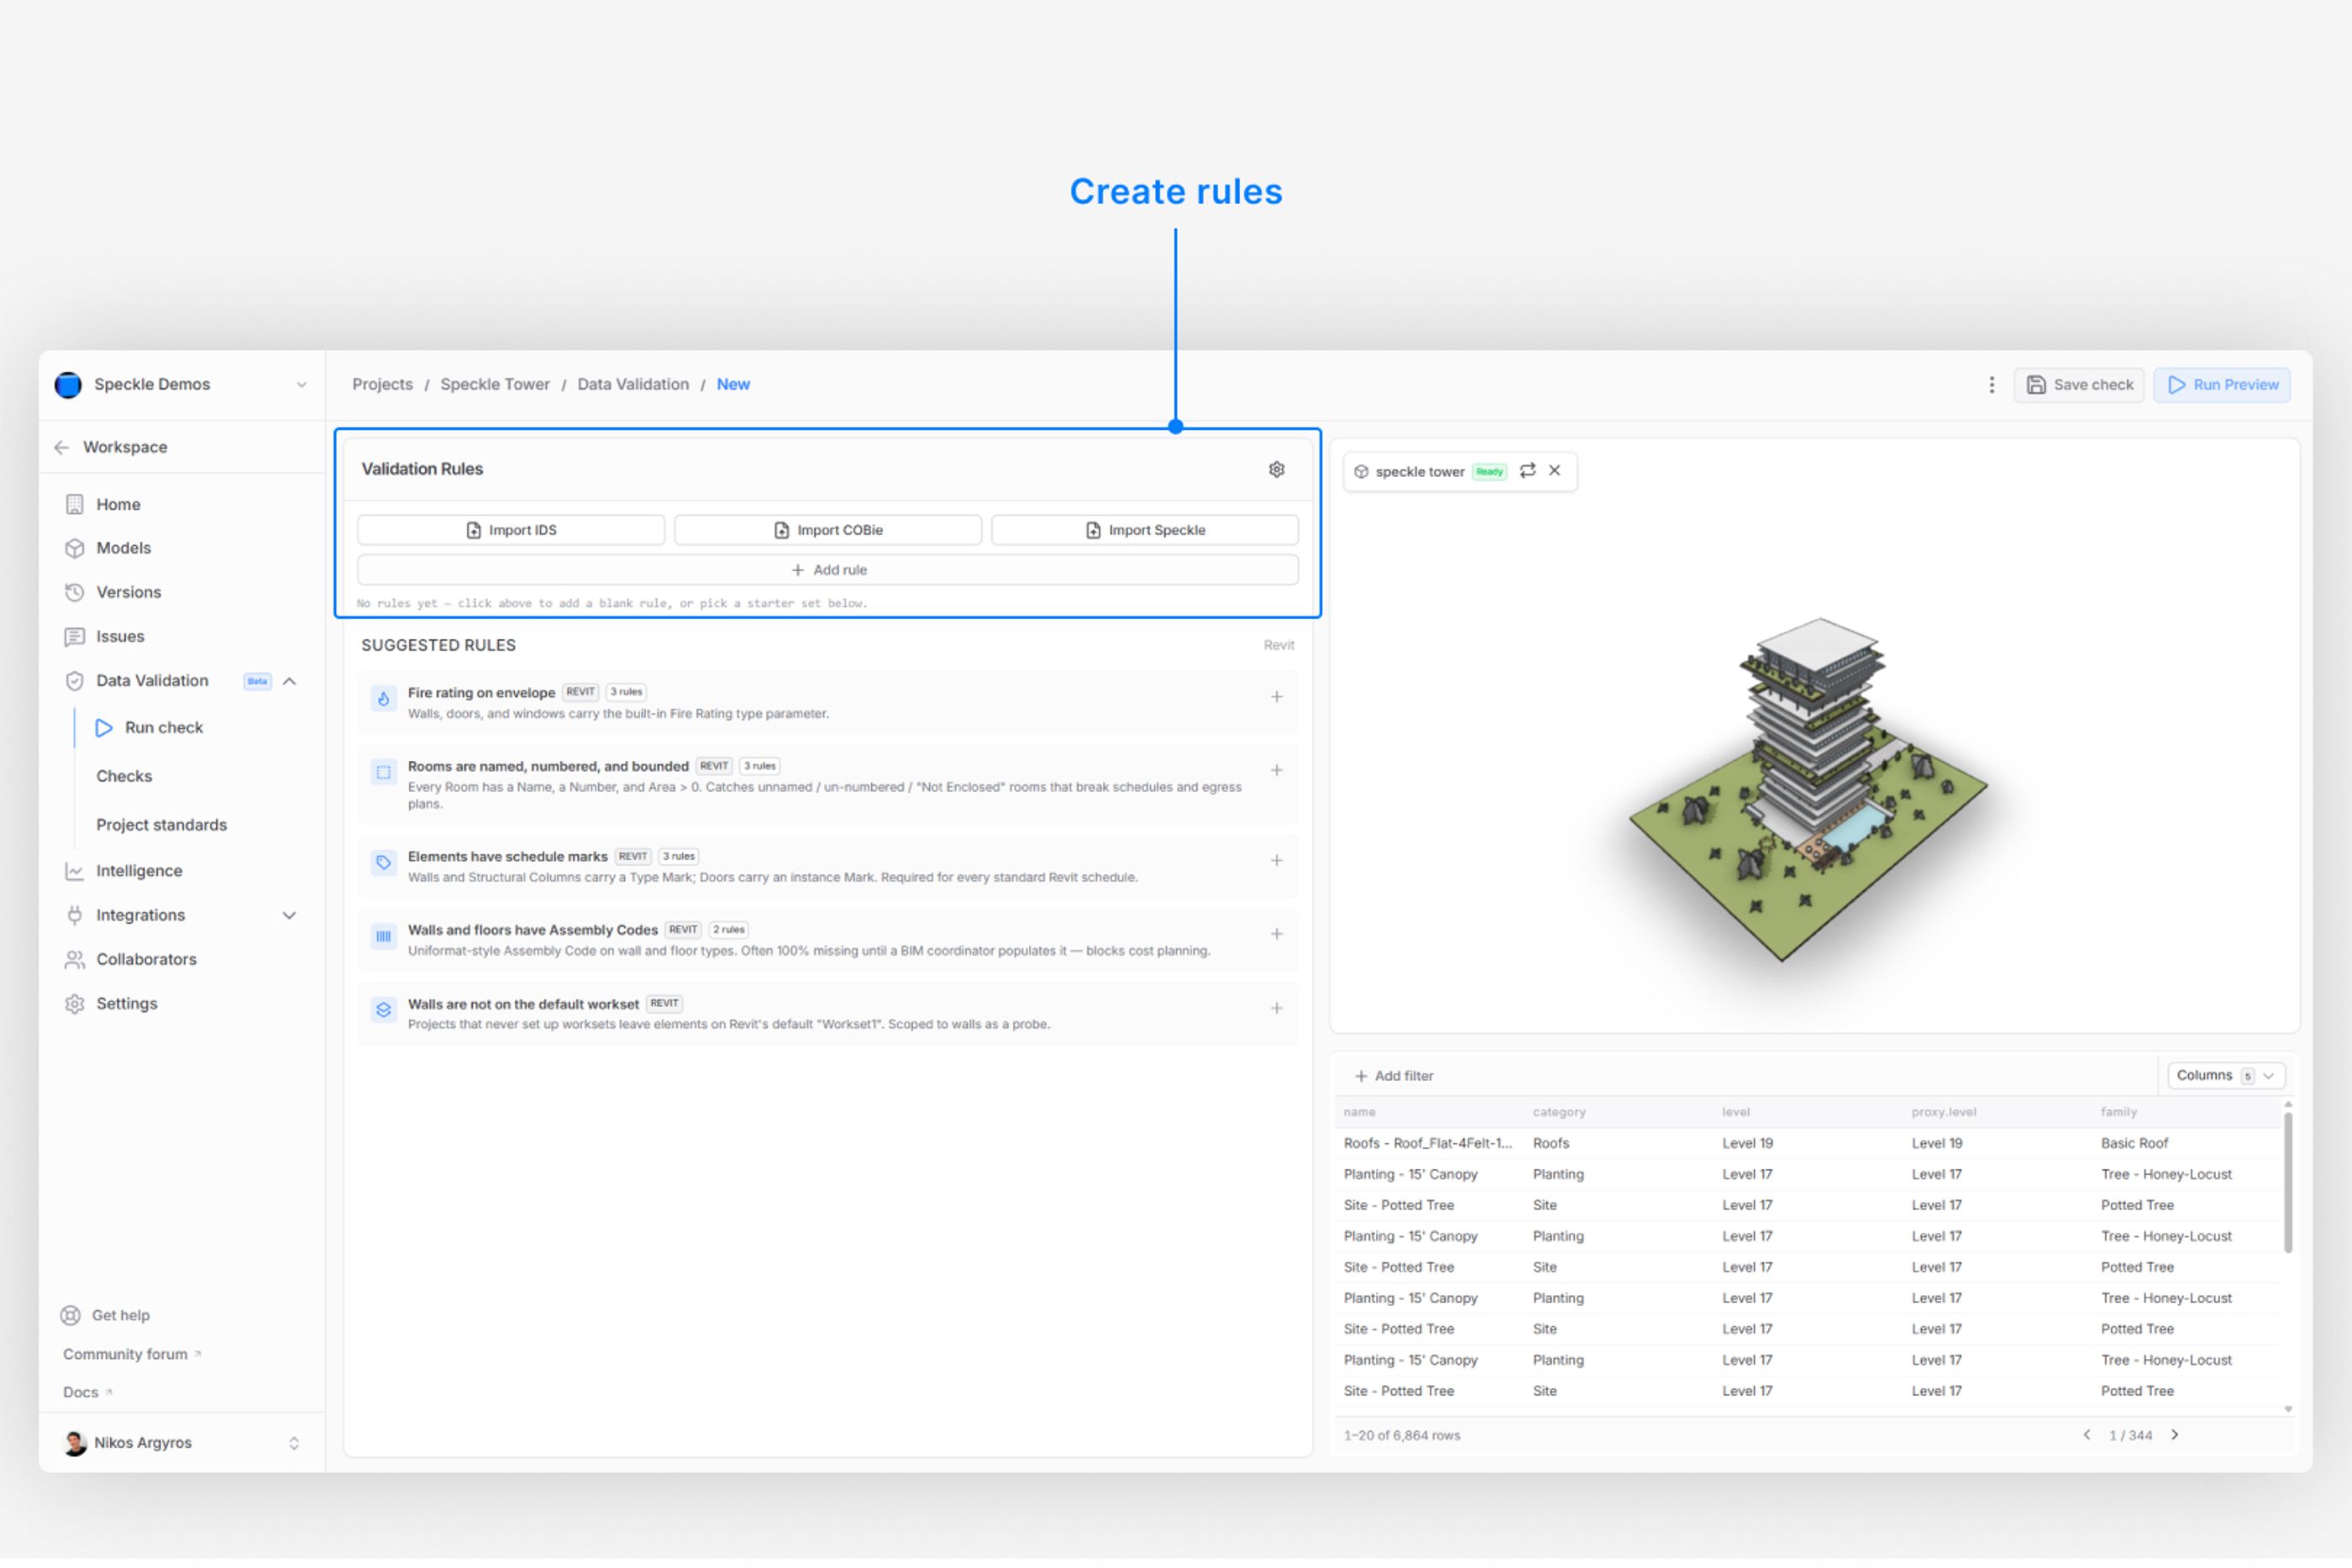
Once your model is connected, you can either create custom rules from scratch or import predefined rule sets such as IDS or COBie.
Create a custom rule
Click + Add Rule to start configuring your checks.
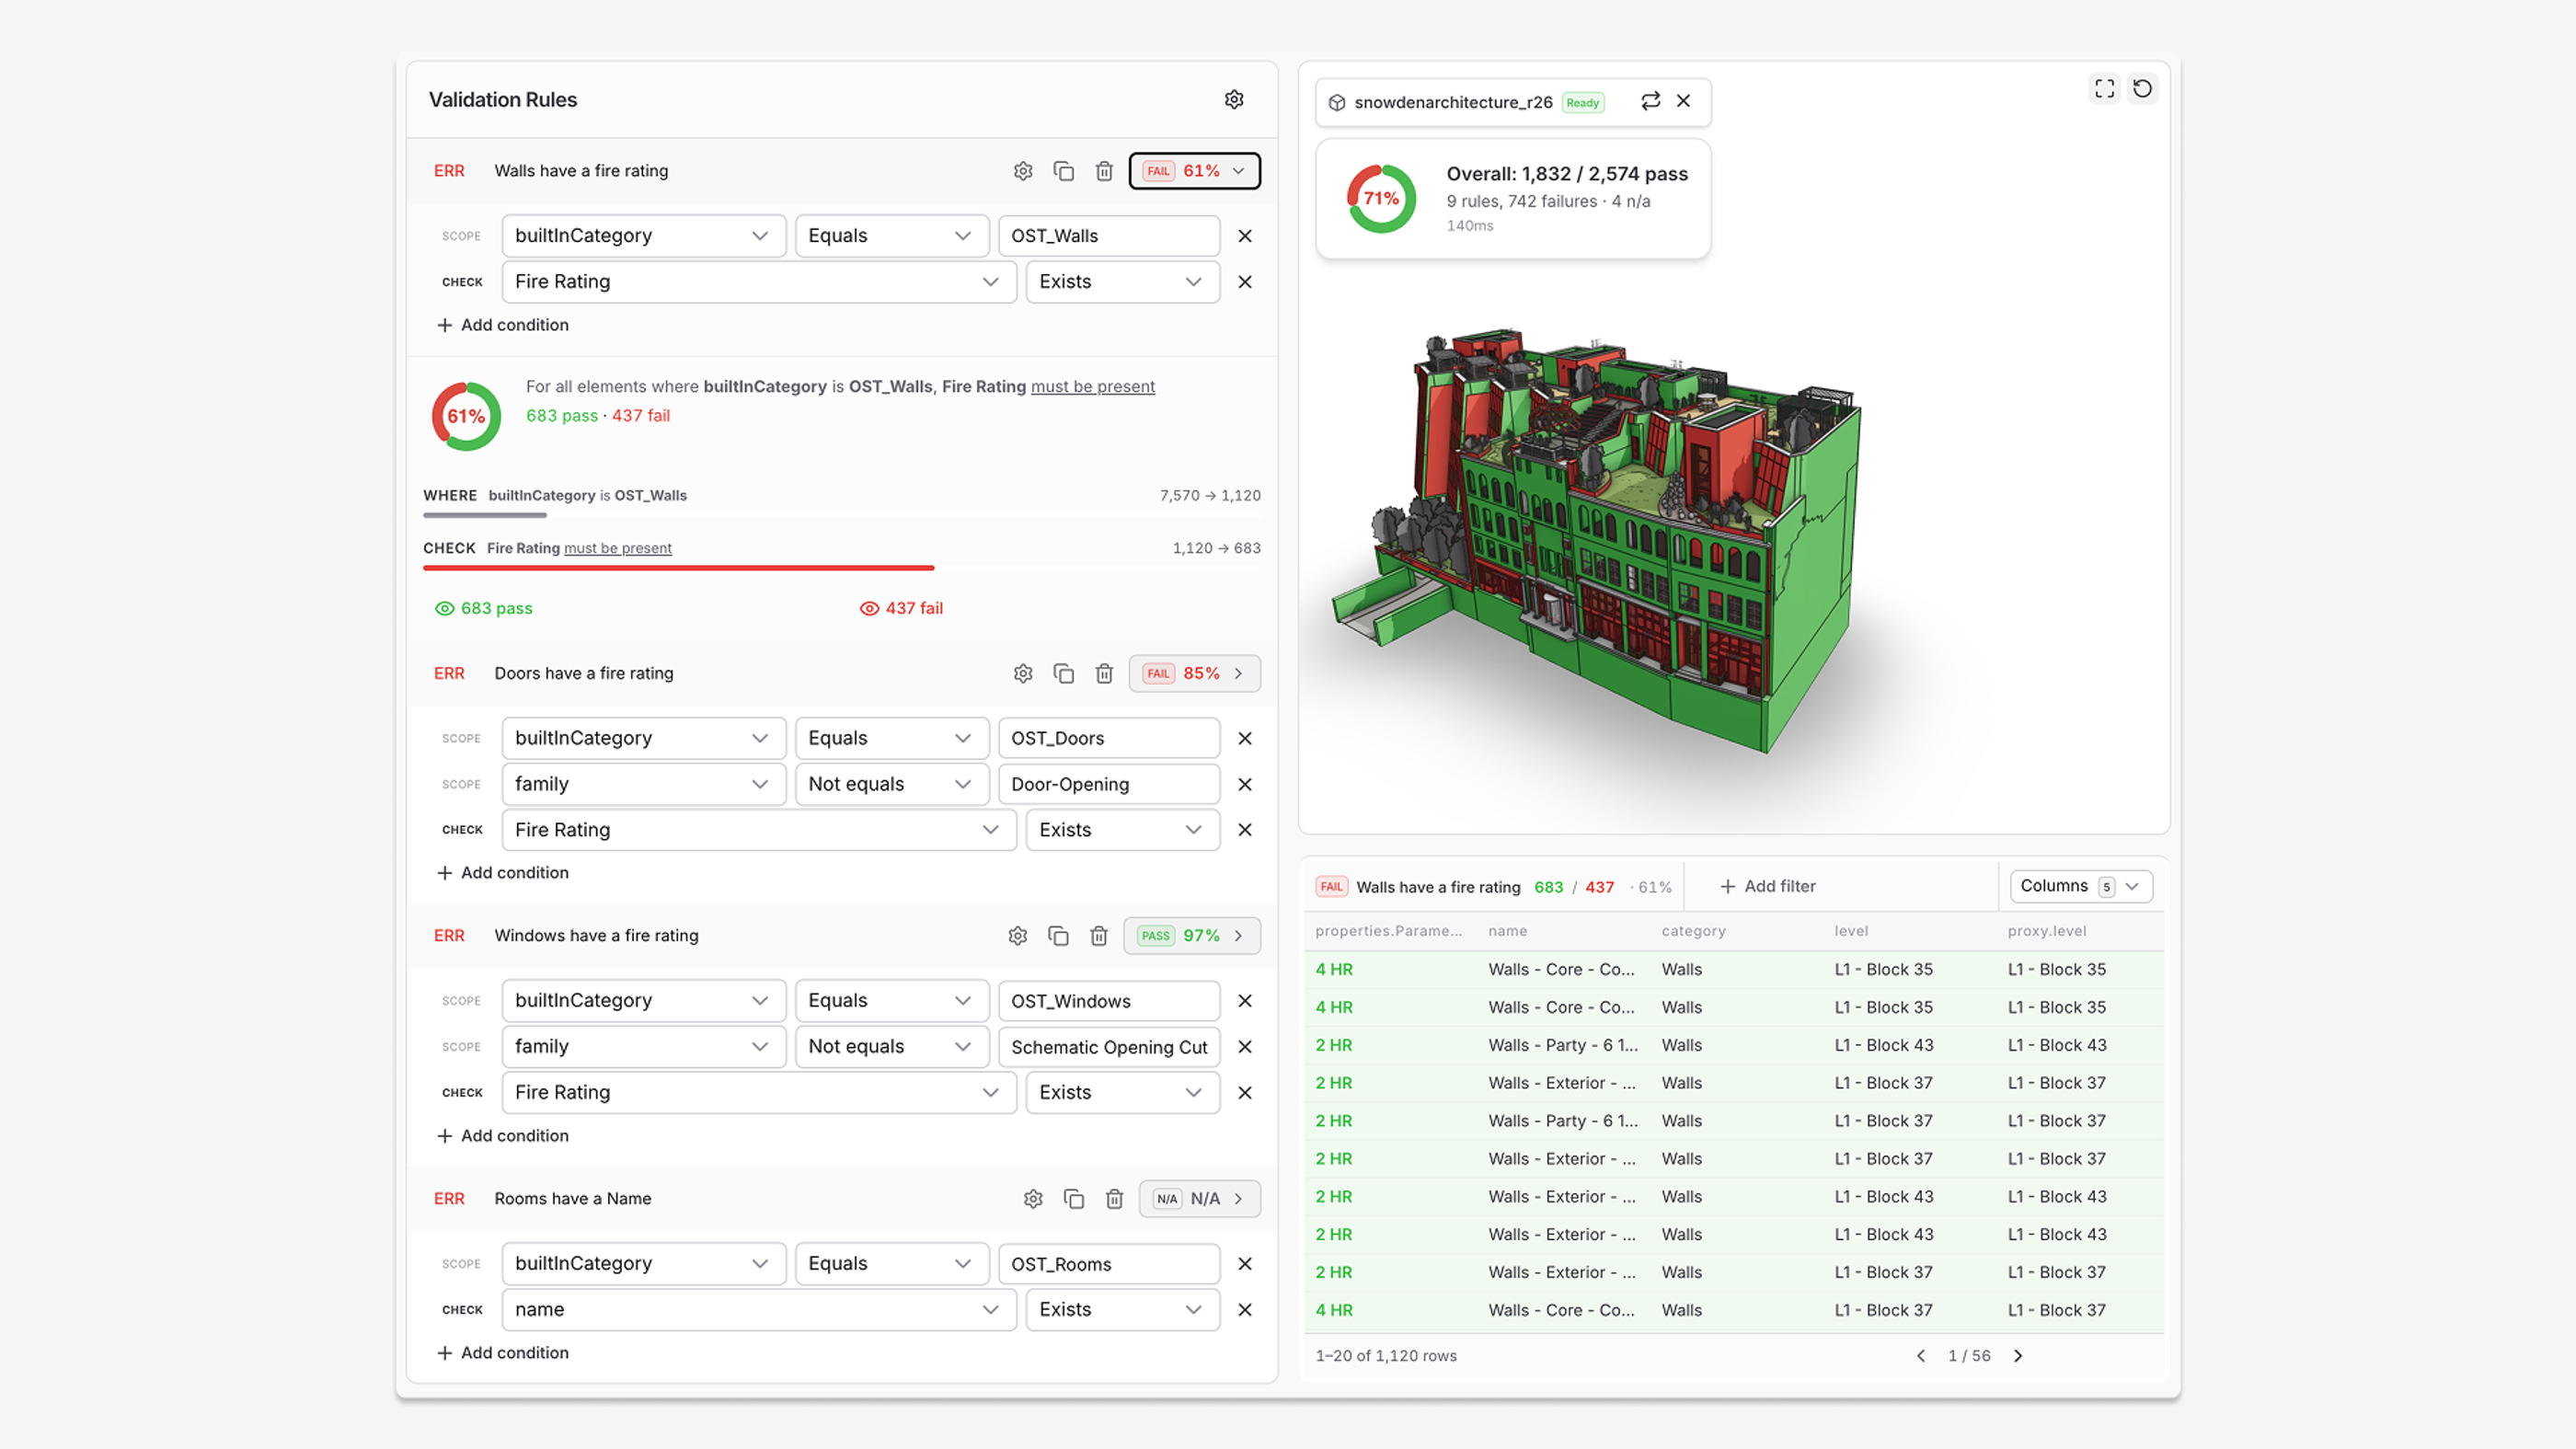
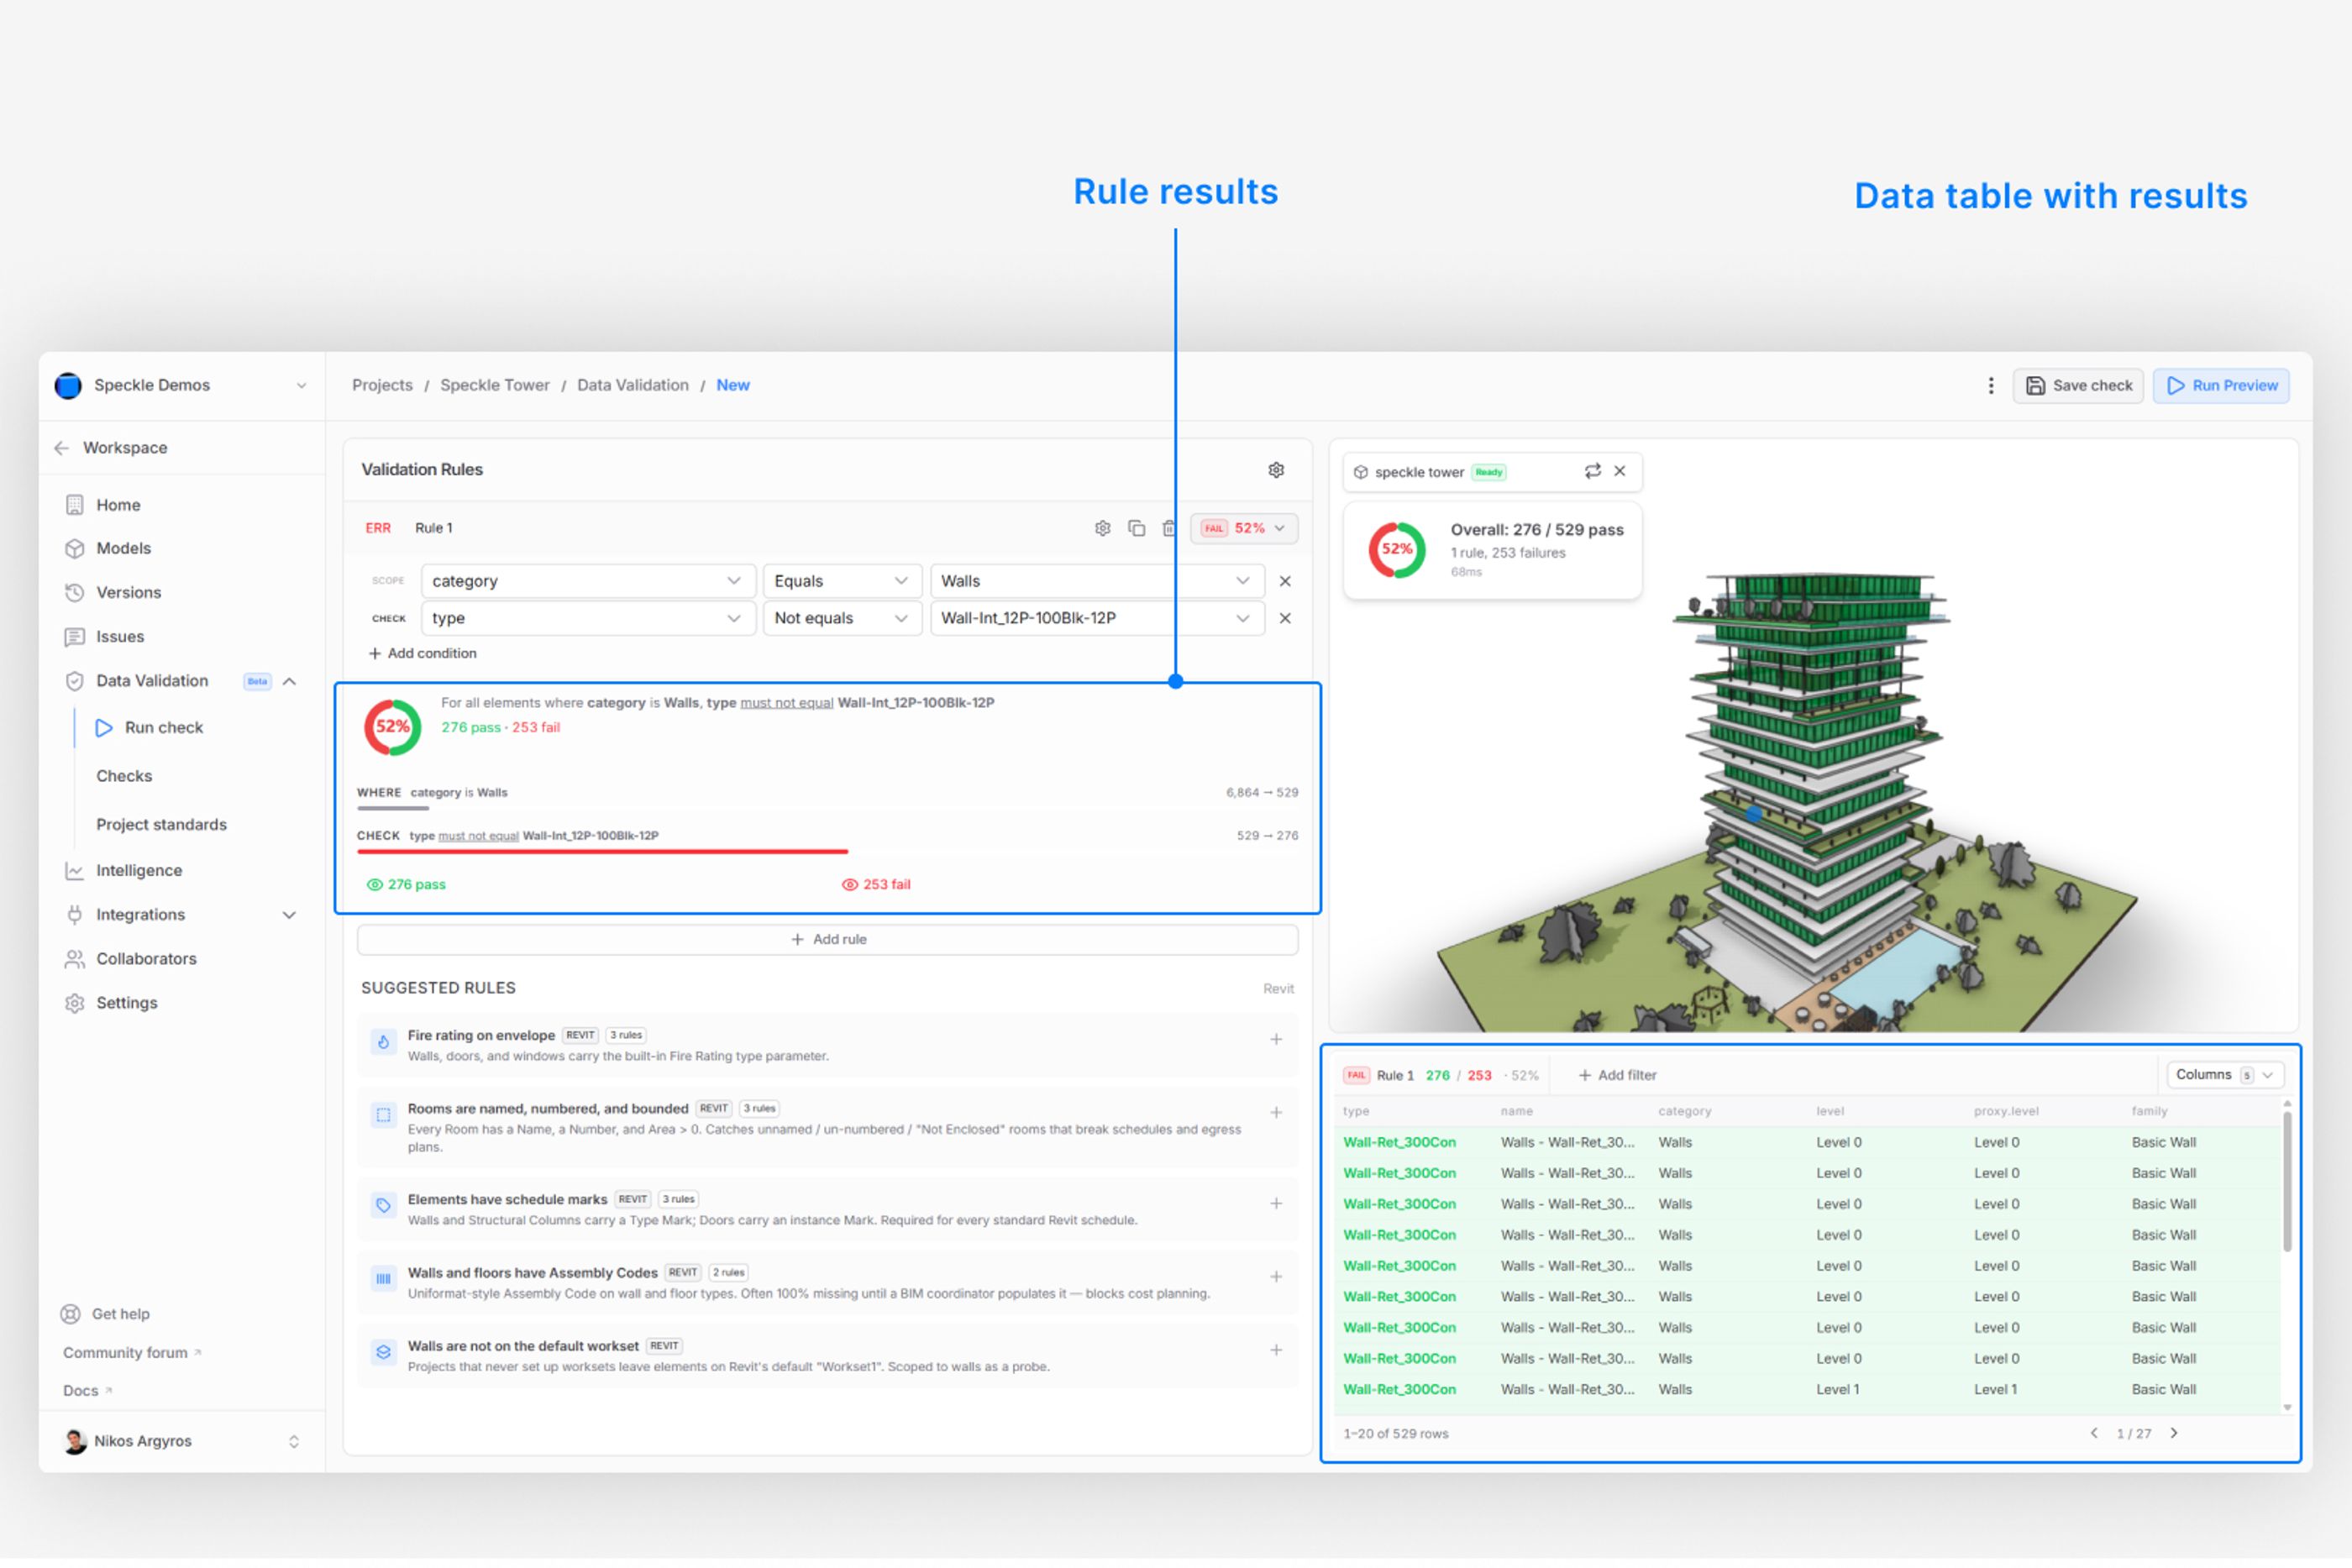
In this example, we’ll create a rule to verify that walls exist in the model:
- Search for the property Category
- Set the condition to Equals
- Enter Walls as the value
Add additional conditions
You can also add more conditions to refine your checks. For example, you may want to verify that the walls are not assigned a specific type.
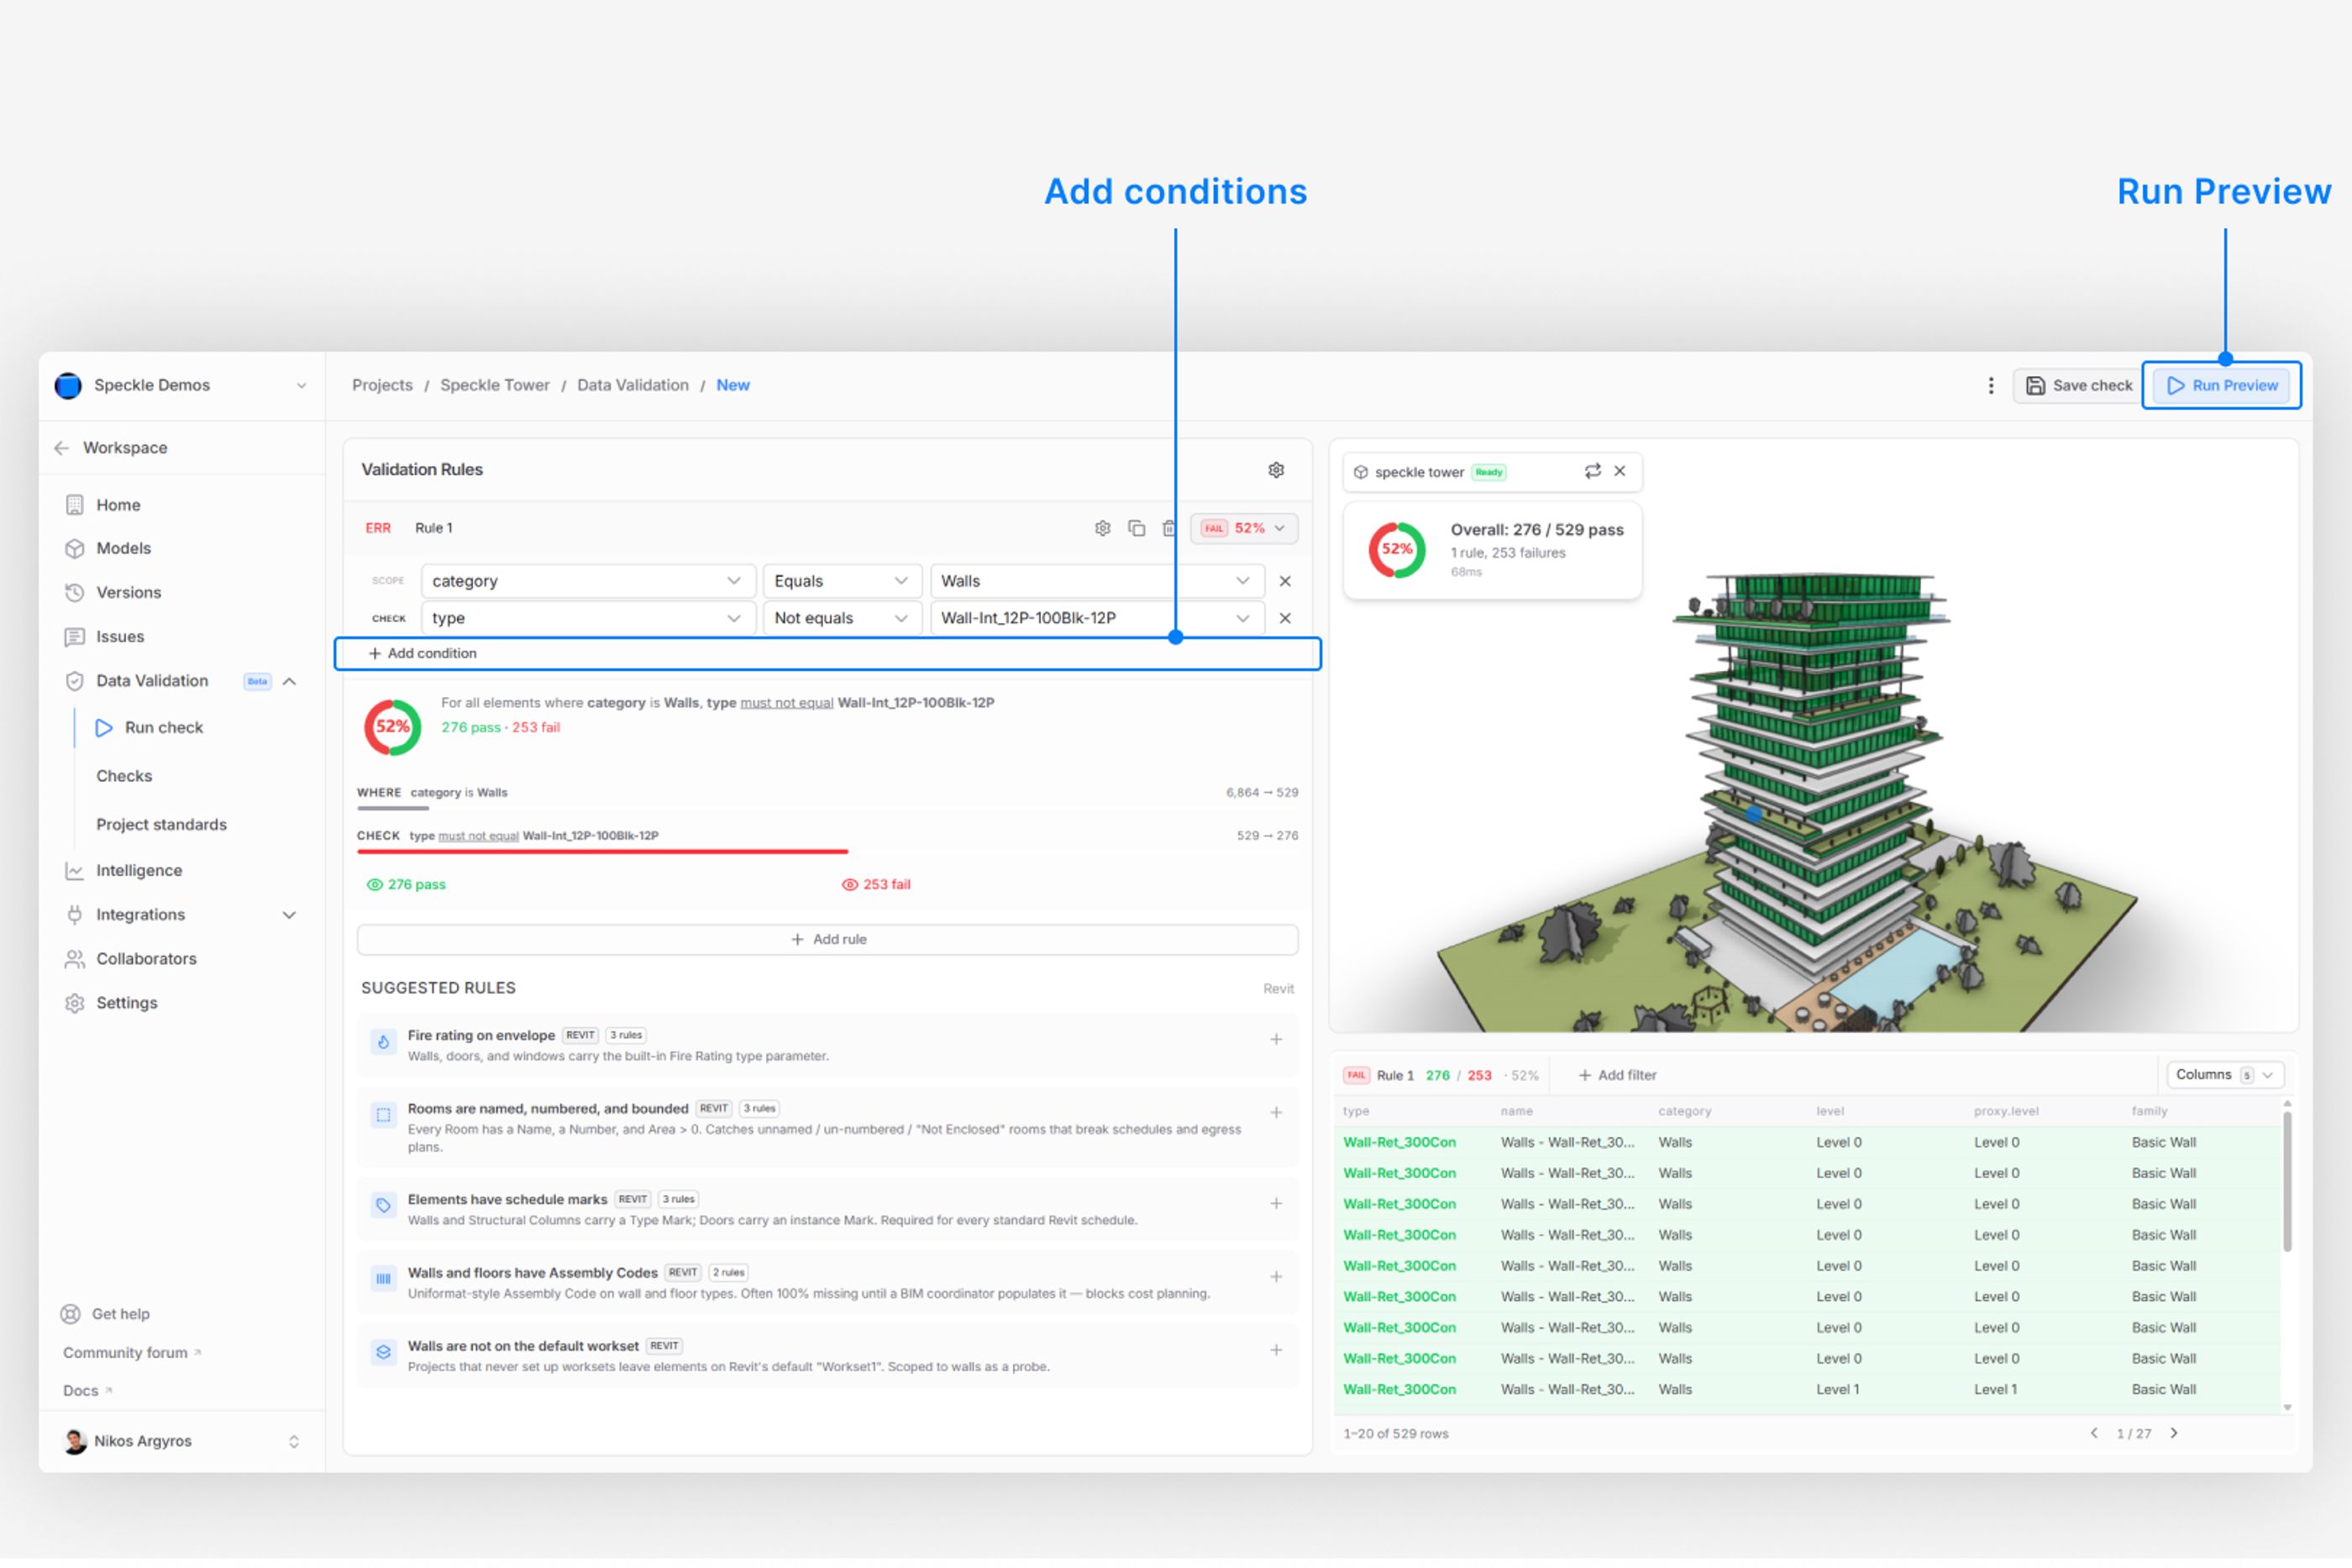
Add condition
Click + Add Condition.
For this example:
- Search for the property Type
- Set the condition to Not Equals
- Enter Wall-int_12P-100Blk-12P as the value
After configuring the rule and condition, click Run Preview.
You can now interact with the chart to highlight which objects passed or failed the rule.e.
Step 3: Review results and apply filters
Validation results
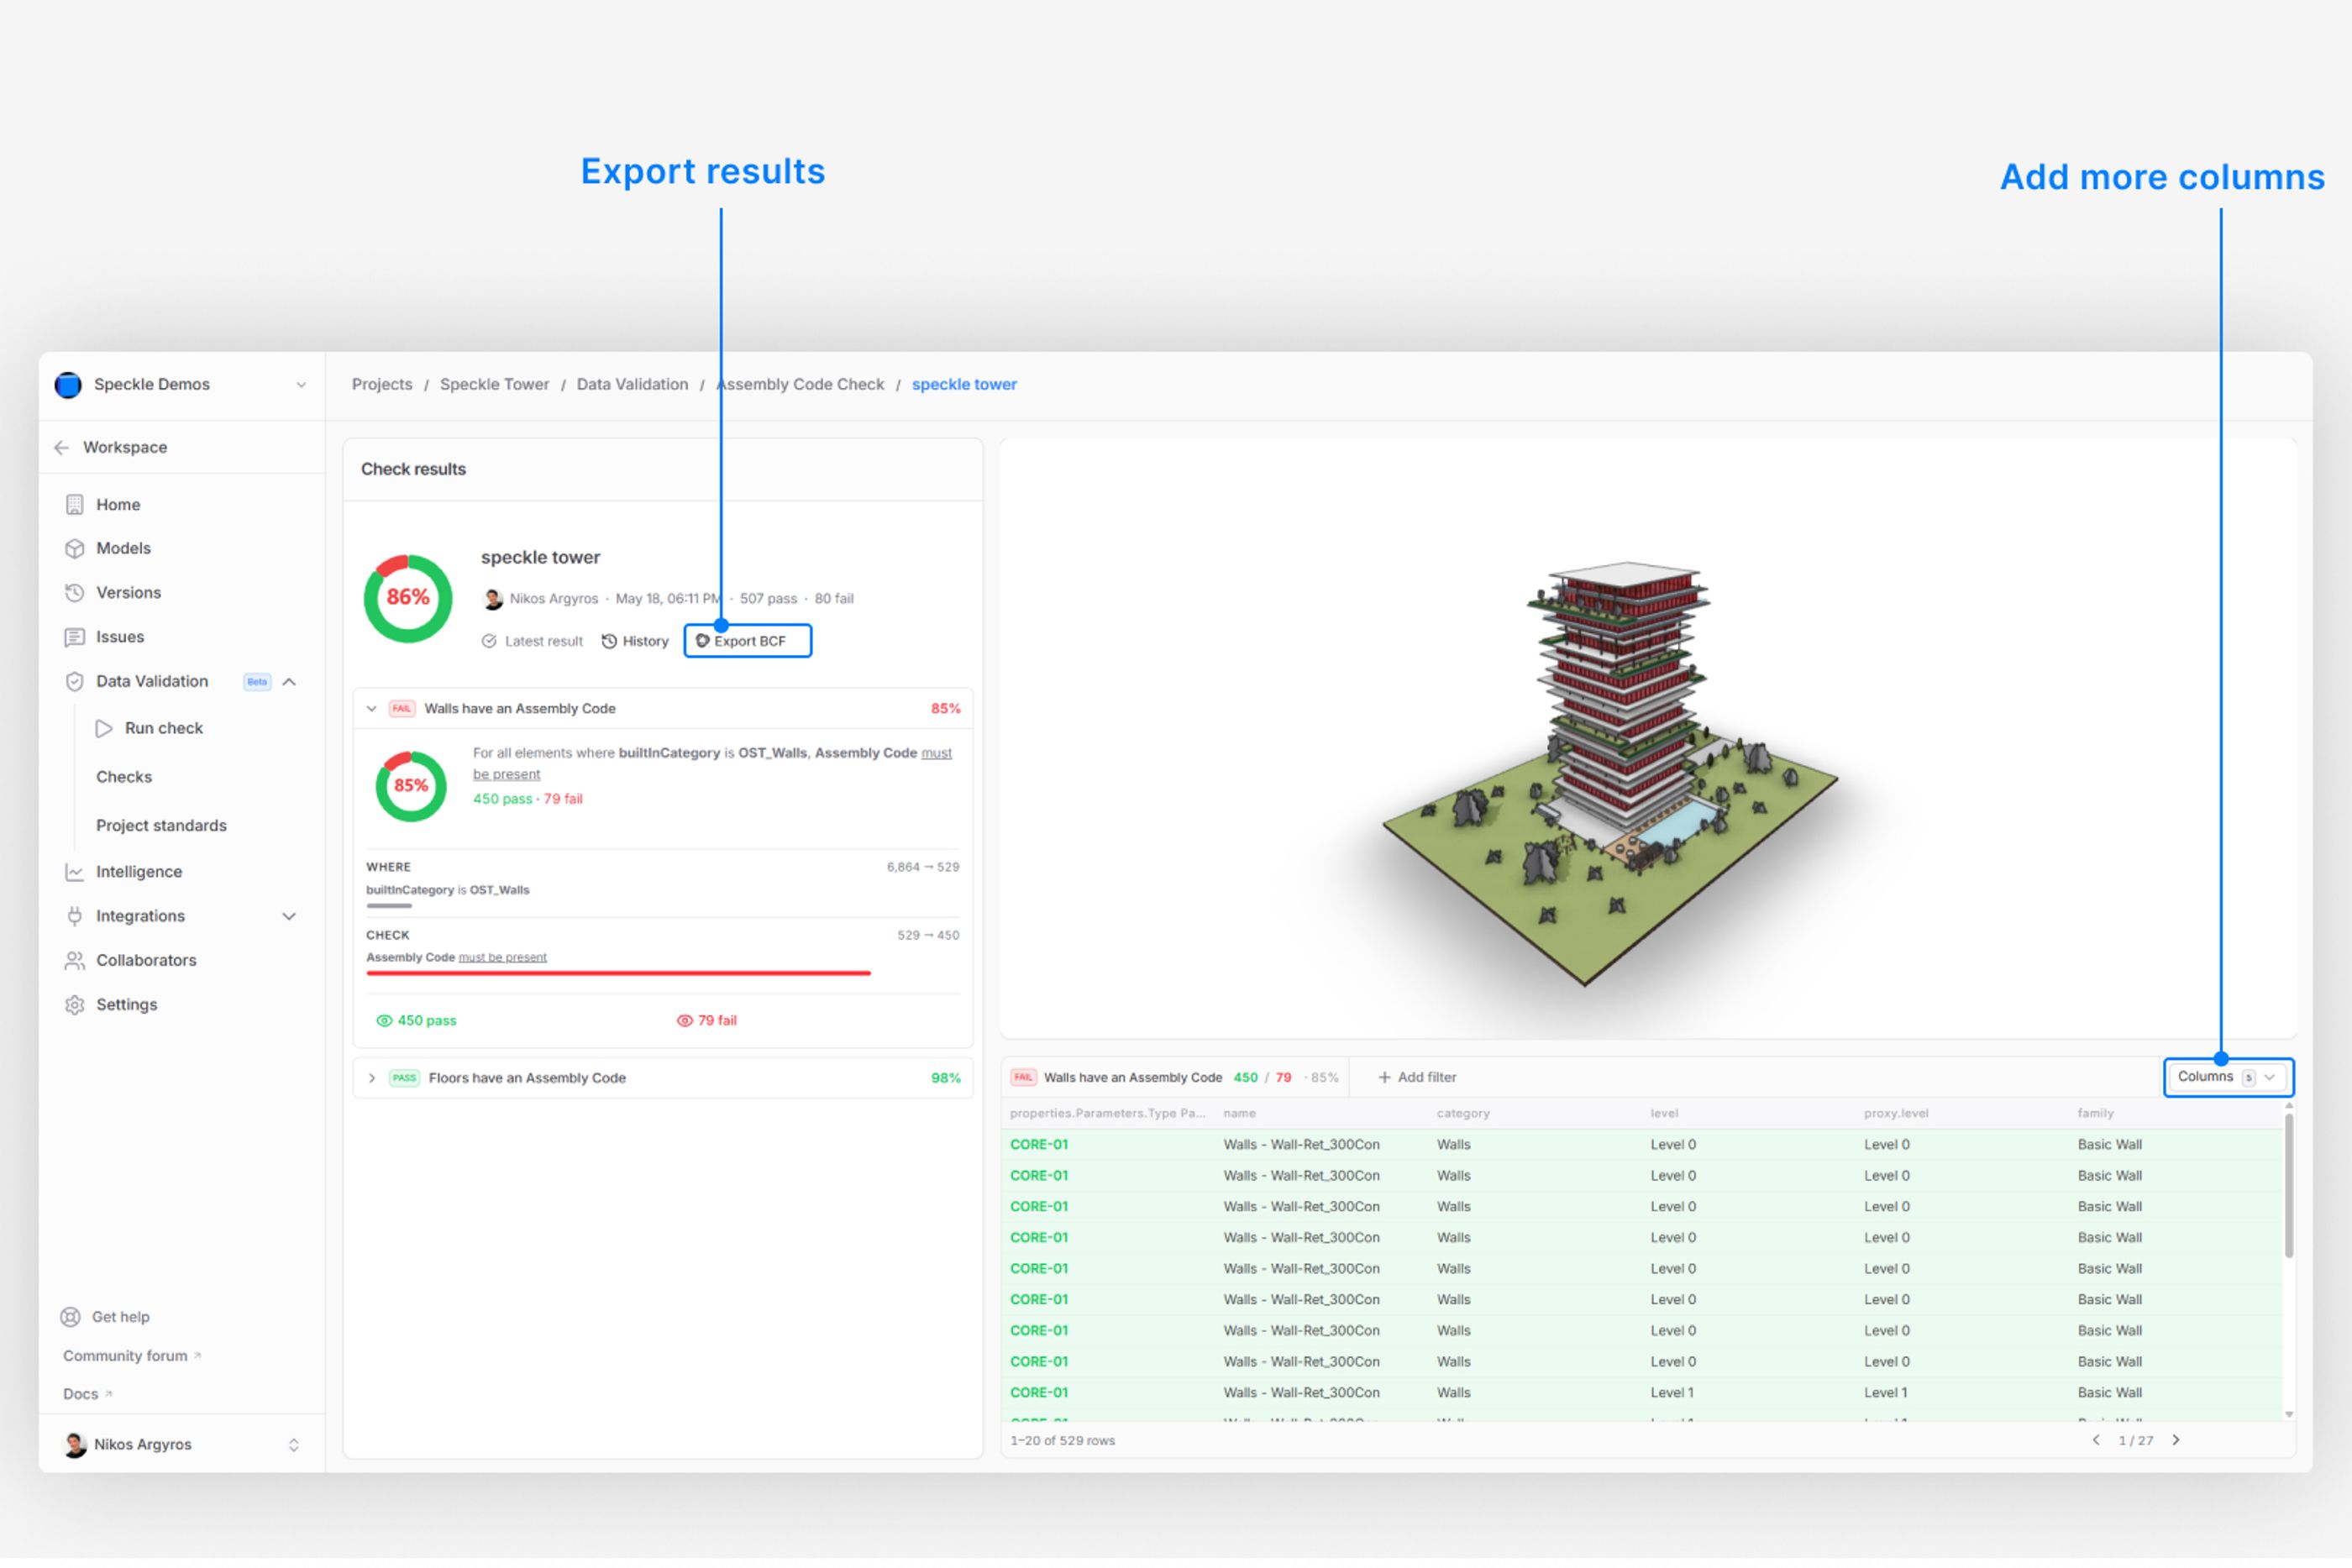
The results for each rule are displayed clearly, allowing you to quickly identify passed and failed objects.
Use the Pass/Fail chart to highlight objects directly in the model.
You can also:
→ Review individual elements and their properties in the data table
→ Use + Add Filter to exclude outliers or narrow down the displayed results
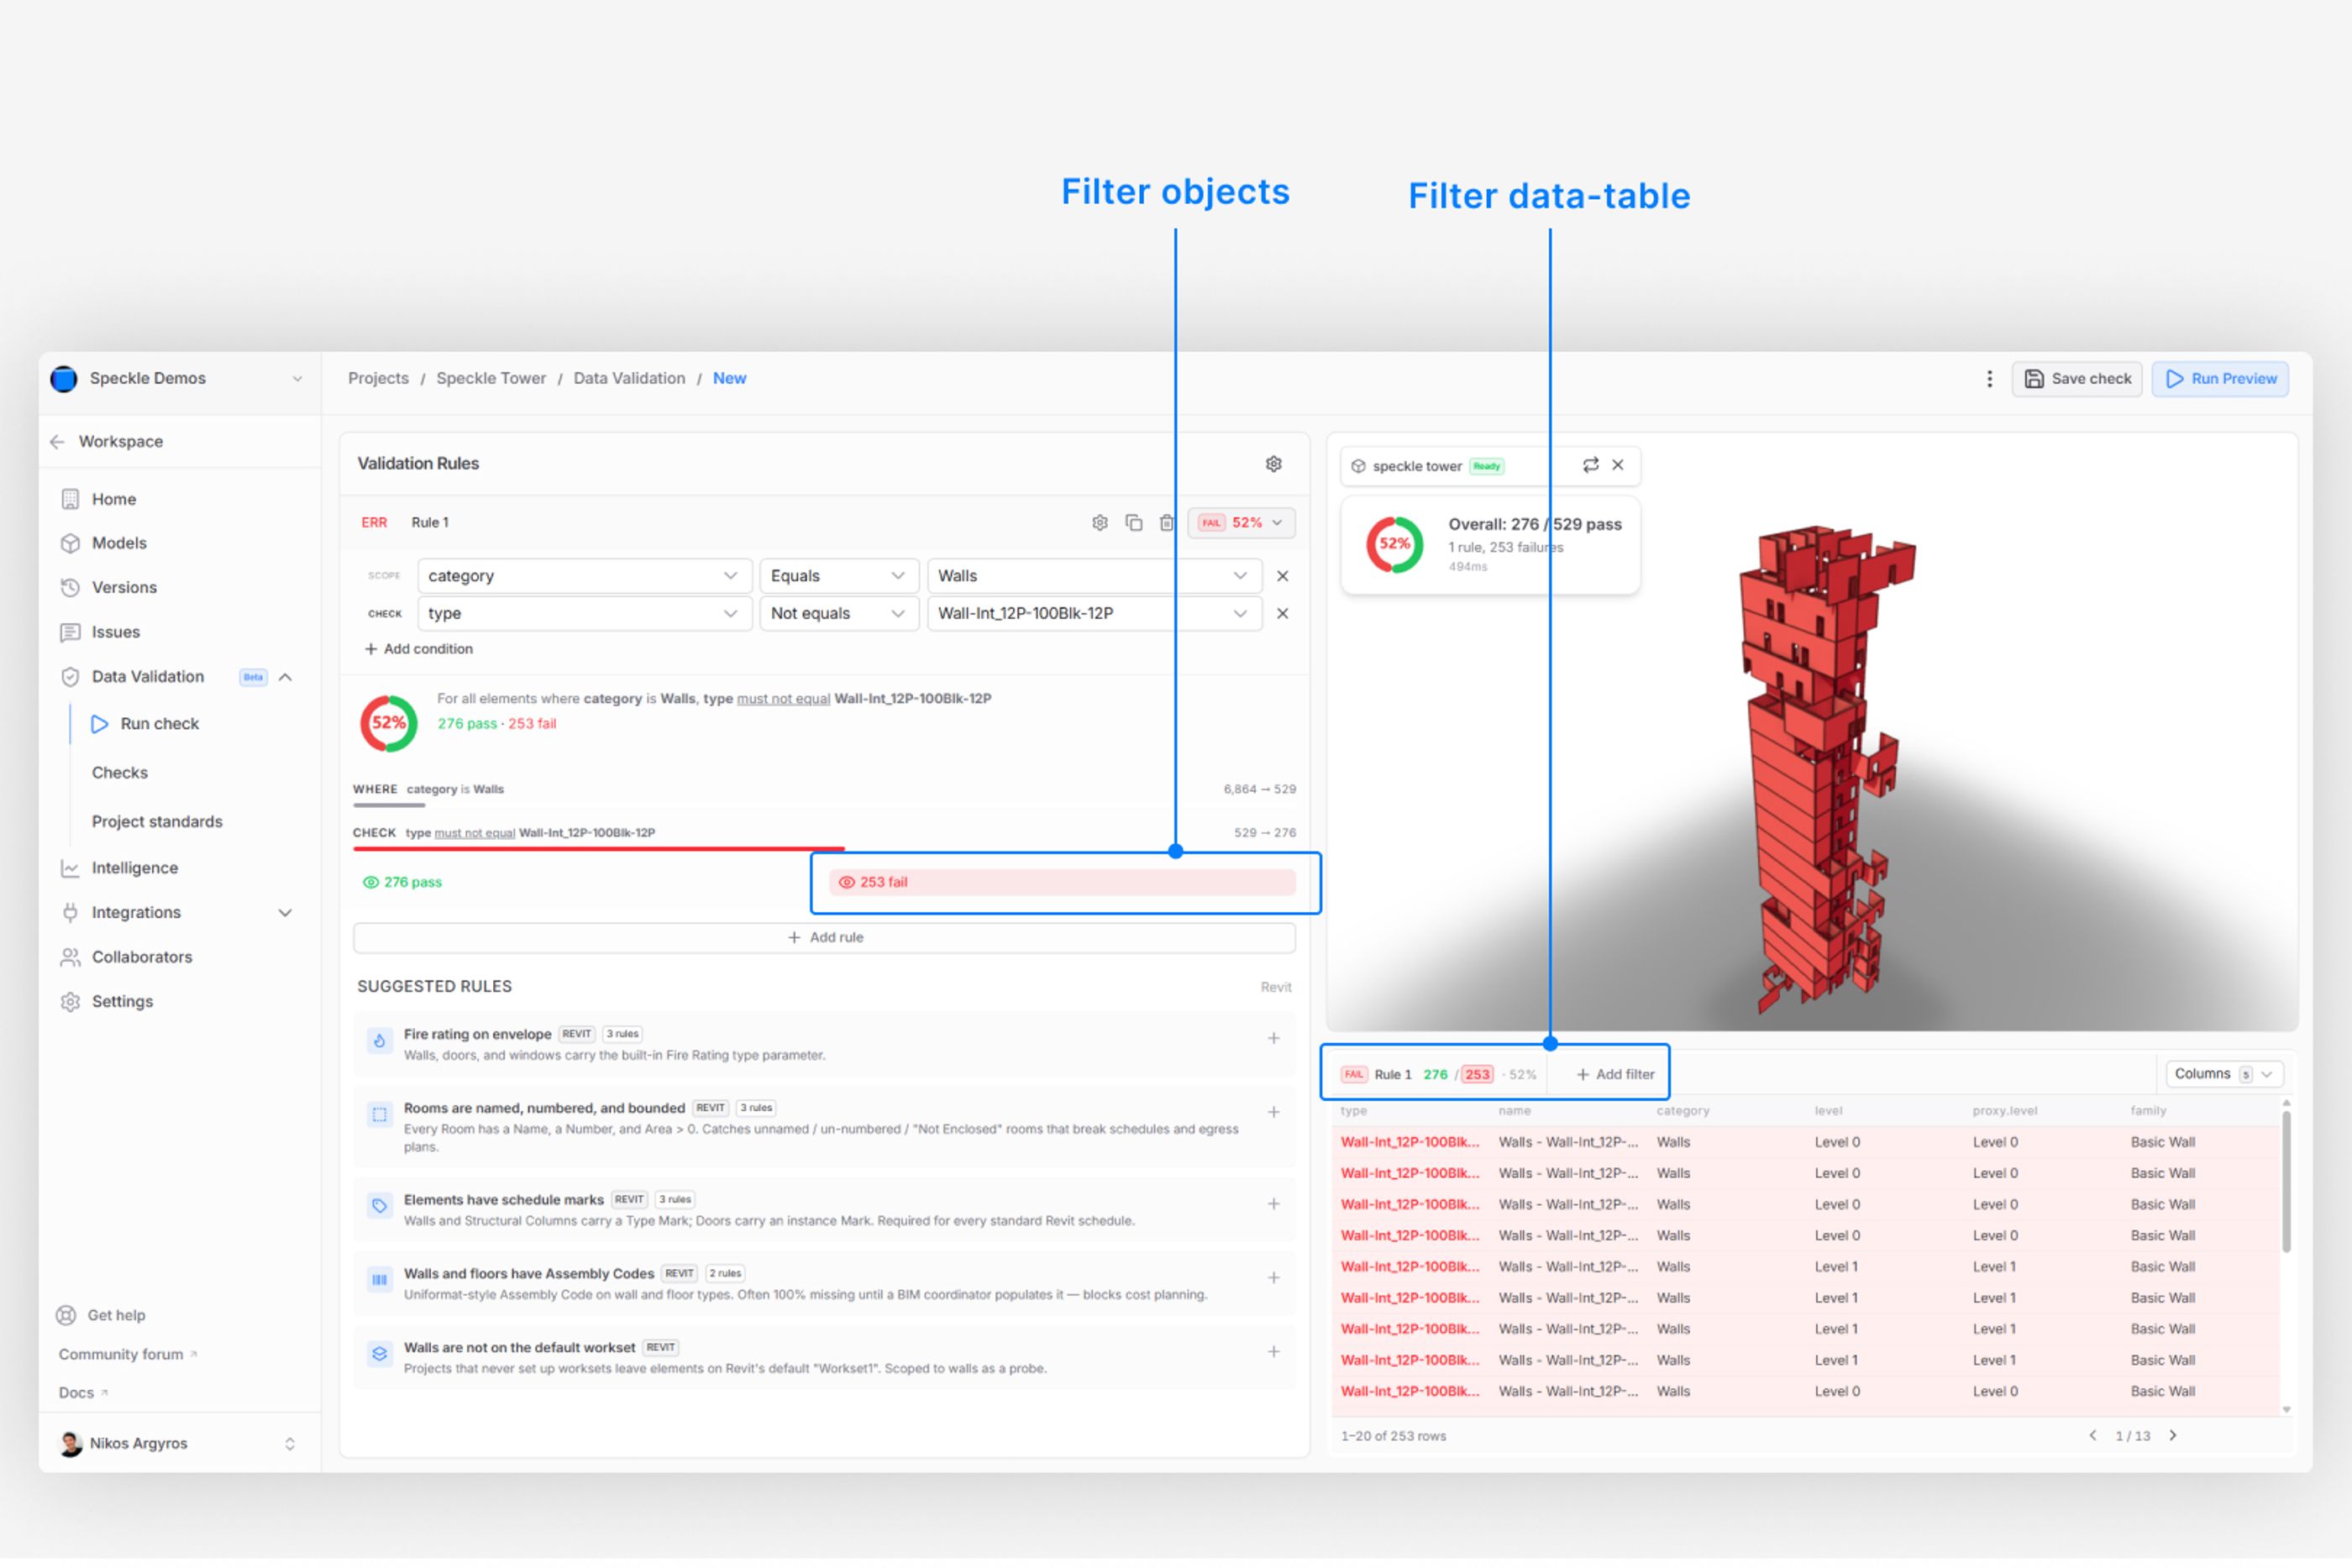
Filter validation results
Step 4: Save checks and track results
After configuring your rules, save the check by clicking the Save button in the top-right corner.
The check will then be stored within your project.
To review saved checks and monitor validation results over time, navigate to the Checks page from the left sidebar.
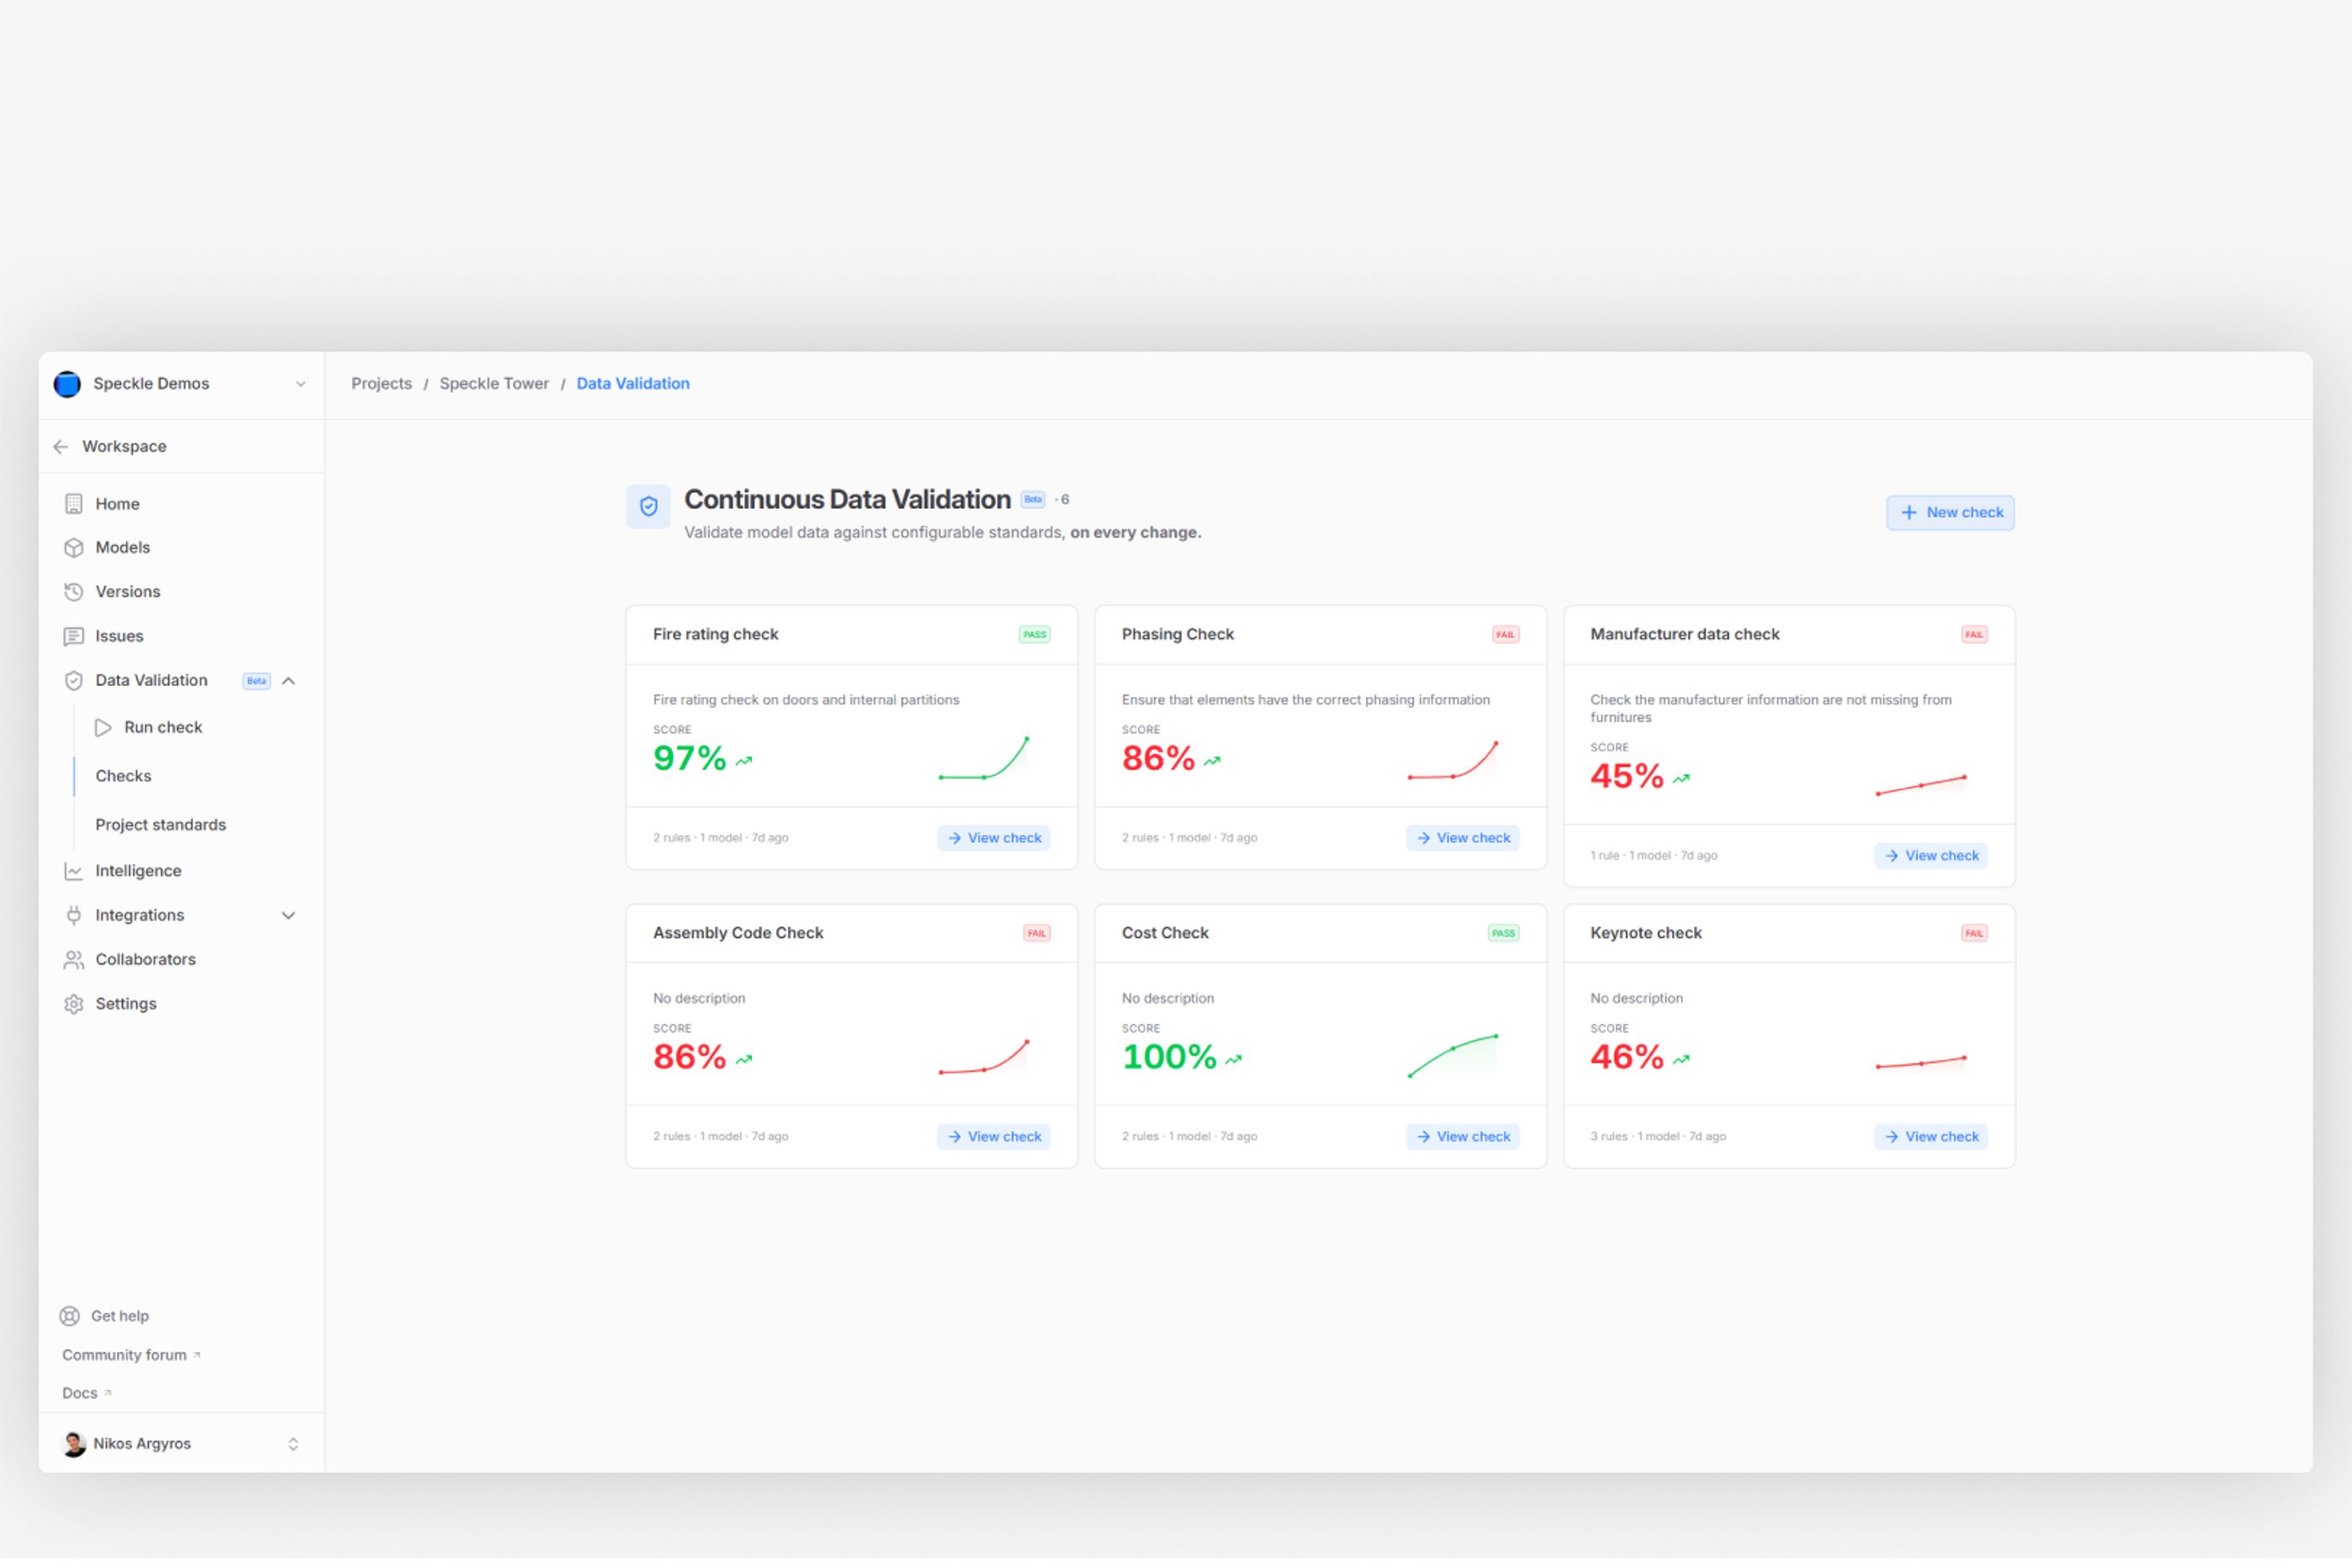
Saved checks
Check progress over time, on every change
Validation results over time
Every time you publish a new model to Speckle, the check runs automatically, allowing you to track the results of each check over time.
This helps automate the validation process, ensuring that nothing is overlooked and that your models continuously improve with every update.
Step 5: Share results
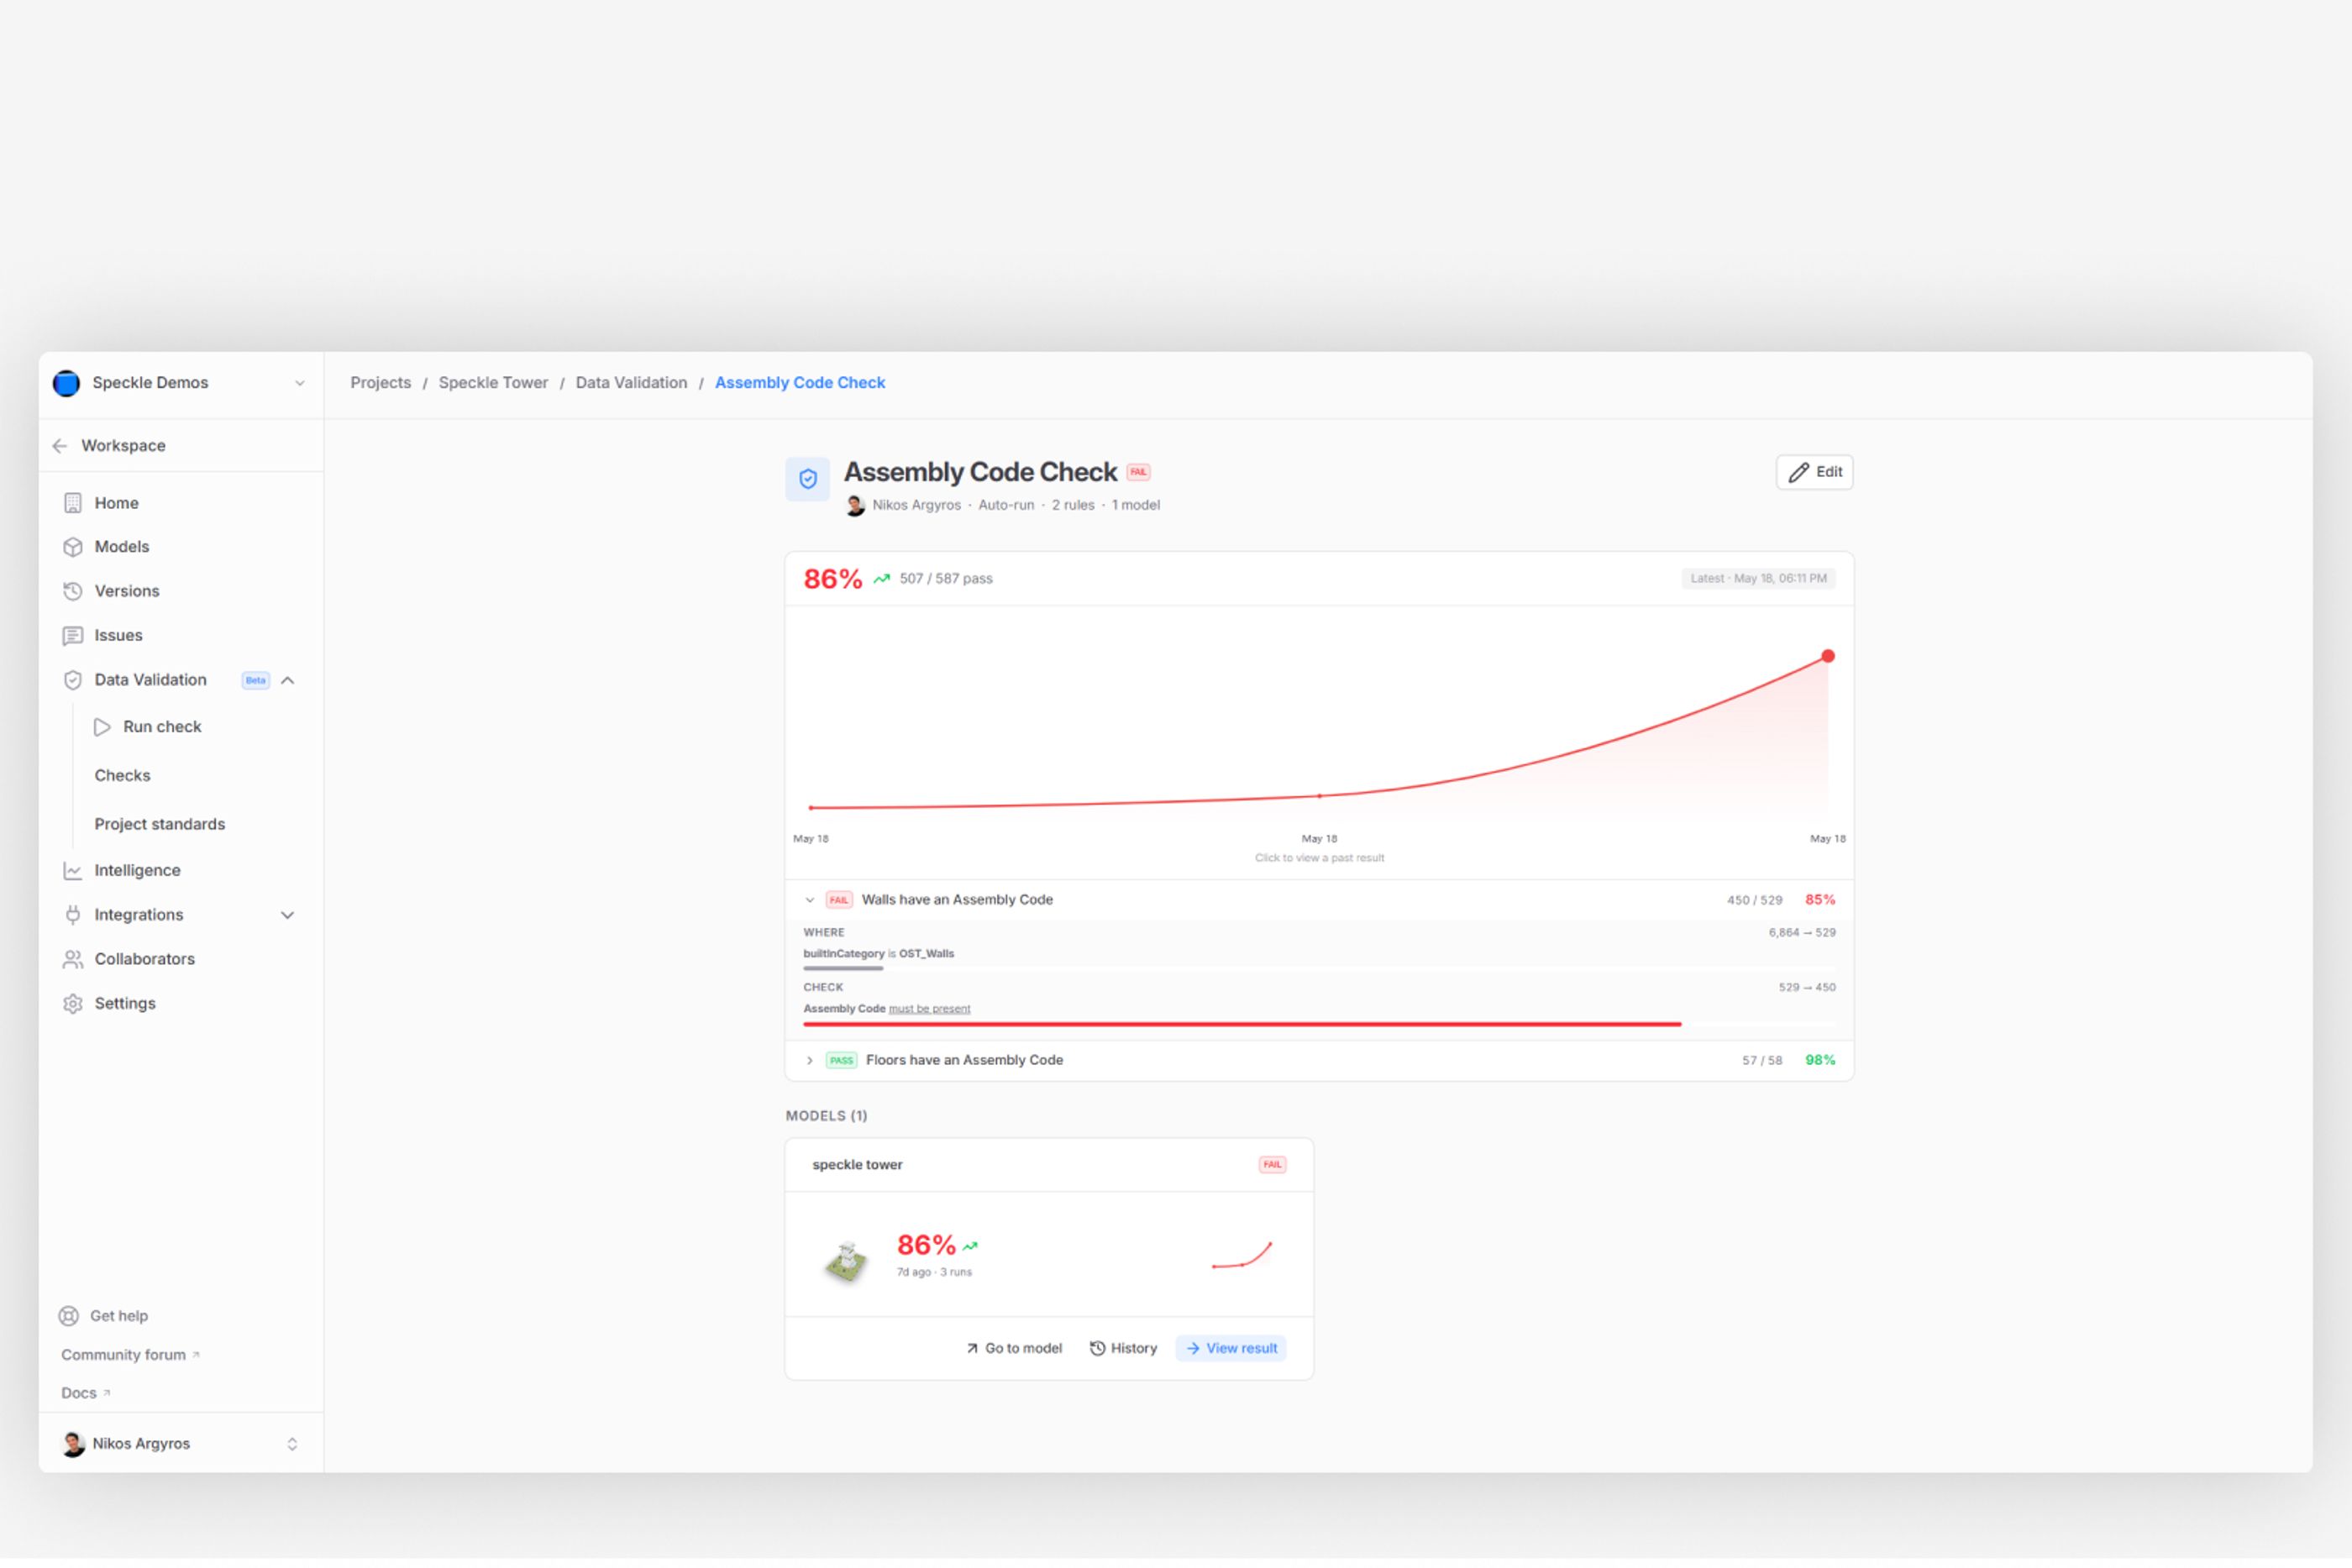
Open one of the checks to review the results for each individual rule.
You can customize the data table by adding additional columns to display more relevant information about the elements and their properties.
To collaborate with external teams, export the results as a BCF file, making it easy to communicate issues and coordinate model reviews with project stakeholders.
Save and share
Step 6: Project standards
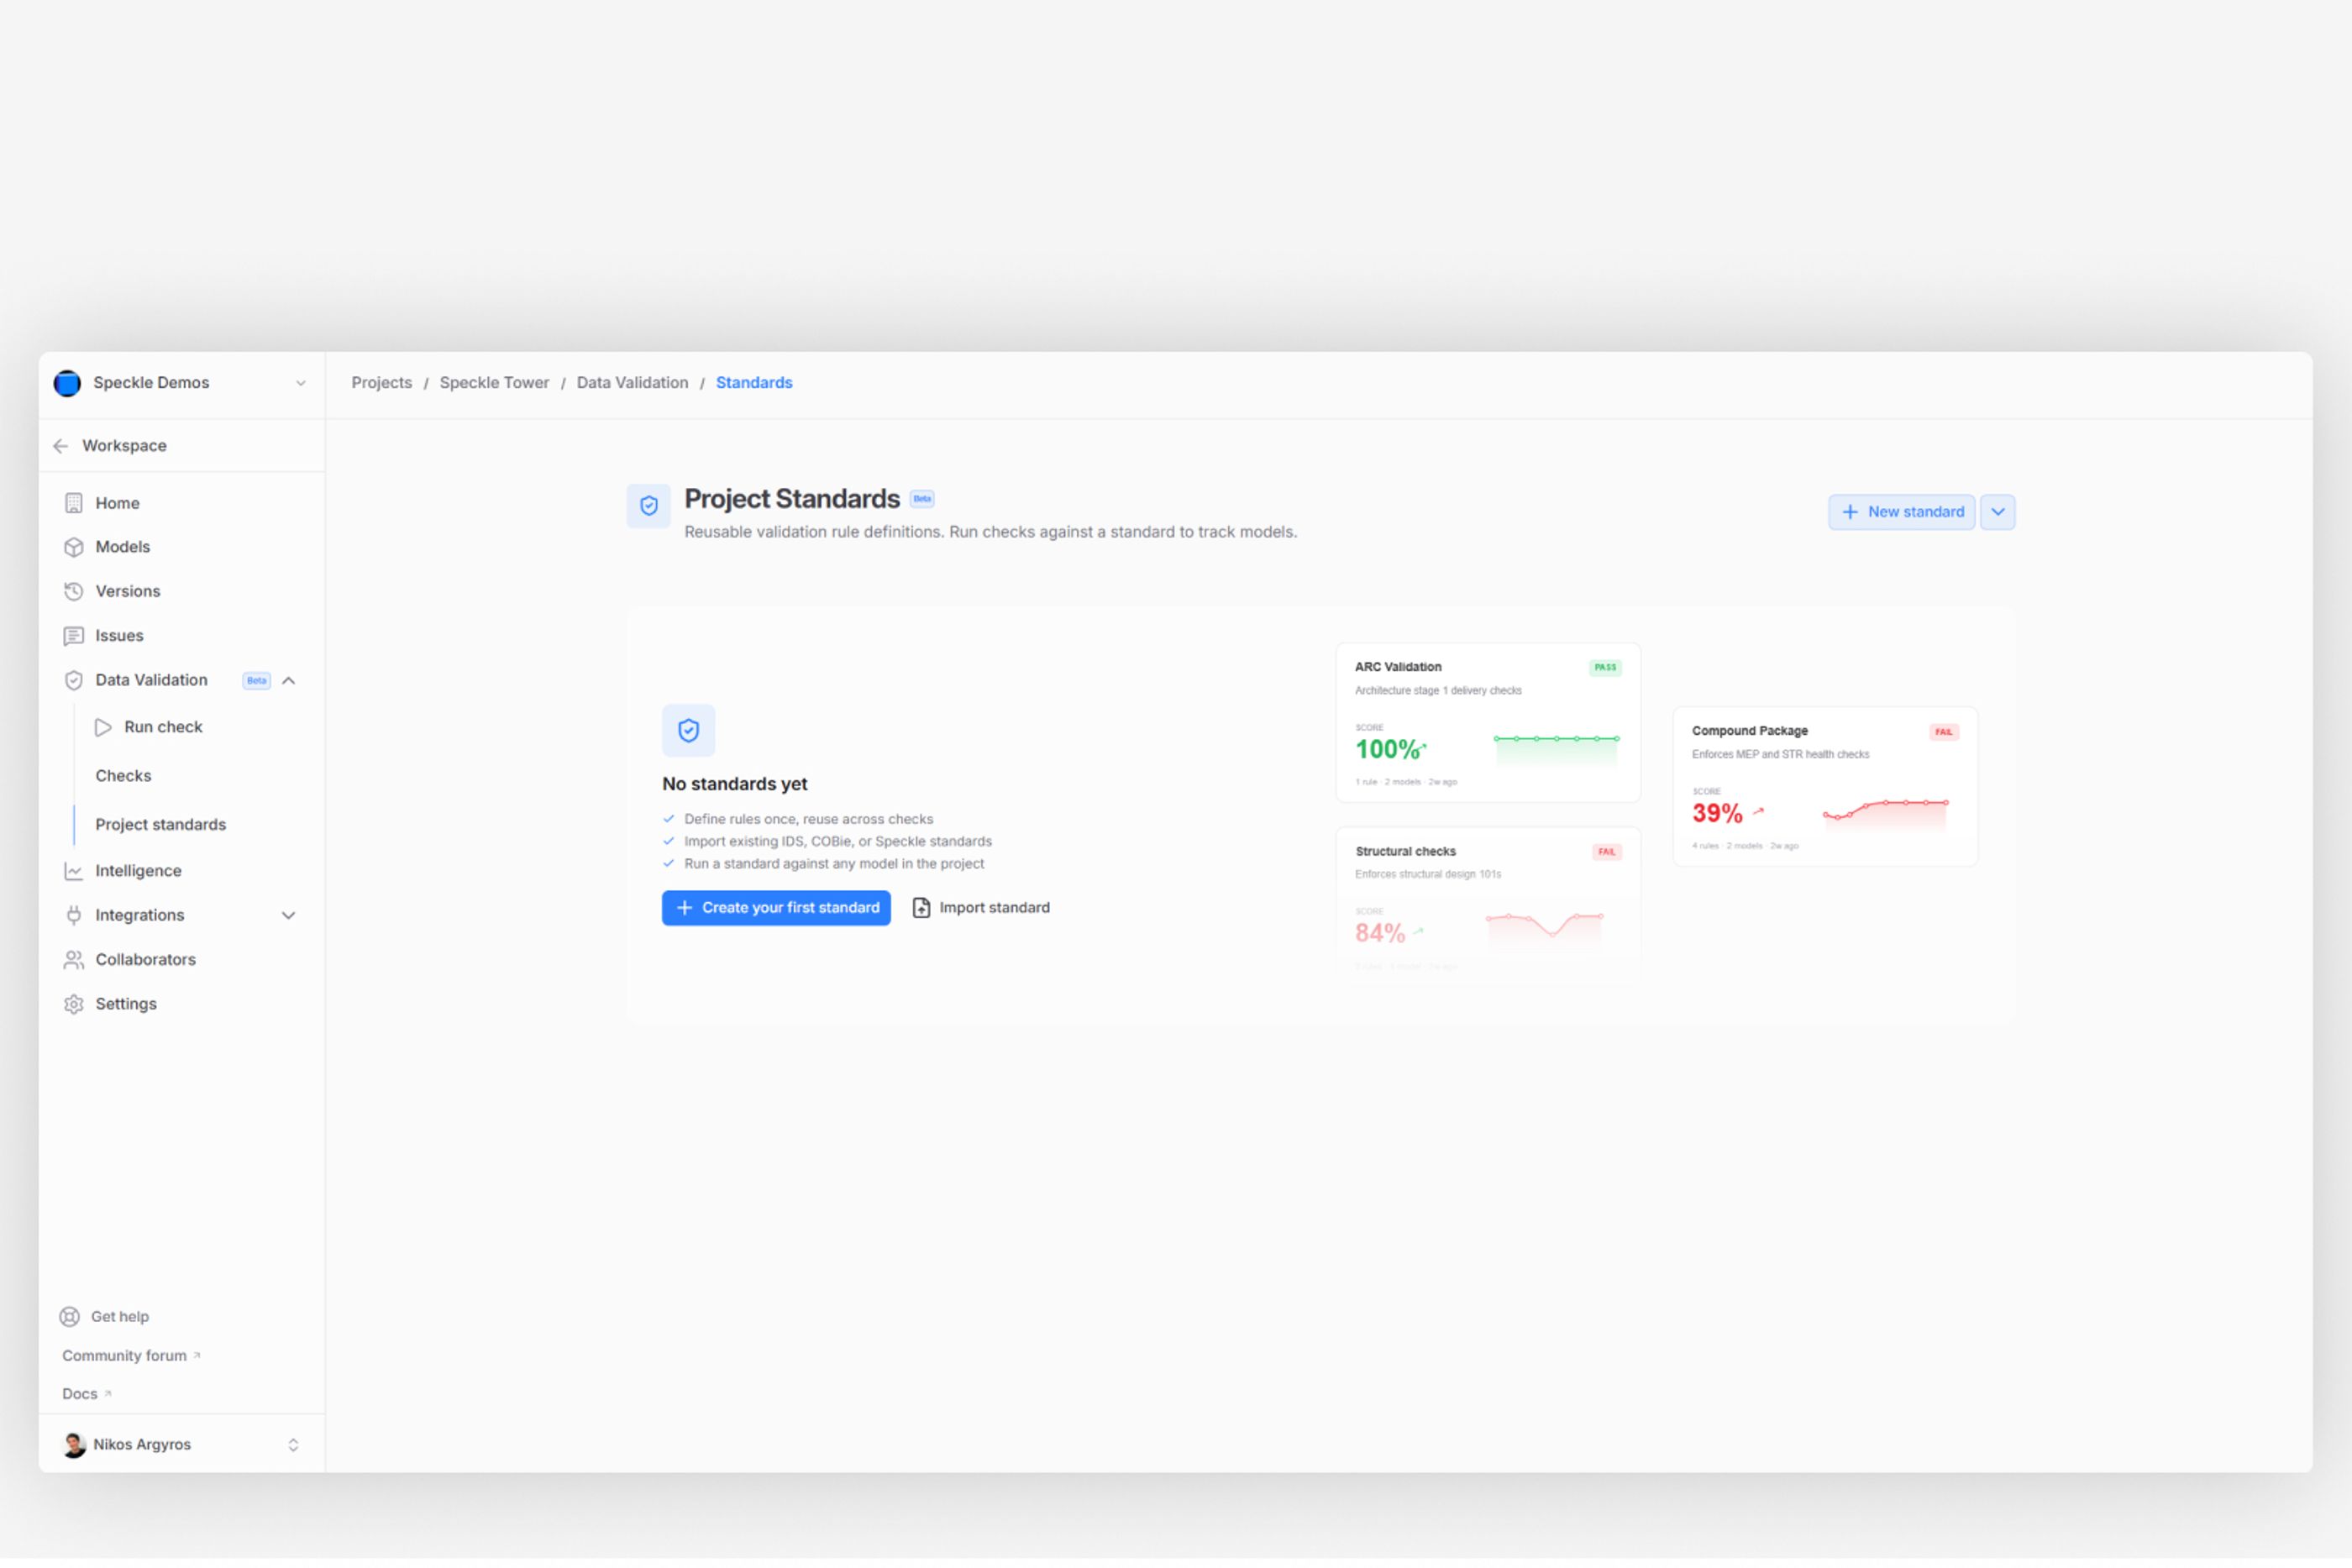
Project standards
Project Standards are reusable validation rule definitions that help maintain consistency across your workflows and ensure that all project models follow the same quality requirements.
Instead of recreating the same rules for every check, you can define a standard once and reuse it across multiple models within the same project. This makes it easier to enforce project-wide requirements, reduce repetitive setup work, and streamline your validation process.
Project Standards are especially useful for teams working with shared BIM requirements, naming conventions, classification systems, or delivery standards such as IDS and COBie.
When a standard is updated, all checks using that standard can automatically benefit from the latest rule definitions, helping teams stay aligned and maintain consistent model quality throughout the project lifecycle.
Trust your data at every stage.