Master Revit-Rhino Collaboration: Professional Speckle Workflow Guide
This tutorial demonstrates best practices for collaborative workflows between Revit and Rhino using Speckle as the bridge platform. You'll learn how to share architectural context from Revit to external collaborators working in Rhino, and how to integrate their work back into your Revit project. This workflow is particularly valuable for early to mid-stage design projects requiring rapid collaboration between architects and subconsultants.
Prerequisites
Before starting this tutorial, ensure you have:
- Speckle Account: Set up and ready to use (create one at app.speckle.systems)
- Software Installations:
- Autodesk Revit (with Speckle Revit connector installed)
- McNeel Rhino (with Speckle Rhino connector installed)
- Knowledge Level: Basic familiarity with Revit and Rhino interfaces
- Project Setup: A base Revit model ready to share
Stage 1: Publishing the Base Revit Model
Setting Up Your Speckle Project
Start by establishing the architectural context that external collaborators will need. In your Revit model:
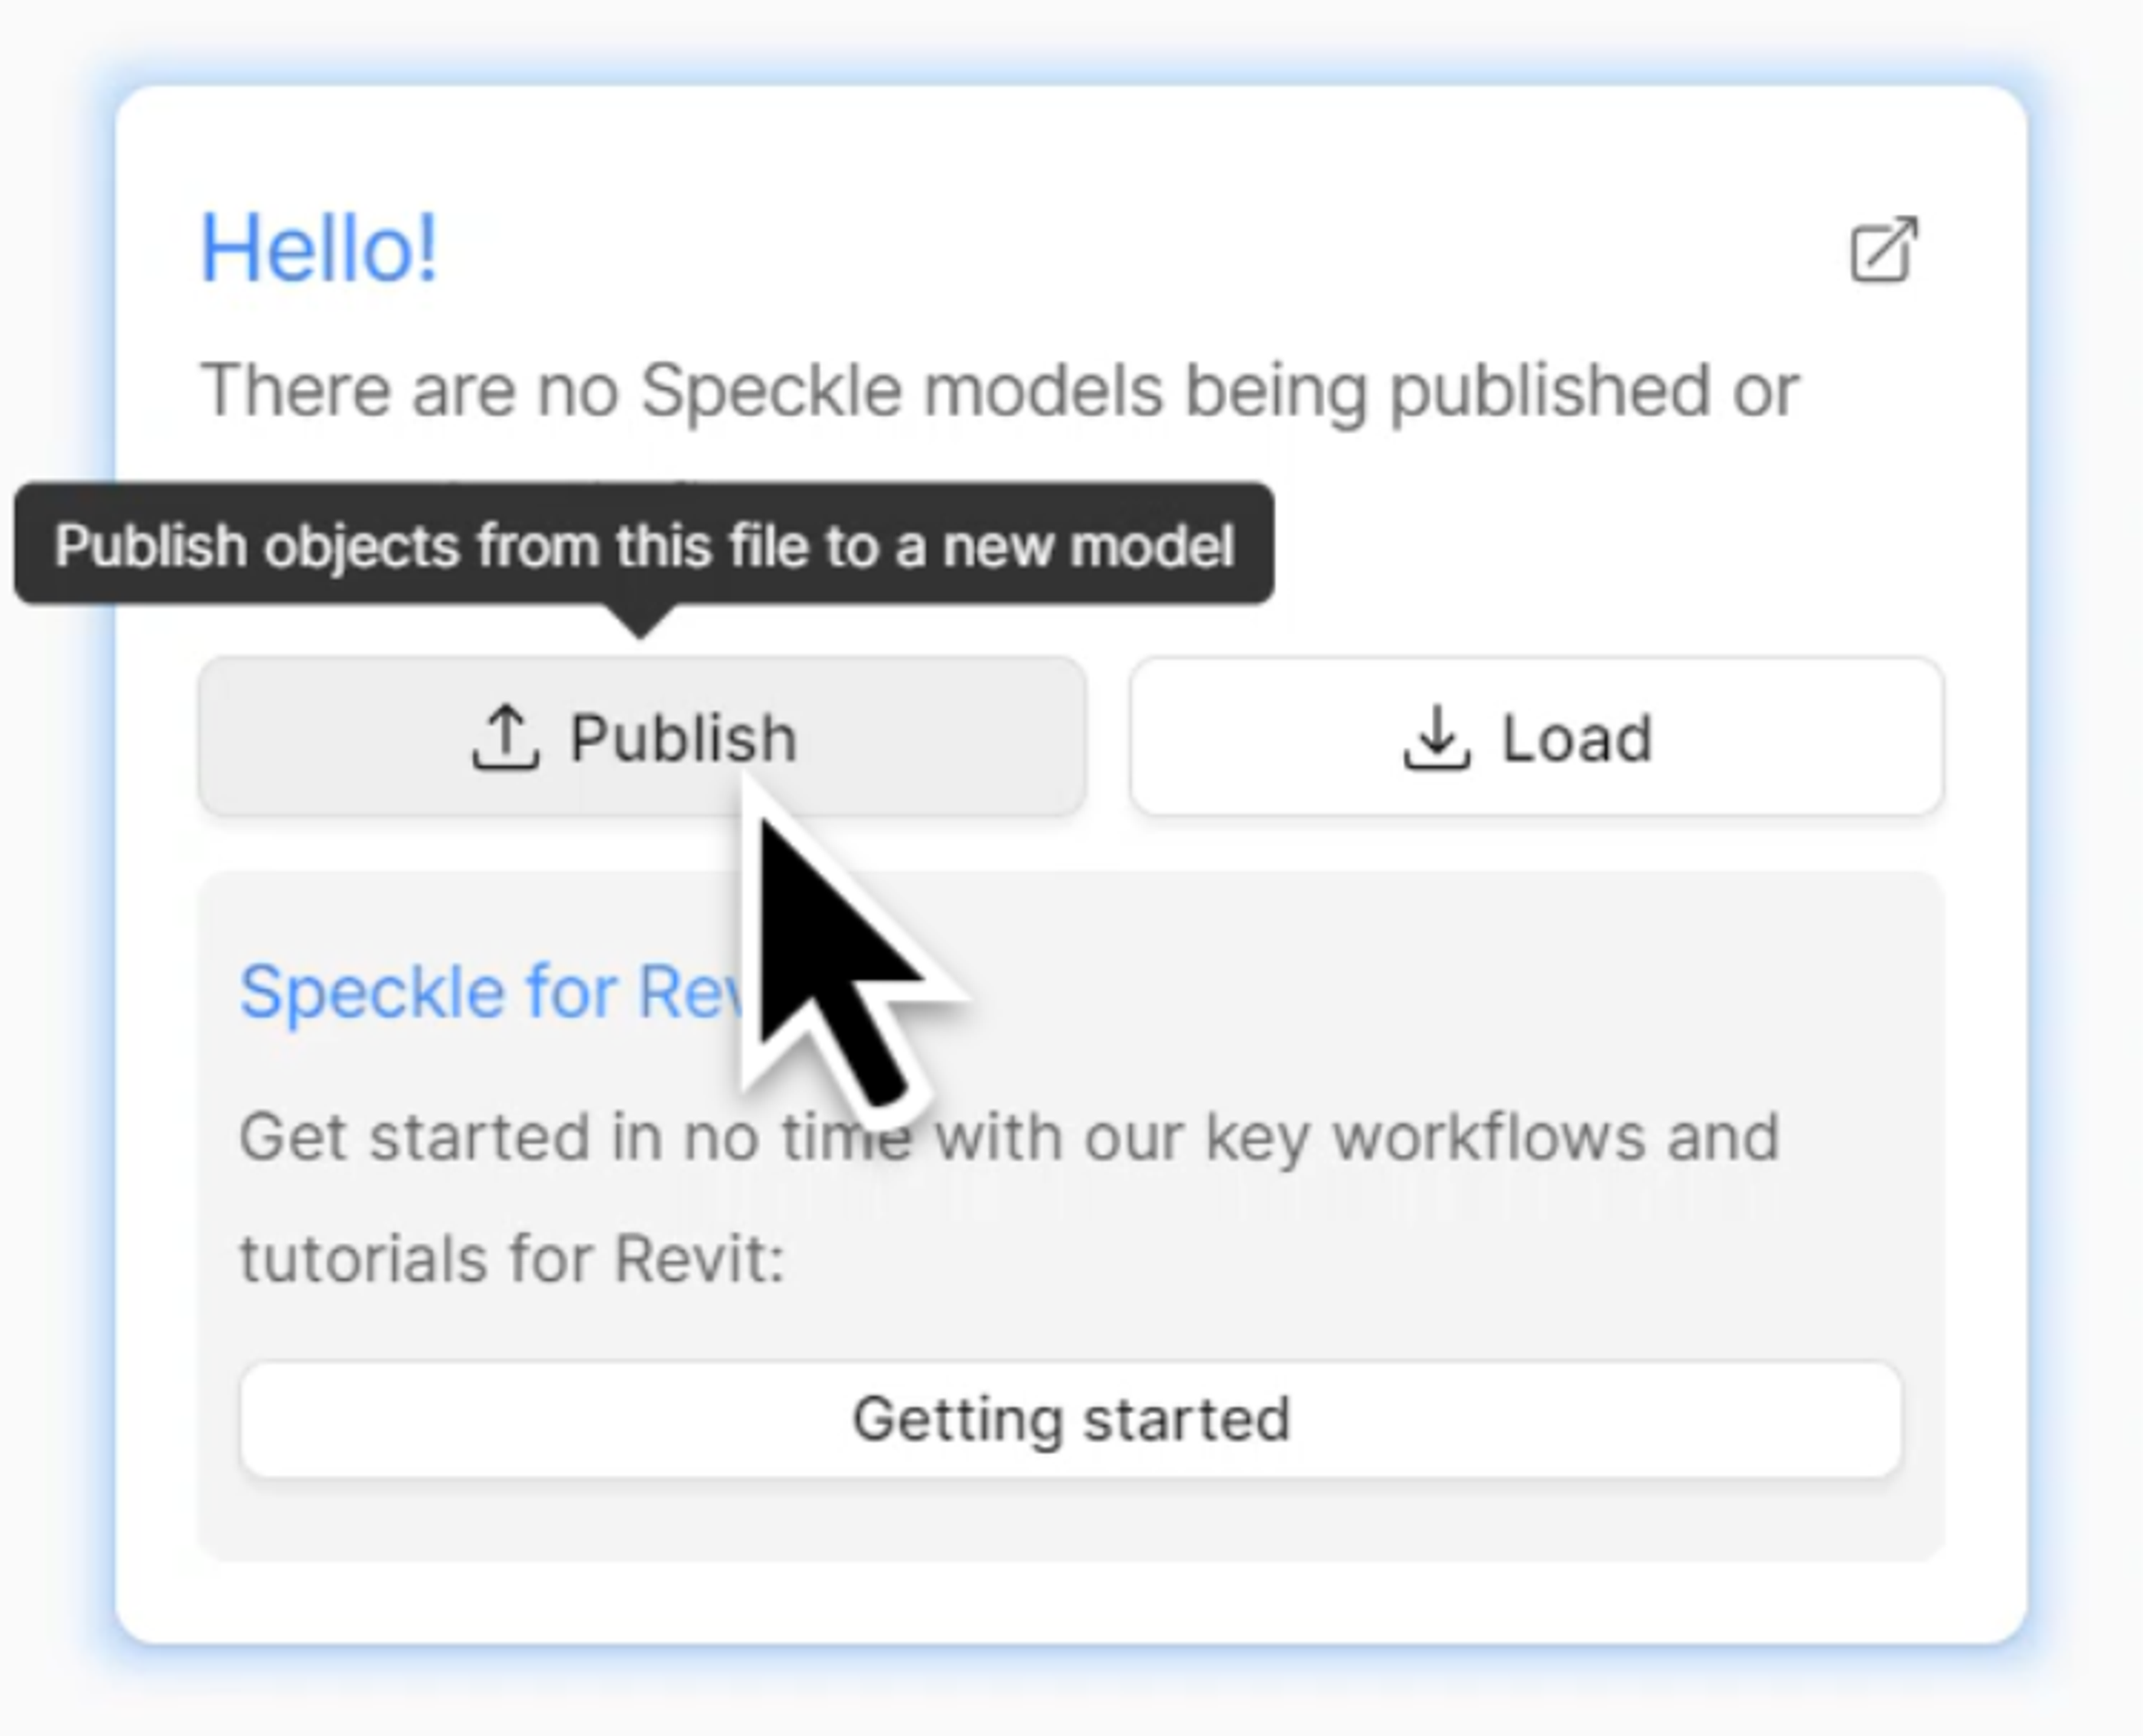
- Open the Speckle panel
- Click the Publish button to begin the upload process
- Select Create New Project and give it a descriptive name (e.g., "Speckle Tower")
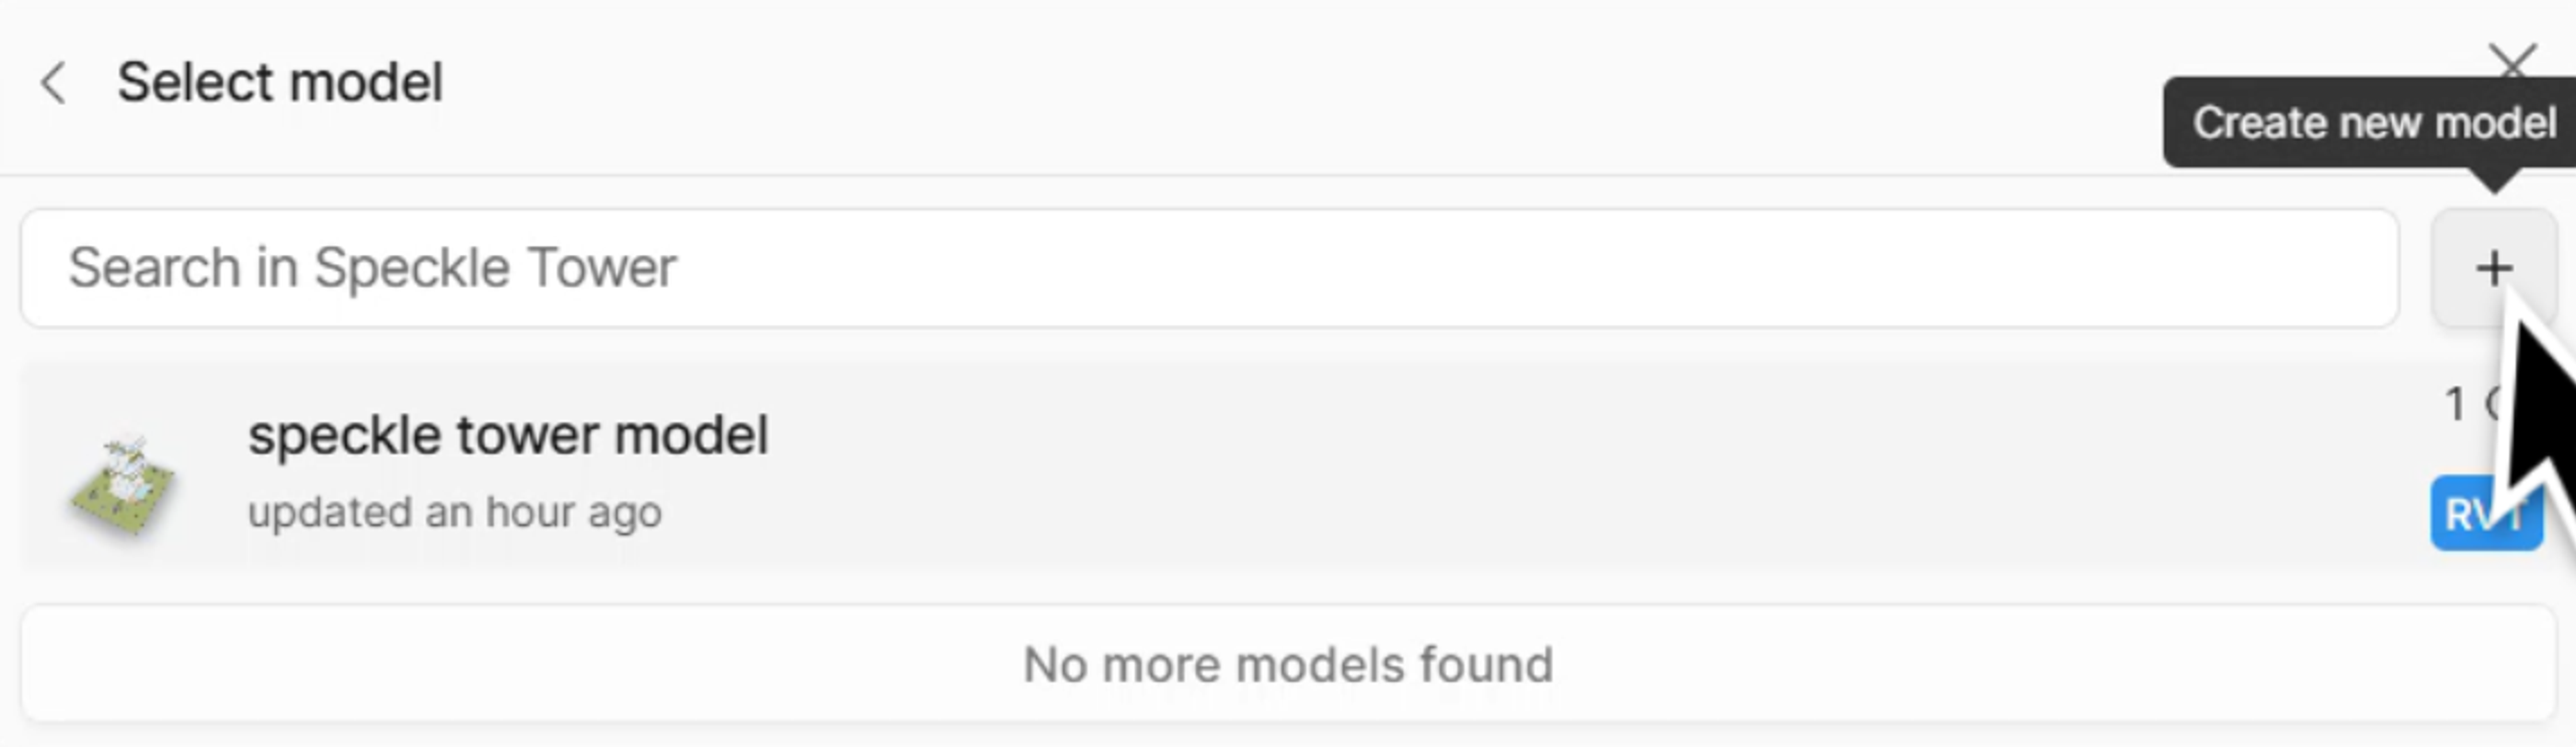
- Create your model name within the project (e.g., "Speckle Tower Model")
Selecting Geometry for Upload
When choosing what to upload, consider the context your collaborators need:
- Use click and drag to select all relevant geometry in your model
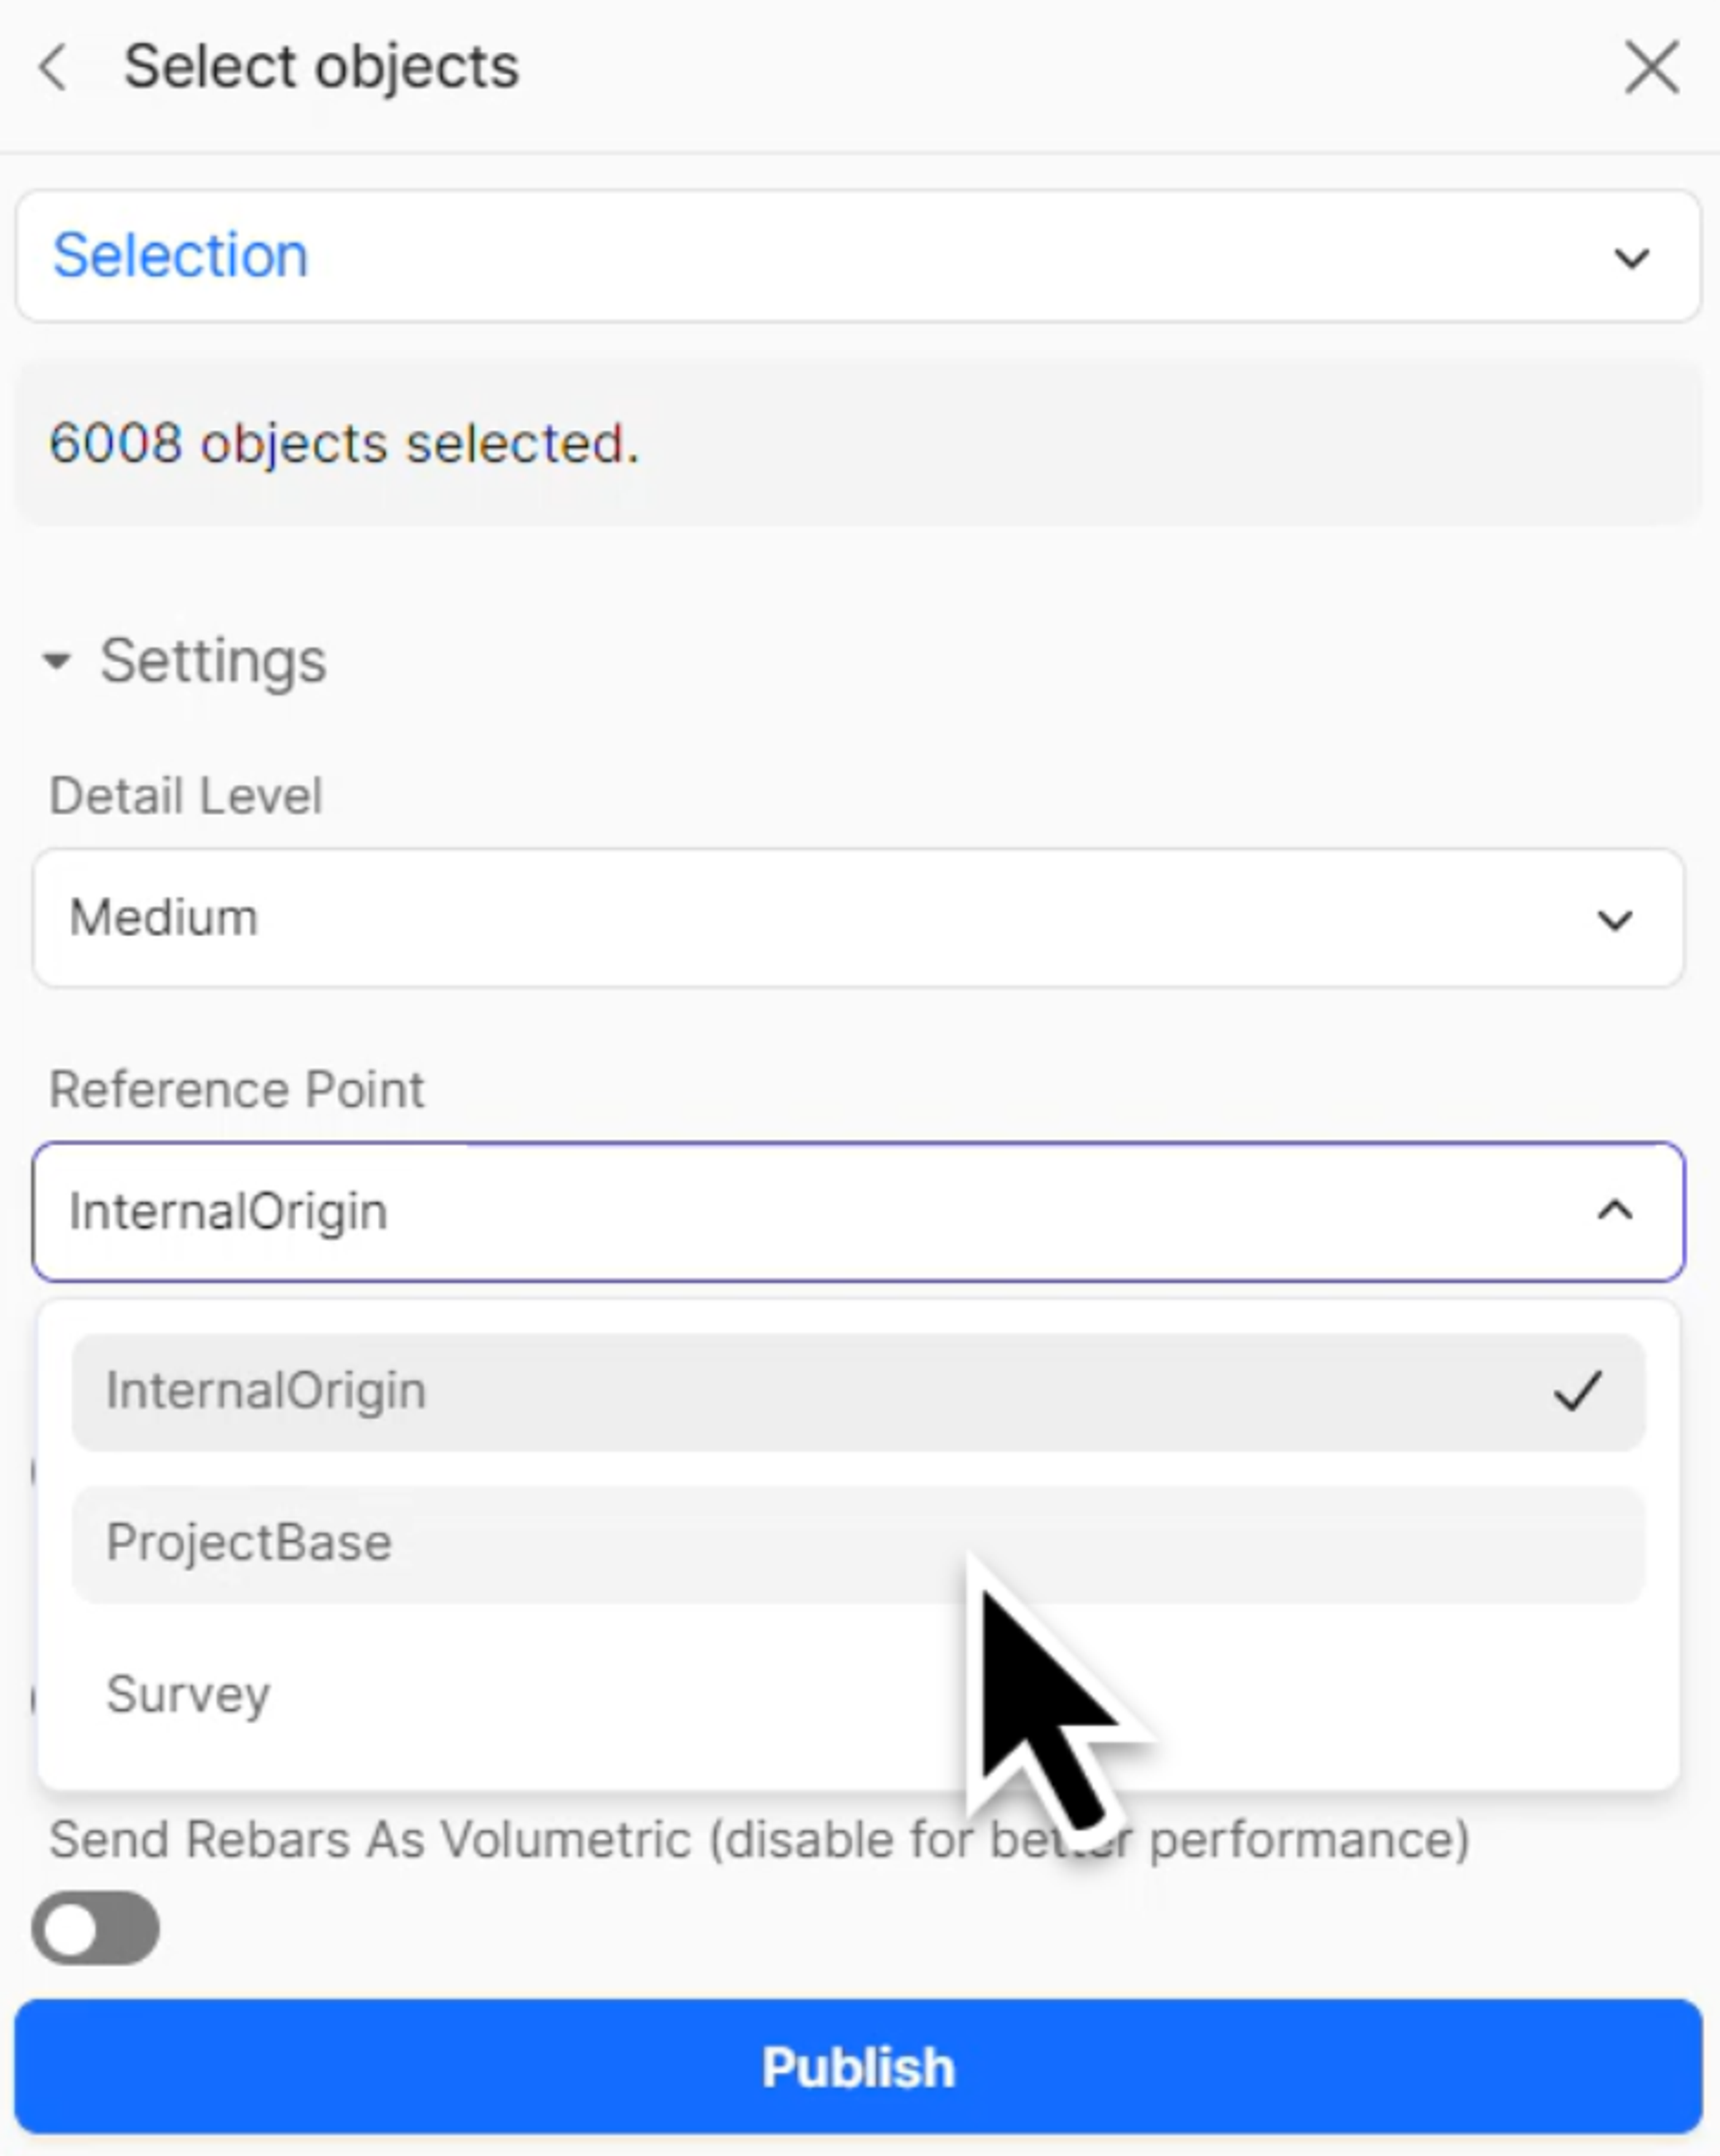
- The panel will display information about the number of objects selected
Critical Reference Point Settings
This is one of the most important aspects of the workflow:
- In the Settings section, locate the reference point options
- Set the reference point to Project Base (rather than internal origin or survey point)
- This ensures proper coordination when geometry returns to Revit. The project base becomes the zero-zero point in Rhino, ensuring that when collaborators publish their work back to Speckle, it lands in the correct location within your Revit model.
- Click Publish to upload your model to Speckle
Stage 2: Loading the Model into Rhino
Initial Rhino Setup
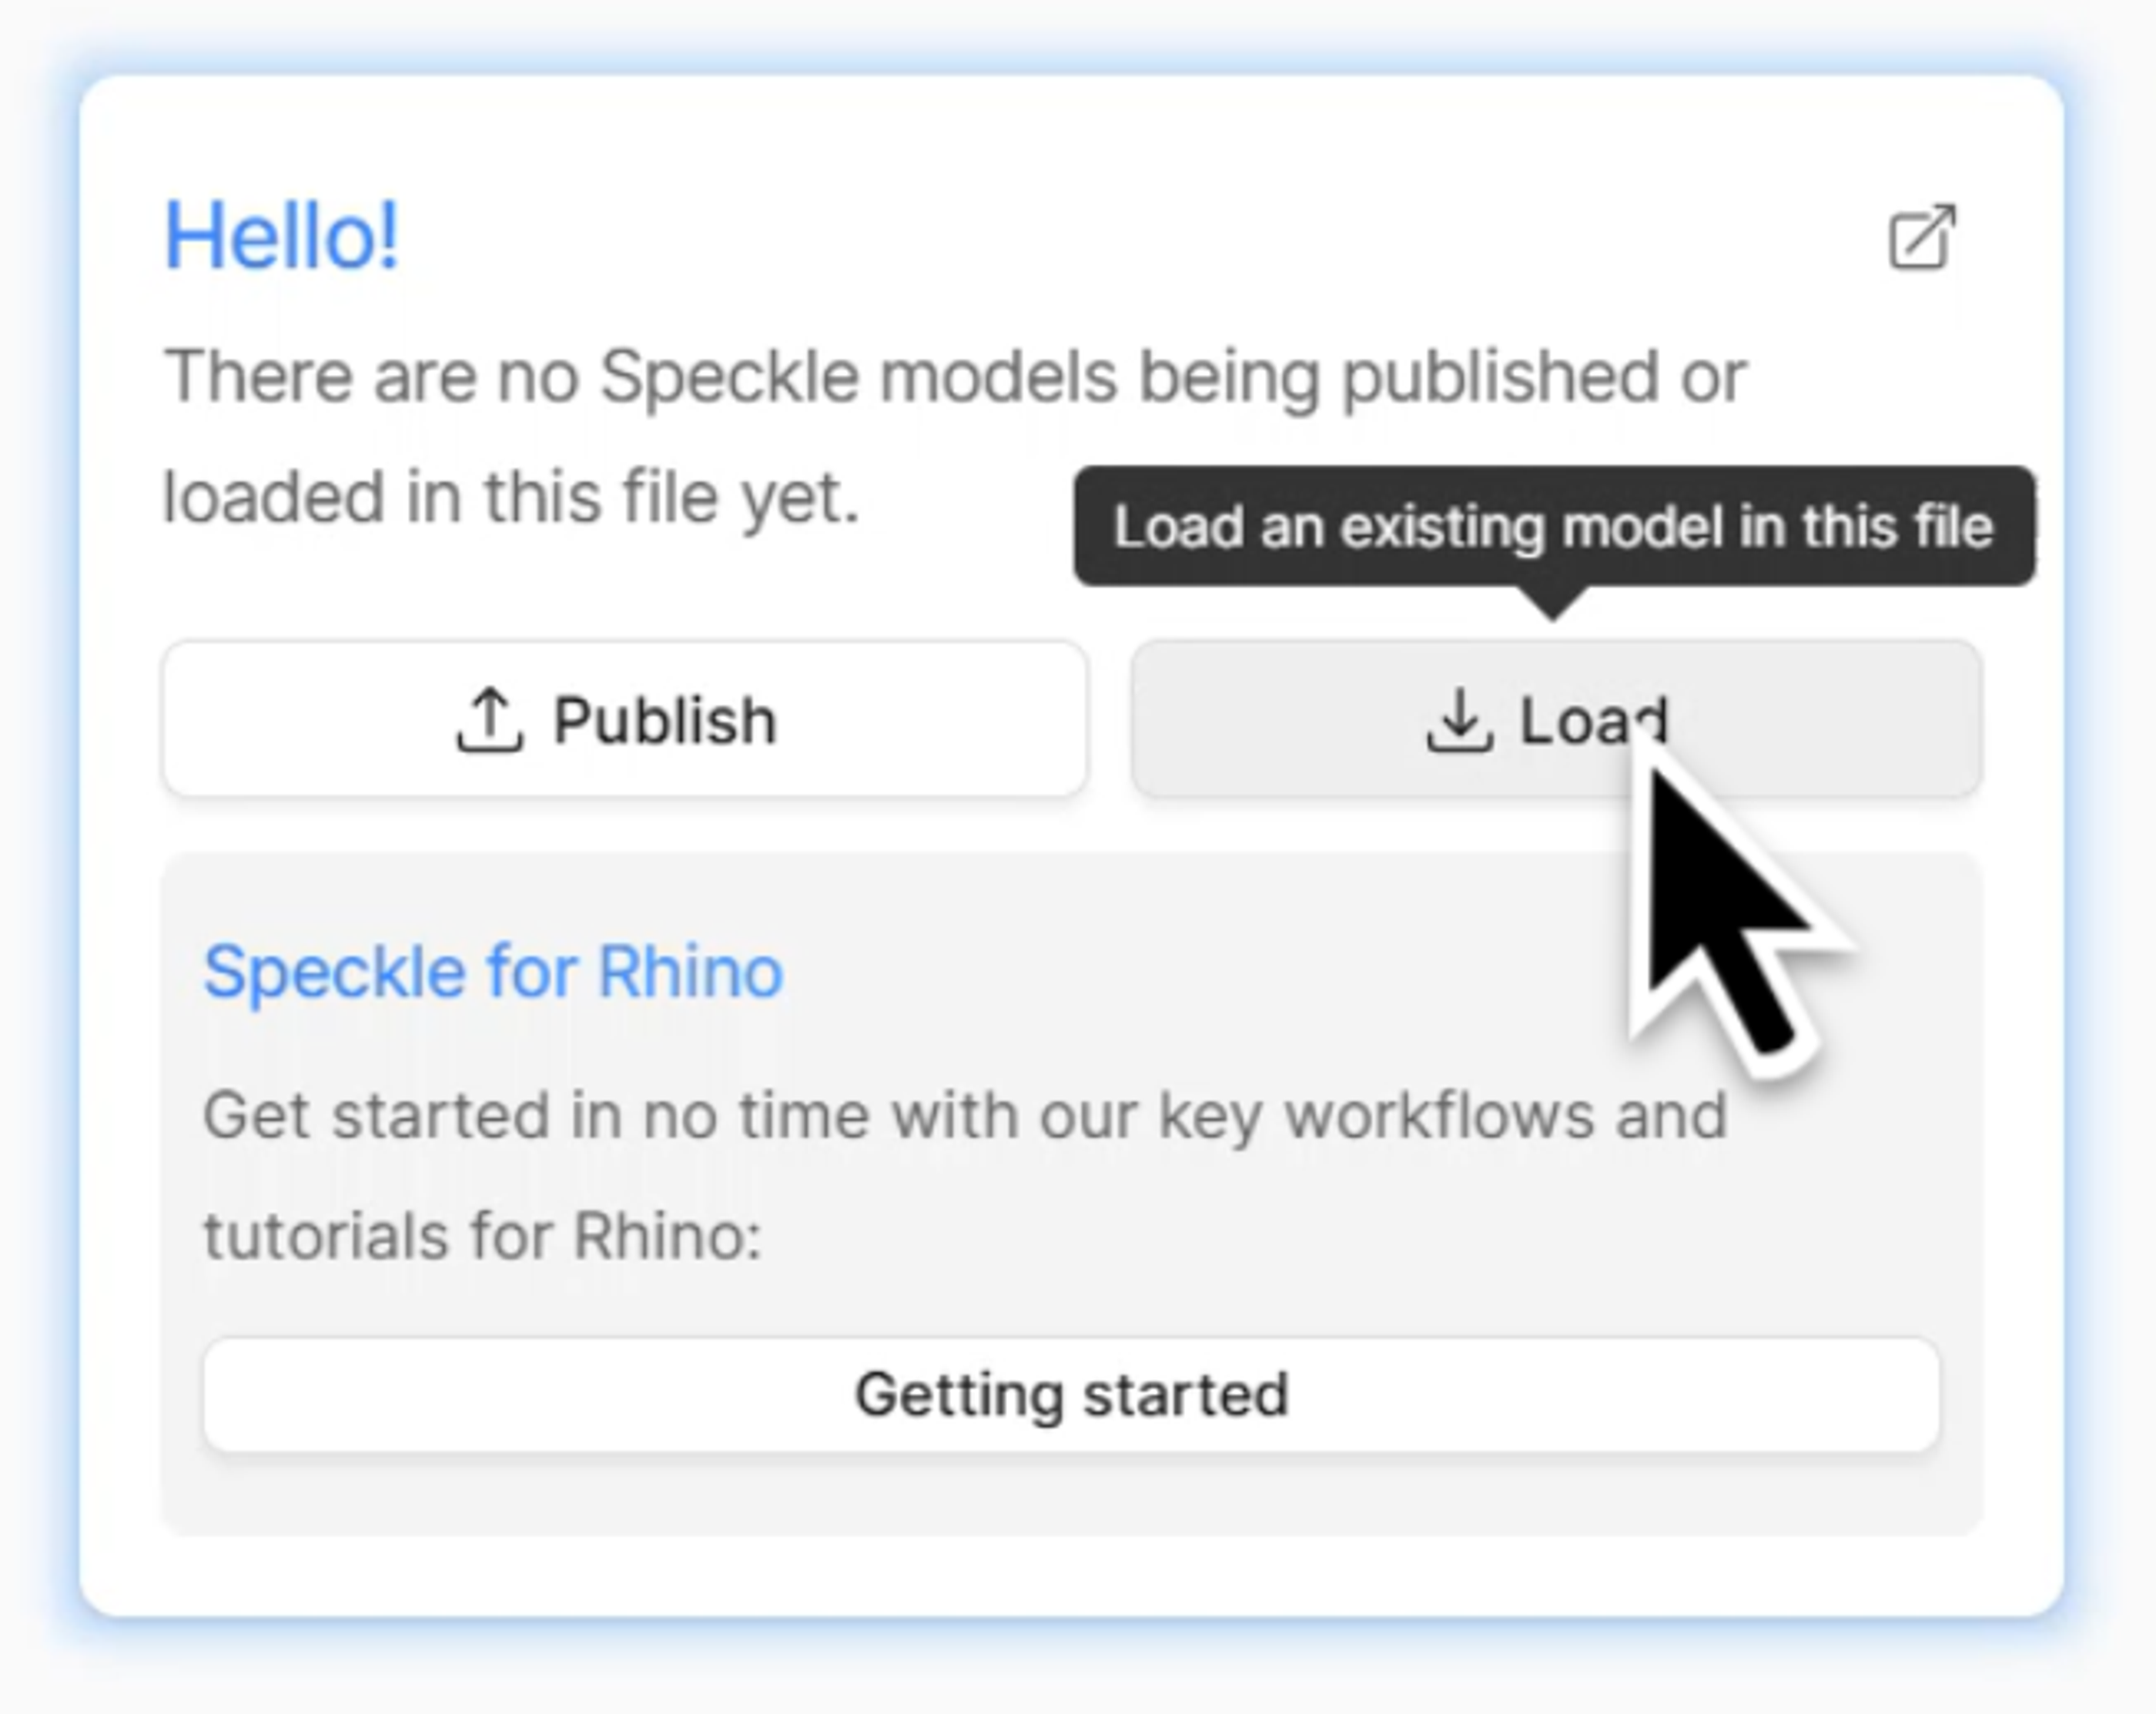
- Open the Speckle panel in Rhino
- Click the Load button to access available projects
Importing the Speckle Model
- Select your project from the available list
- Select the Model you want
- Choose the version you want to load (typically the latest)
Understanding Imported Geometry Characteristics
When working with Speckle-imported geometry in Rhino, be aware of these key aspects:
Geometry Type: All imported geometry comes in as meshes, not NURBS surfaces. This is important for understanding modeling limitations and approaches.
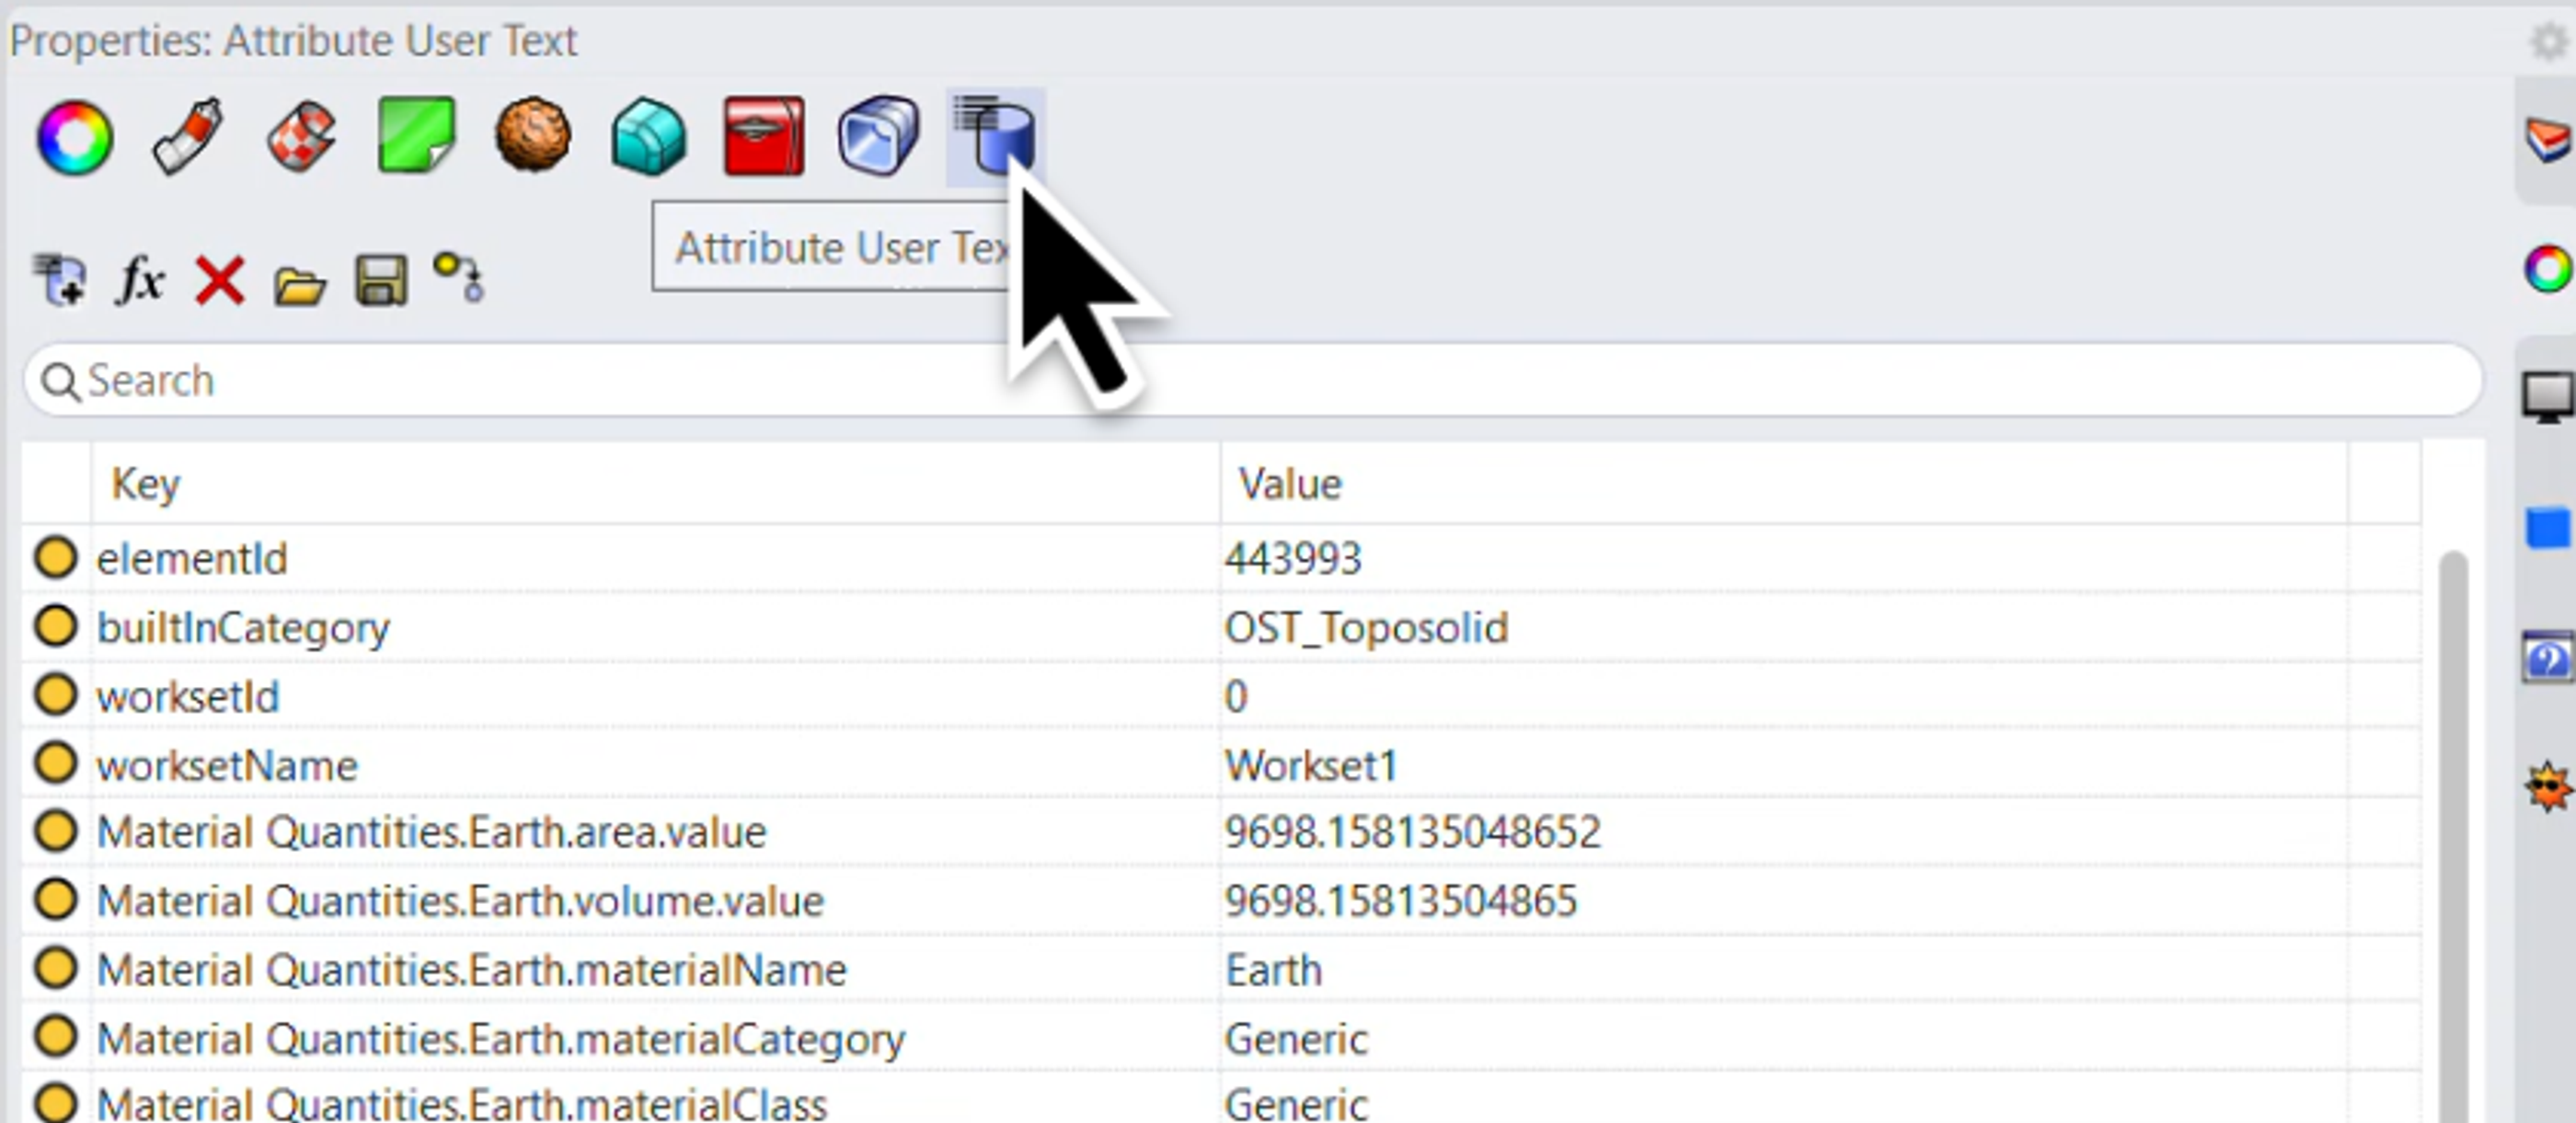
BIM Data Preservation: Despite Rhino not being strictly BIM software, all BIM data from Revit is preserved:
- Access Properties panel → User Text Attributes
- Select any piece of geometry to see all associated Revit data
- This enables "BIM-light" workflows within Rhino when needed
Material Translation: Revit materials automatically convert to Rhino materials:
- Open the Materials tab in Rhino
- All Revit materials appear as new Rhino materials with full properties preserved
- Materials maintain their visual properties for rendering
Layer Organization and Critical Workflow Rules
Speckle creates a layer structure for the imported Revit model:
- Project Parent Layer: Contains all imported geometry for that project
- Floor-Based Organization: Layers correspond to Revit levels
CRITICAL WORKFLOW RULE: Never model within the Speckle parent layer. Any geometry within this layer will be deleted and refreshed every time you load a new version of the Speckle model.
Material Refresh Behavior: Materials also refresh with model updates. To preserve modified materials:
- Duplicate any Speckle material you want to keep permanent
- Rename the duplicated material (this breaks the Speckle identification string)
- The renamed material will persist through model refreshes
Stage 3: Creating Your Rhino Geometry
Setting Up Your Work Layer
Create a proper workspace separate from the Speckle geometry:
- Create a new layer outside the Speckle parent layer
- Place all your original work within this new layer structure
- This separation ensures your work isn't affected by Speckle model updates

Stage 4: Publishing Your Work Back to Speckle
Creating a Separate Model Stream
Maintain clean project organization by creating separate models for different contributors:
- Click the Publish button in Rhino's Speckle panel
- Select the same project as the base architecture
- Create a new model within the project
- Avoid publishing back into the same model to prevent cross-contamination
Why separate models matter: This maintains clear ownership and version control, preventing one contributor's changes from affecting another's work stream.
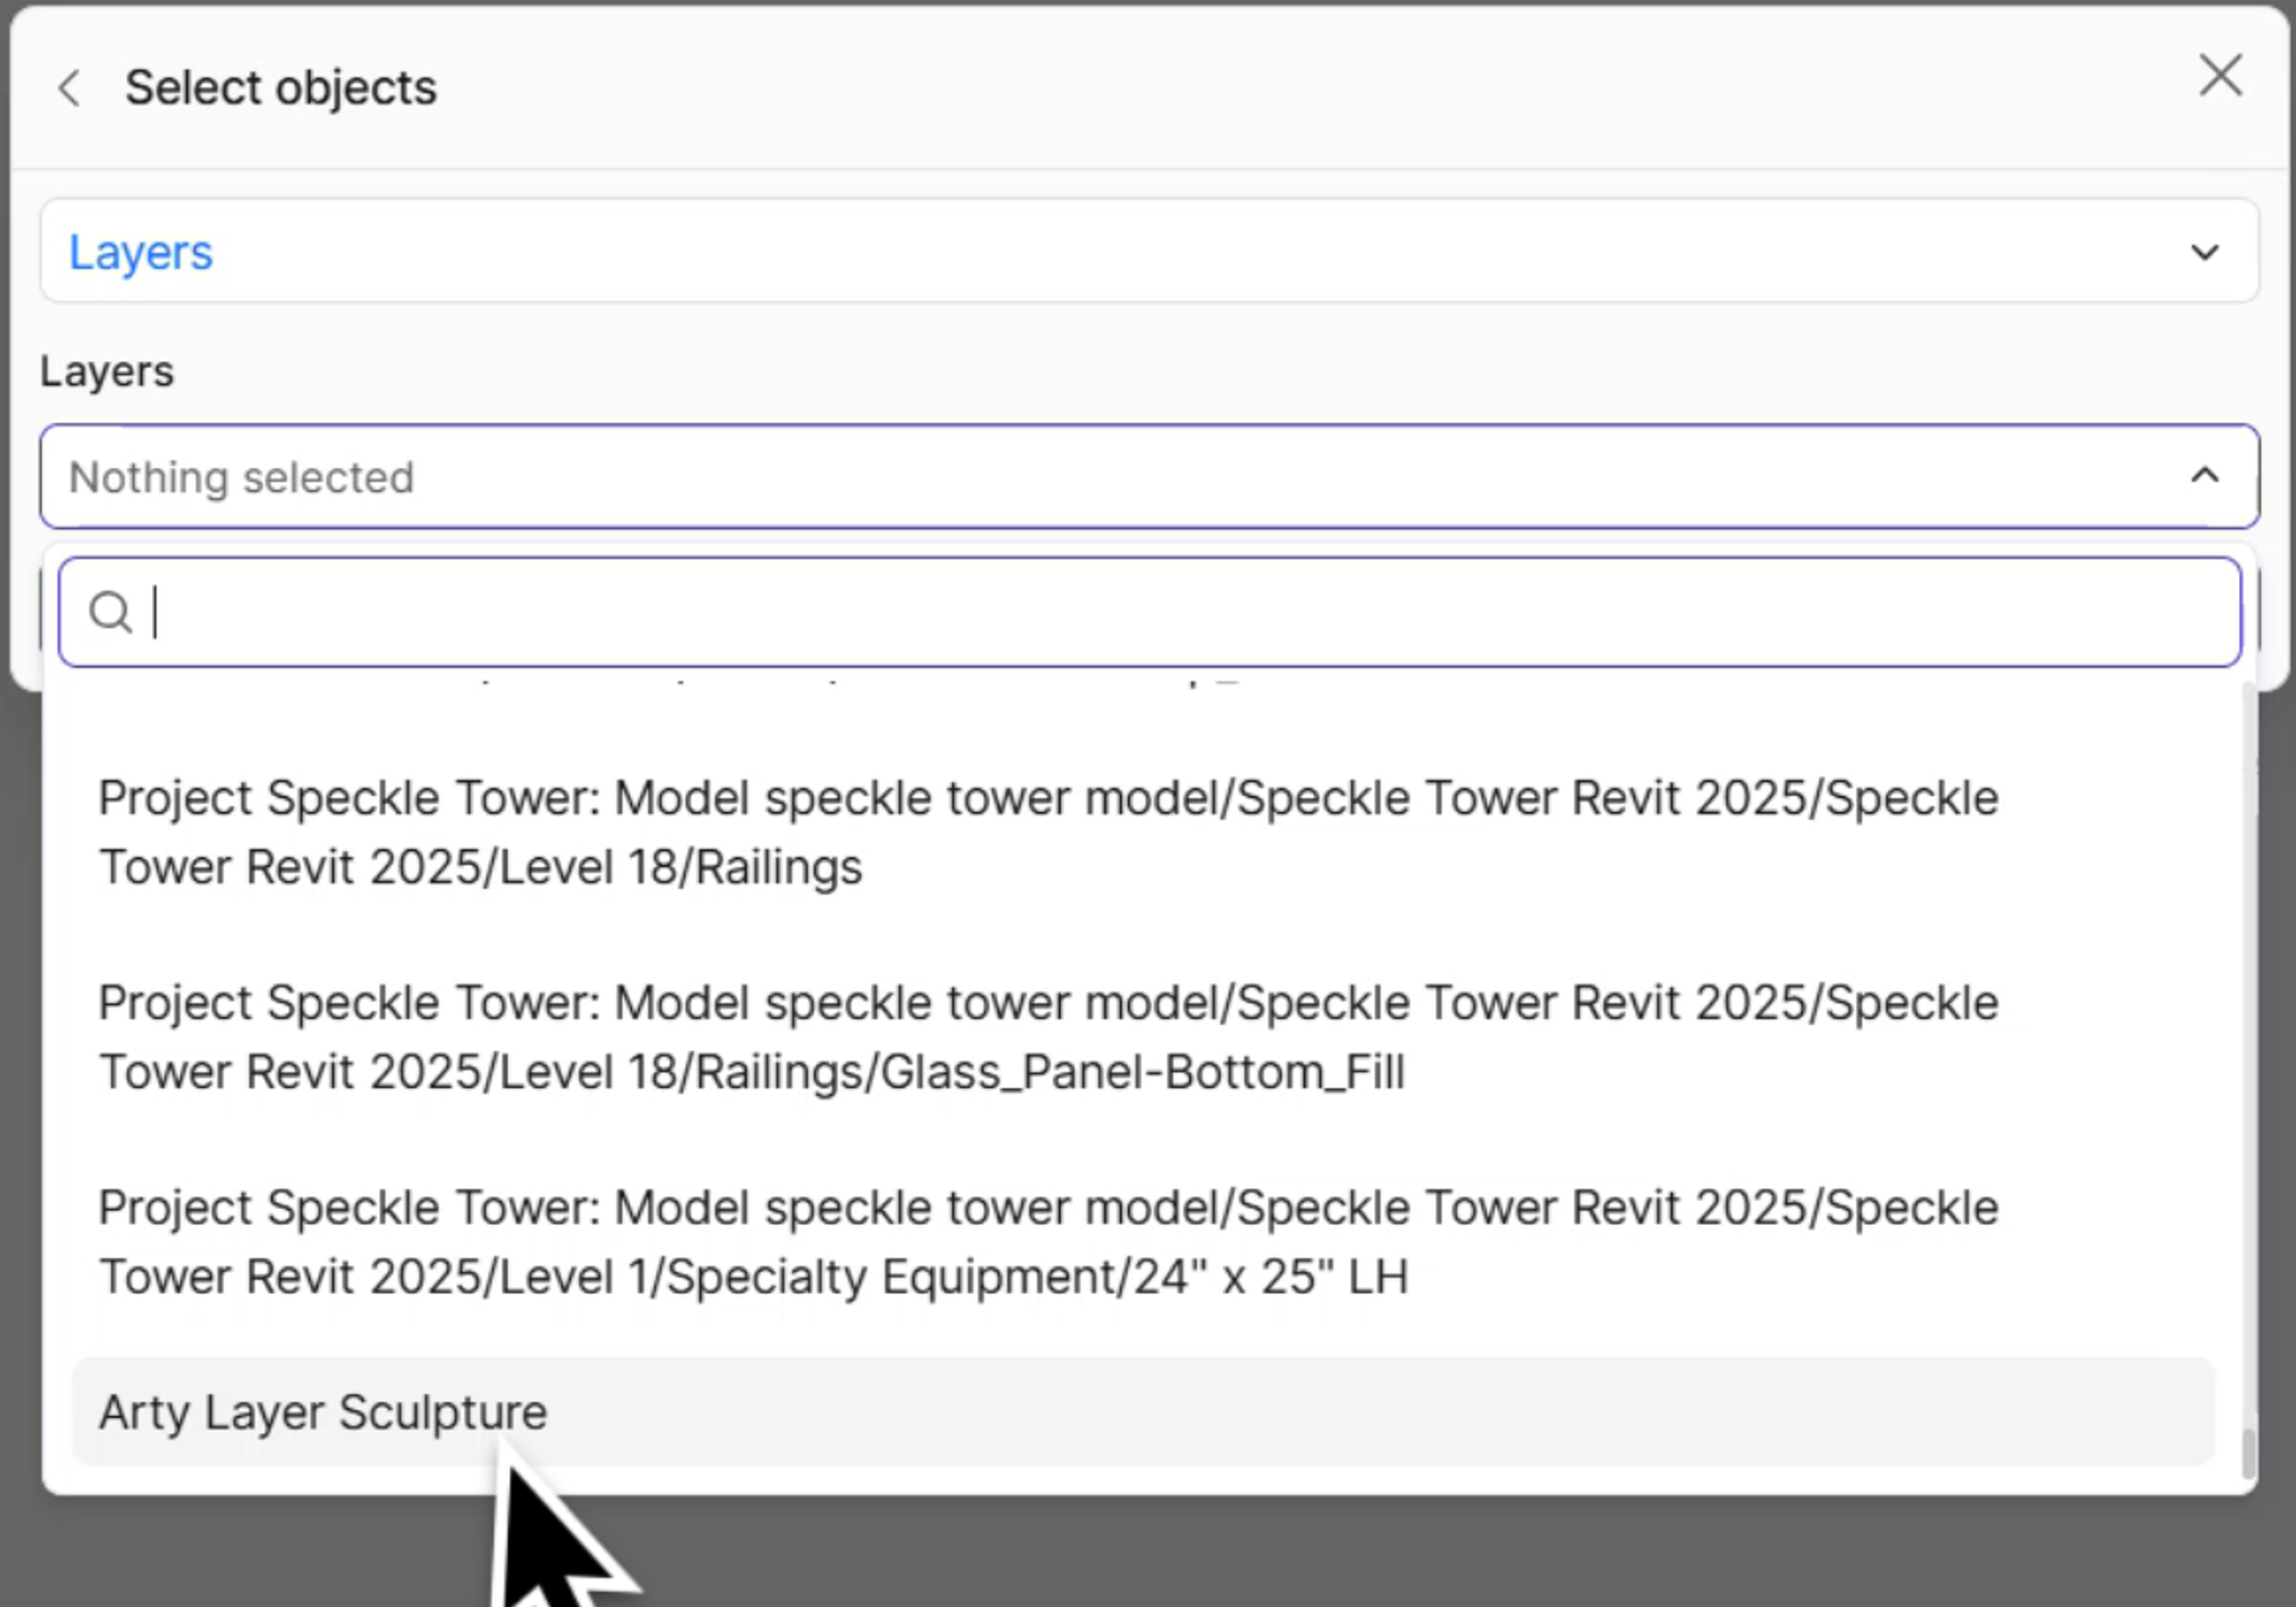
Layer-Based Selection
Use your organized layer structure for precise publishing:
- In the publish dialog, choose Layers instead of manual selection
- Select only your work layer
- Click Publish to upload your contribution
The published model appears immediately in the Speckle web viewer, ready for the architect to integrate.
Stage 5: Integrating External Work into Revit
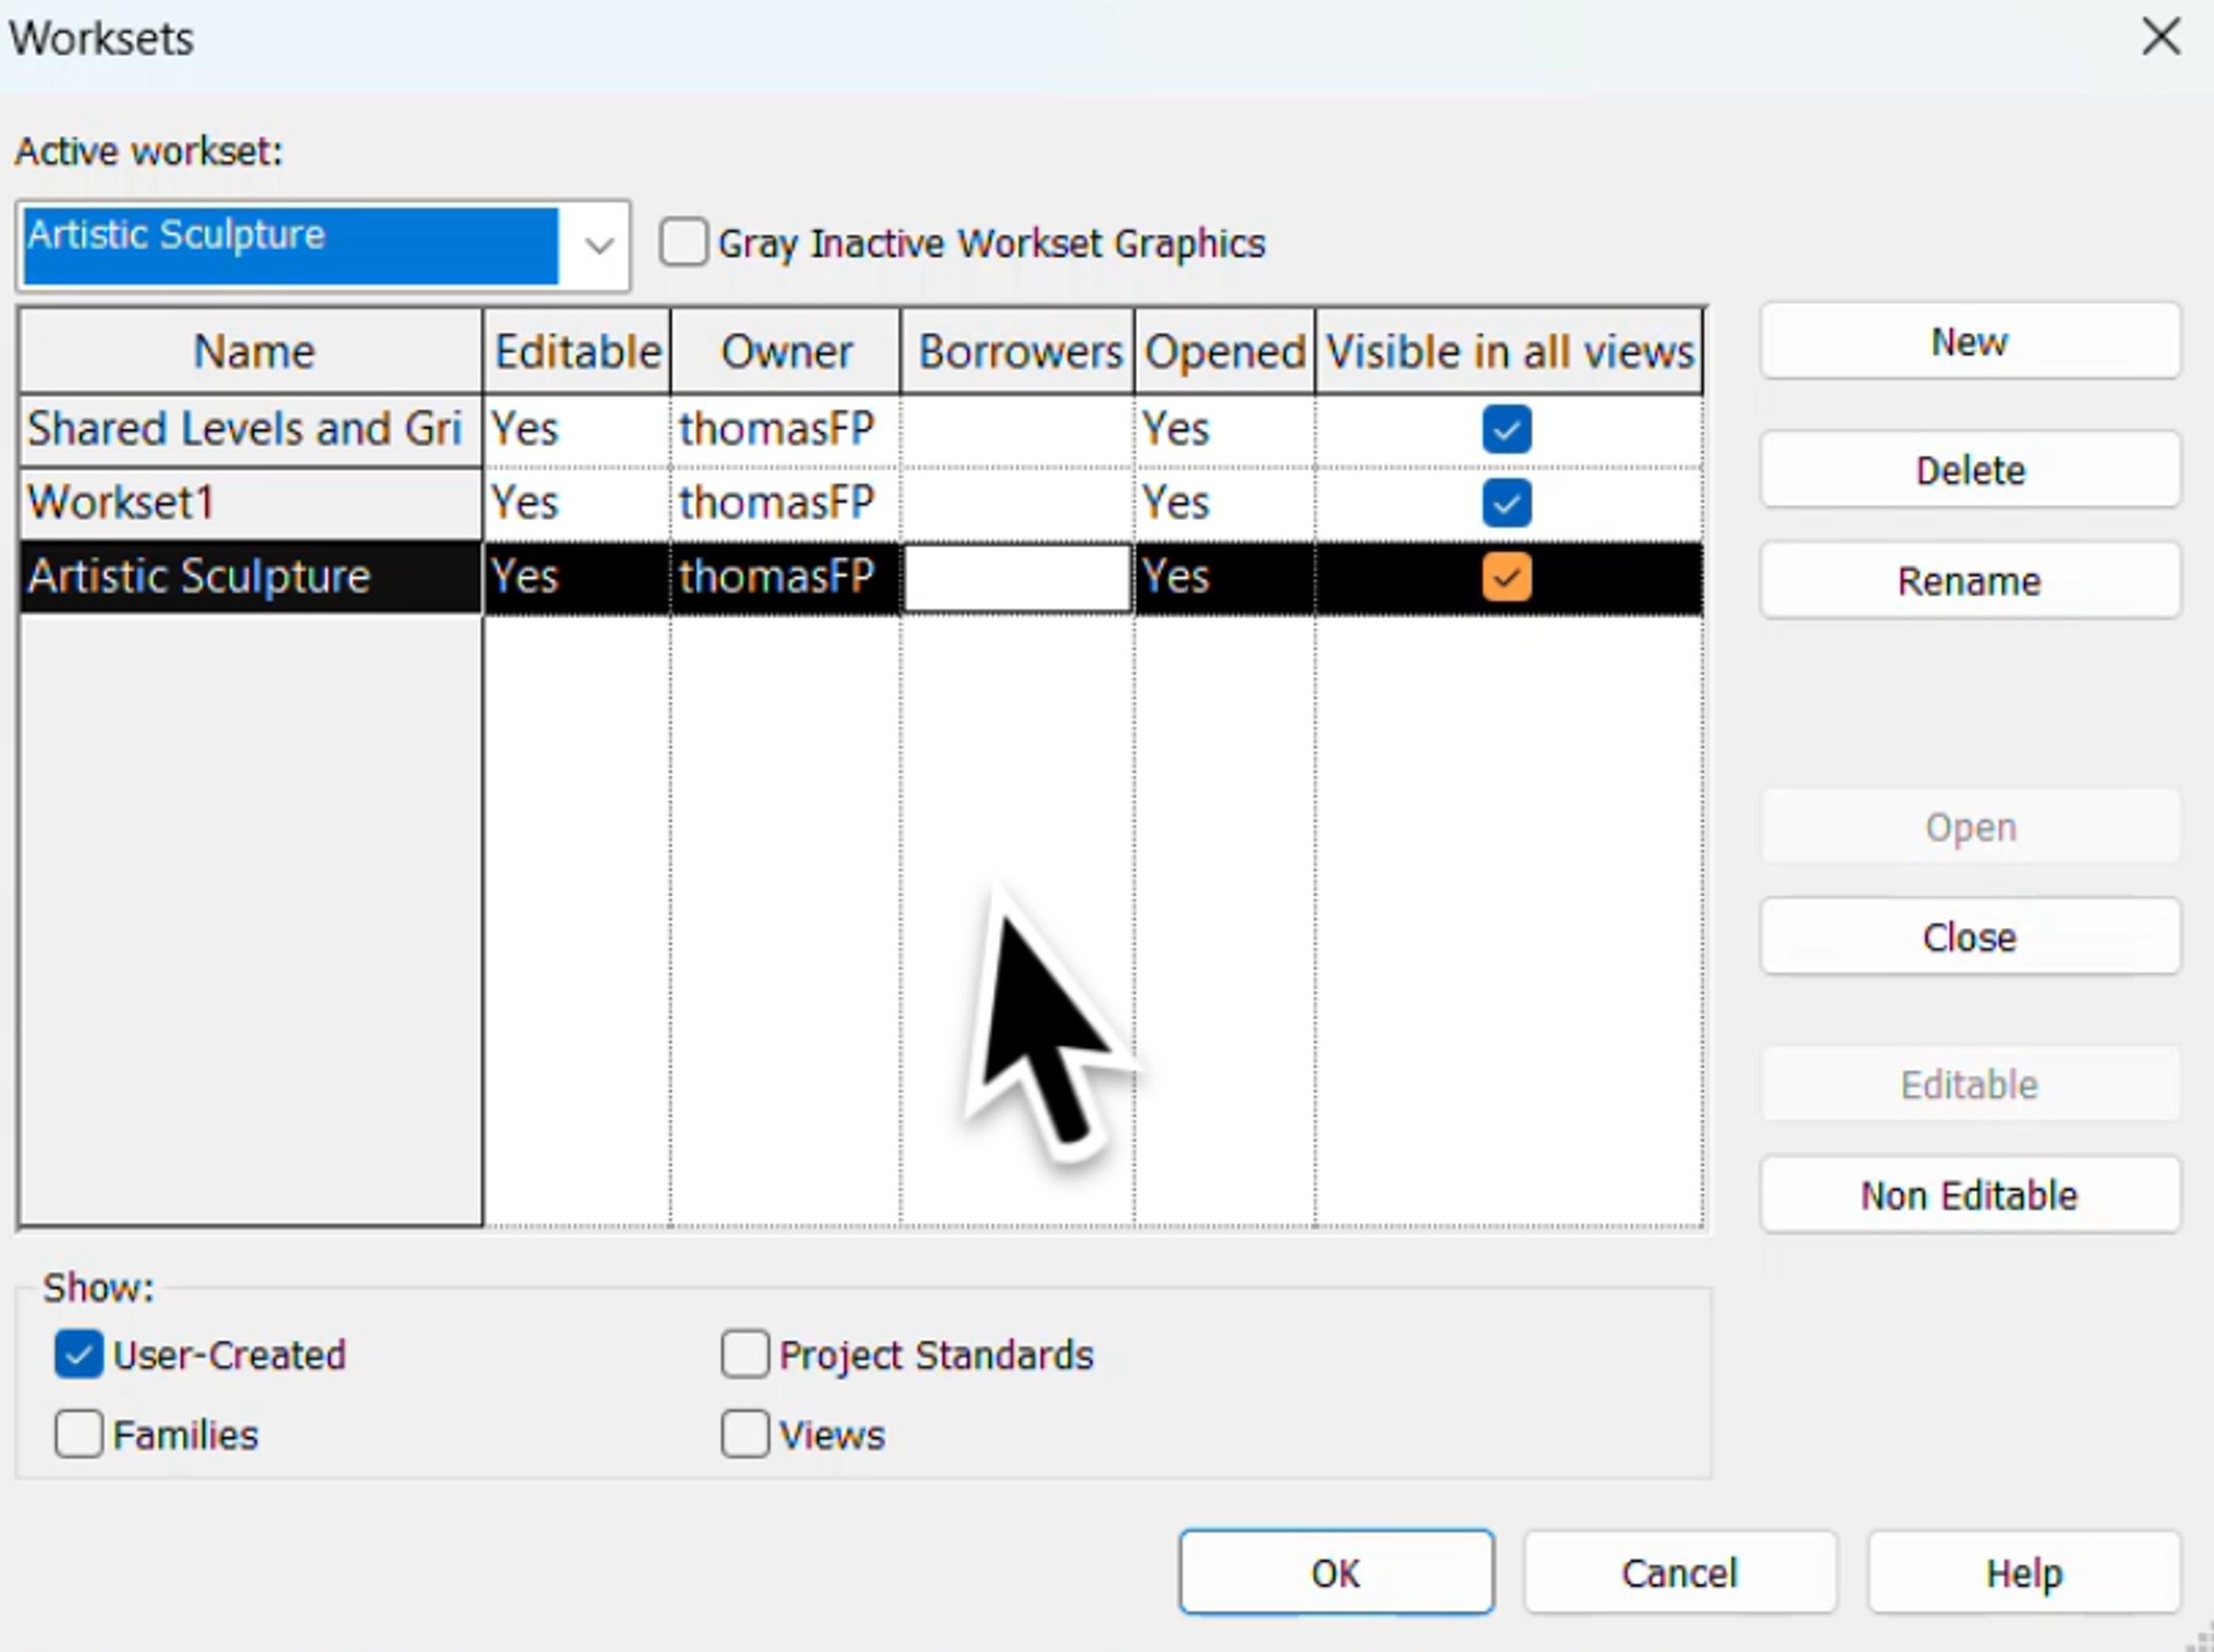
Workset Organization Best Practices
Before loading external geometry, establish proper project organization:
- Navigate to Collaborate tab → Worksets
- Click OK to initialize worksets if not already set up
- Create a New workset specifically for the external model
- Name the workset to match your Speckle model name for clear traceability
Loading External Geometry
Ensure the external geometry loads into the correct organizational structure:
- Verify the active workset: Check that your new workset is active before loading
- Navigate to Speckle Load button
- Select your project and the external model
- Choose the desired version and load
Applications
Project Phase Integration
This collaborative workflow proves most valuable during:
Early Design Phase:
- Rapid concept development with multiple stakeholders
- Quick iteration cycles between disciplines
- Easy geometry sharing without complex file management
Mid-Design Phase:
- Detailed coordination between consultants
- Integration of specialized elements (art installations, custom components)
- Real-time collaboration across different software platforms
Scaling Considerations
For larger projects, consider:
- Model segmentation: Break large models into logical chunks
- Performance optimization: Monitor model size and complexity for smooth collaboration
Conclusion
Speckle eliminates the traditional barriers between different design software platforms, enabling true collaborative design regardless of tool preferences. This workflow is particularly powerful during early and mid-stage design when rapid iteration and multi-stakeholder input drive project success.
Next Steps: Experiment with this workflow on smaller test projects first, establish your team's naming conventions and organizational standards, and consider expanding to additional software platforms as your collaborative needs grow.
The strength of this approach lies in its simplicity - there's minimal learning curve for new collaborators, and it's often the easiest way to get multiple people working together regardless of their software expertise.