Speckle saved views and presentations: A complete tutorial
Introduction
Elegantly presenting BIM models can be complex; beauty is not the first word that comes to mind when thinking of BIM. With Speckle, we believe even your LOD 100 models deserve to be presented as beautifully as possible, and that's where our new features come in.
With saved views, it's now effortless to record your favourite views alongside any filtering and render settings you have applied. This means you can revisit those super-specific views at any time or save them for your team to use later.
Building on saved views, we took the feature to its logical end by adding a full presentation mode. This means you can now send curated slide decks of your live 3D BIM model to your client or team in minutes.
Prerequisites
Before starting this tutorial, ensure you have:
- A Speckle account – Sign up at app.speckle.systems if you haven't already.
- A 3D model uploaded to Speckle – Any model from supported CAD authoring software.
Stage 1: Creating your first saved view
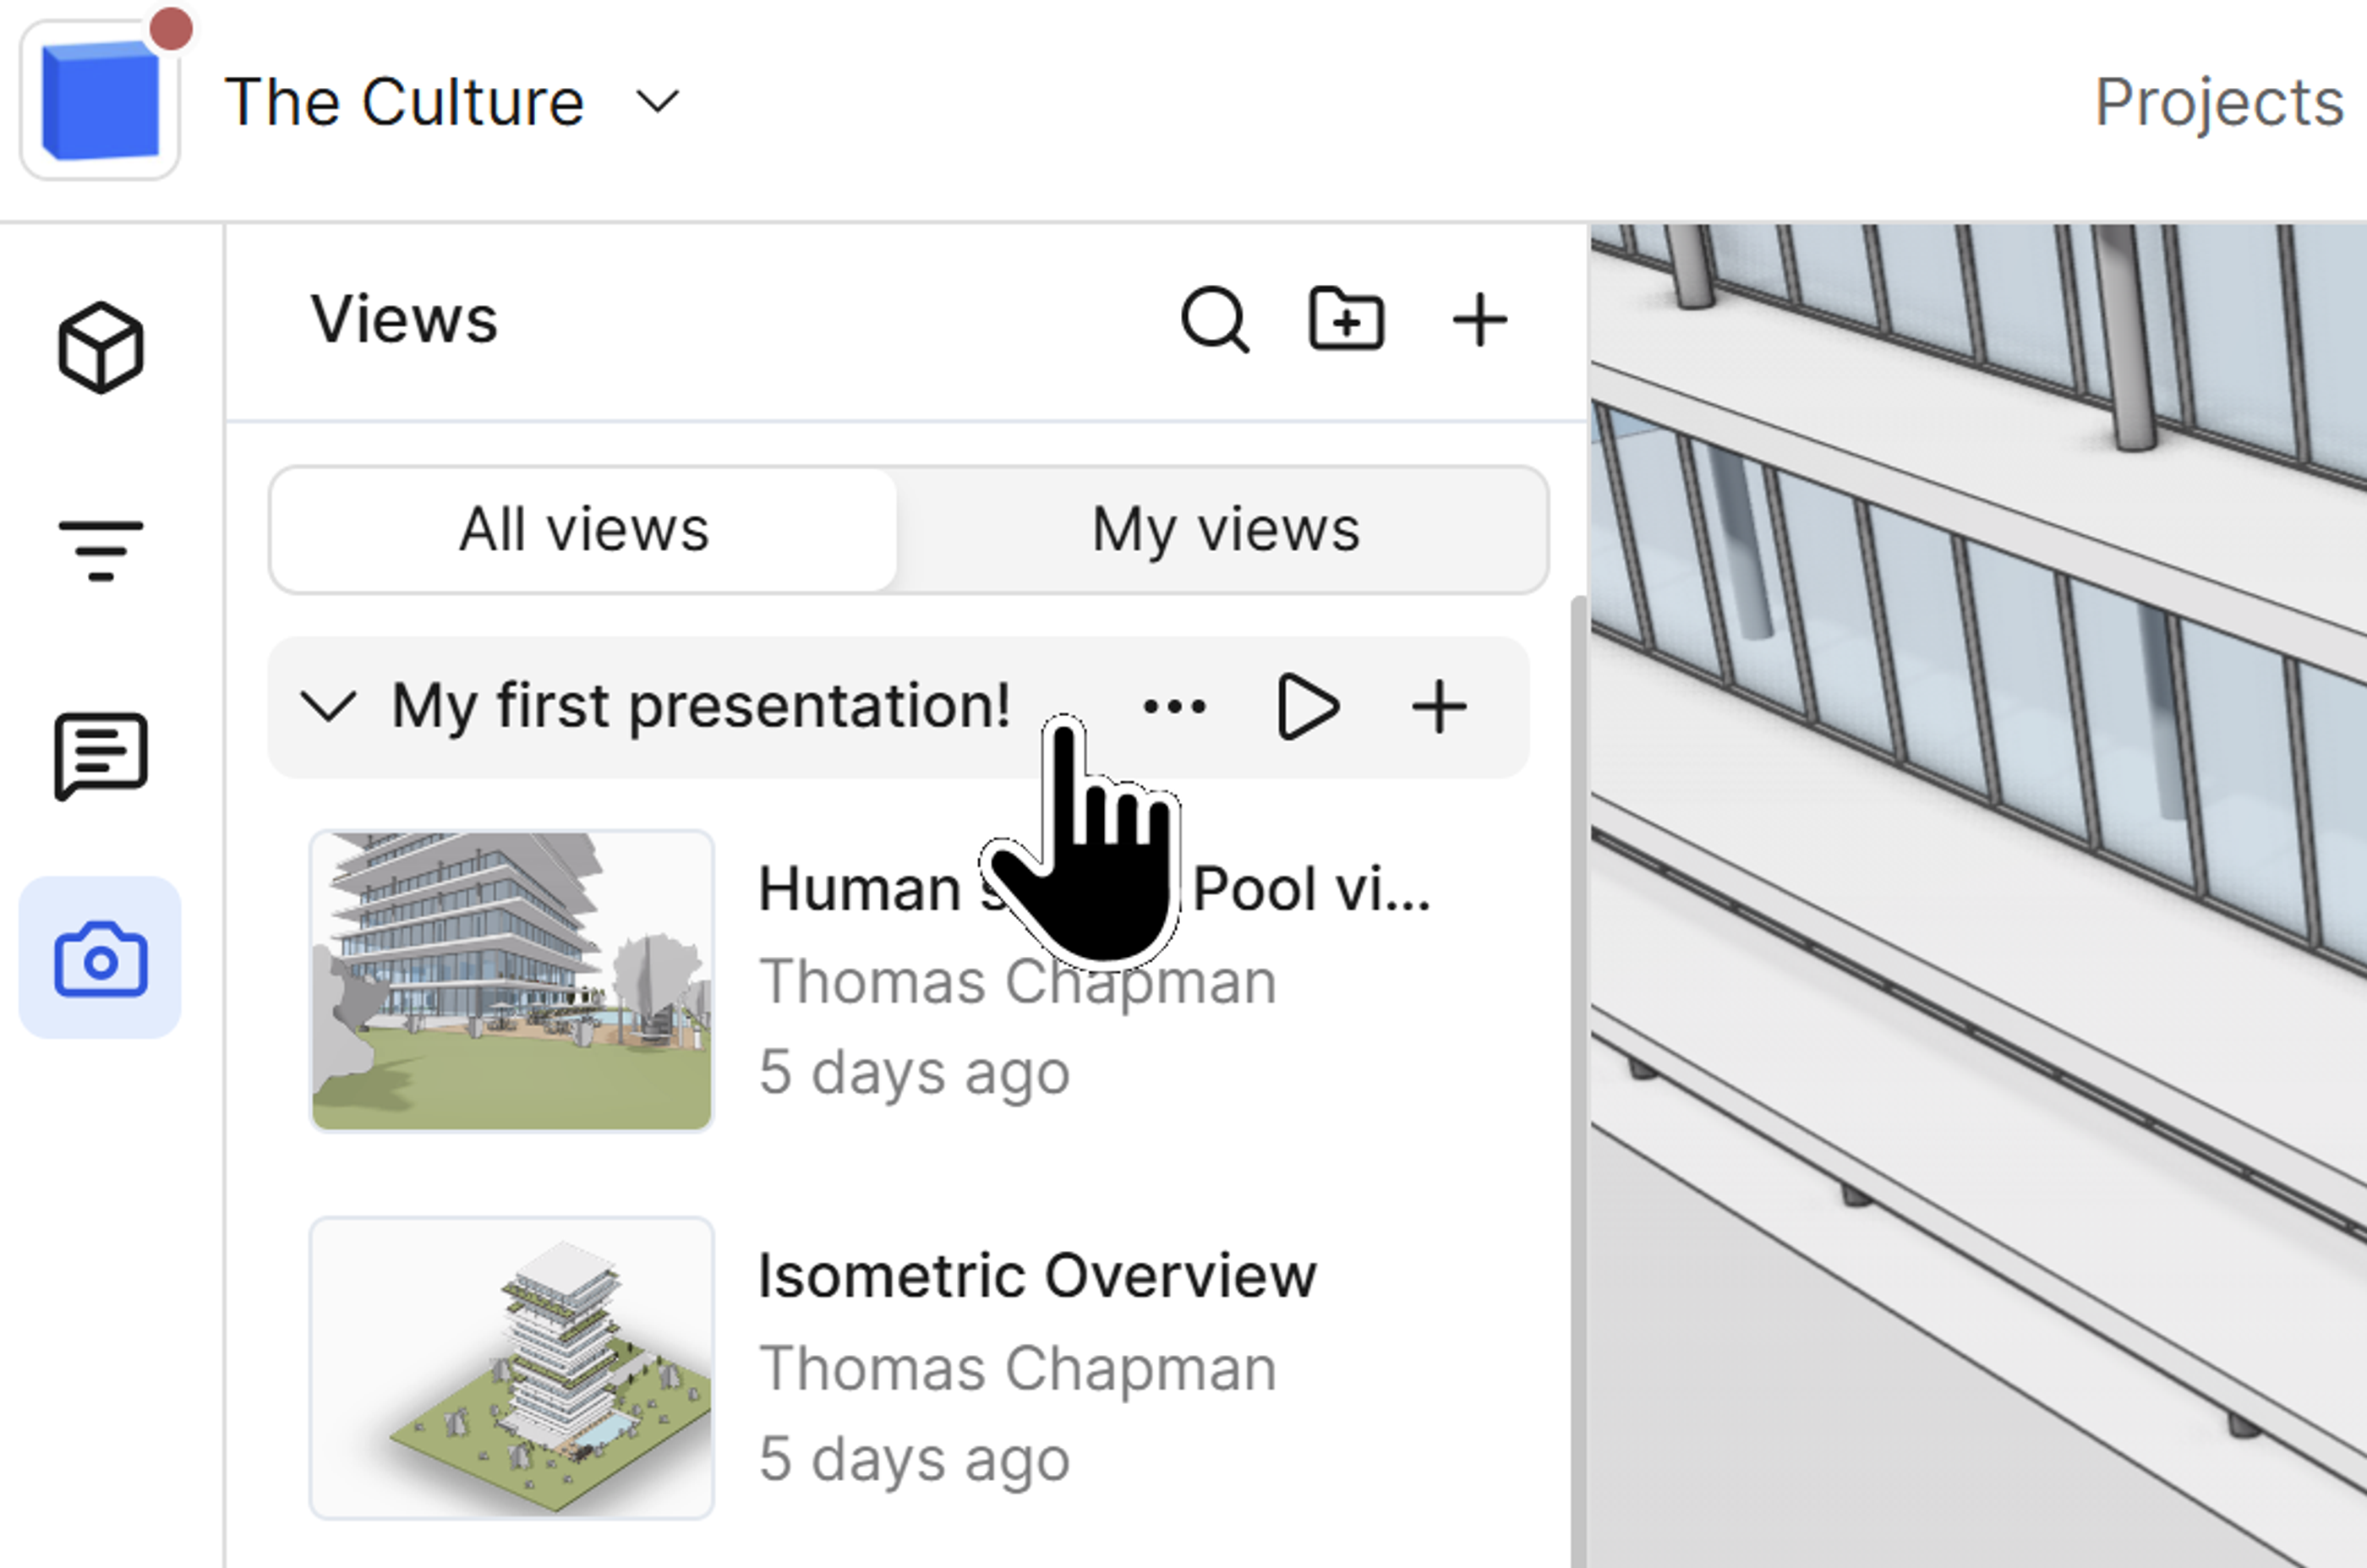
Accessing the saved views panel
The saved views feature is accessed through a dedicated panel in the Speckle Web Viewer:
- Navigate to the left-hand side of the web viewer interface.
- Click on the camera icon to open the saved views panel.
- The panel will appear, displaying any existing saved views.
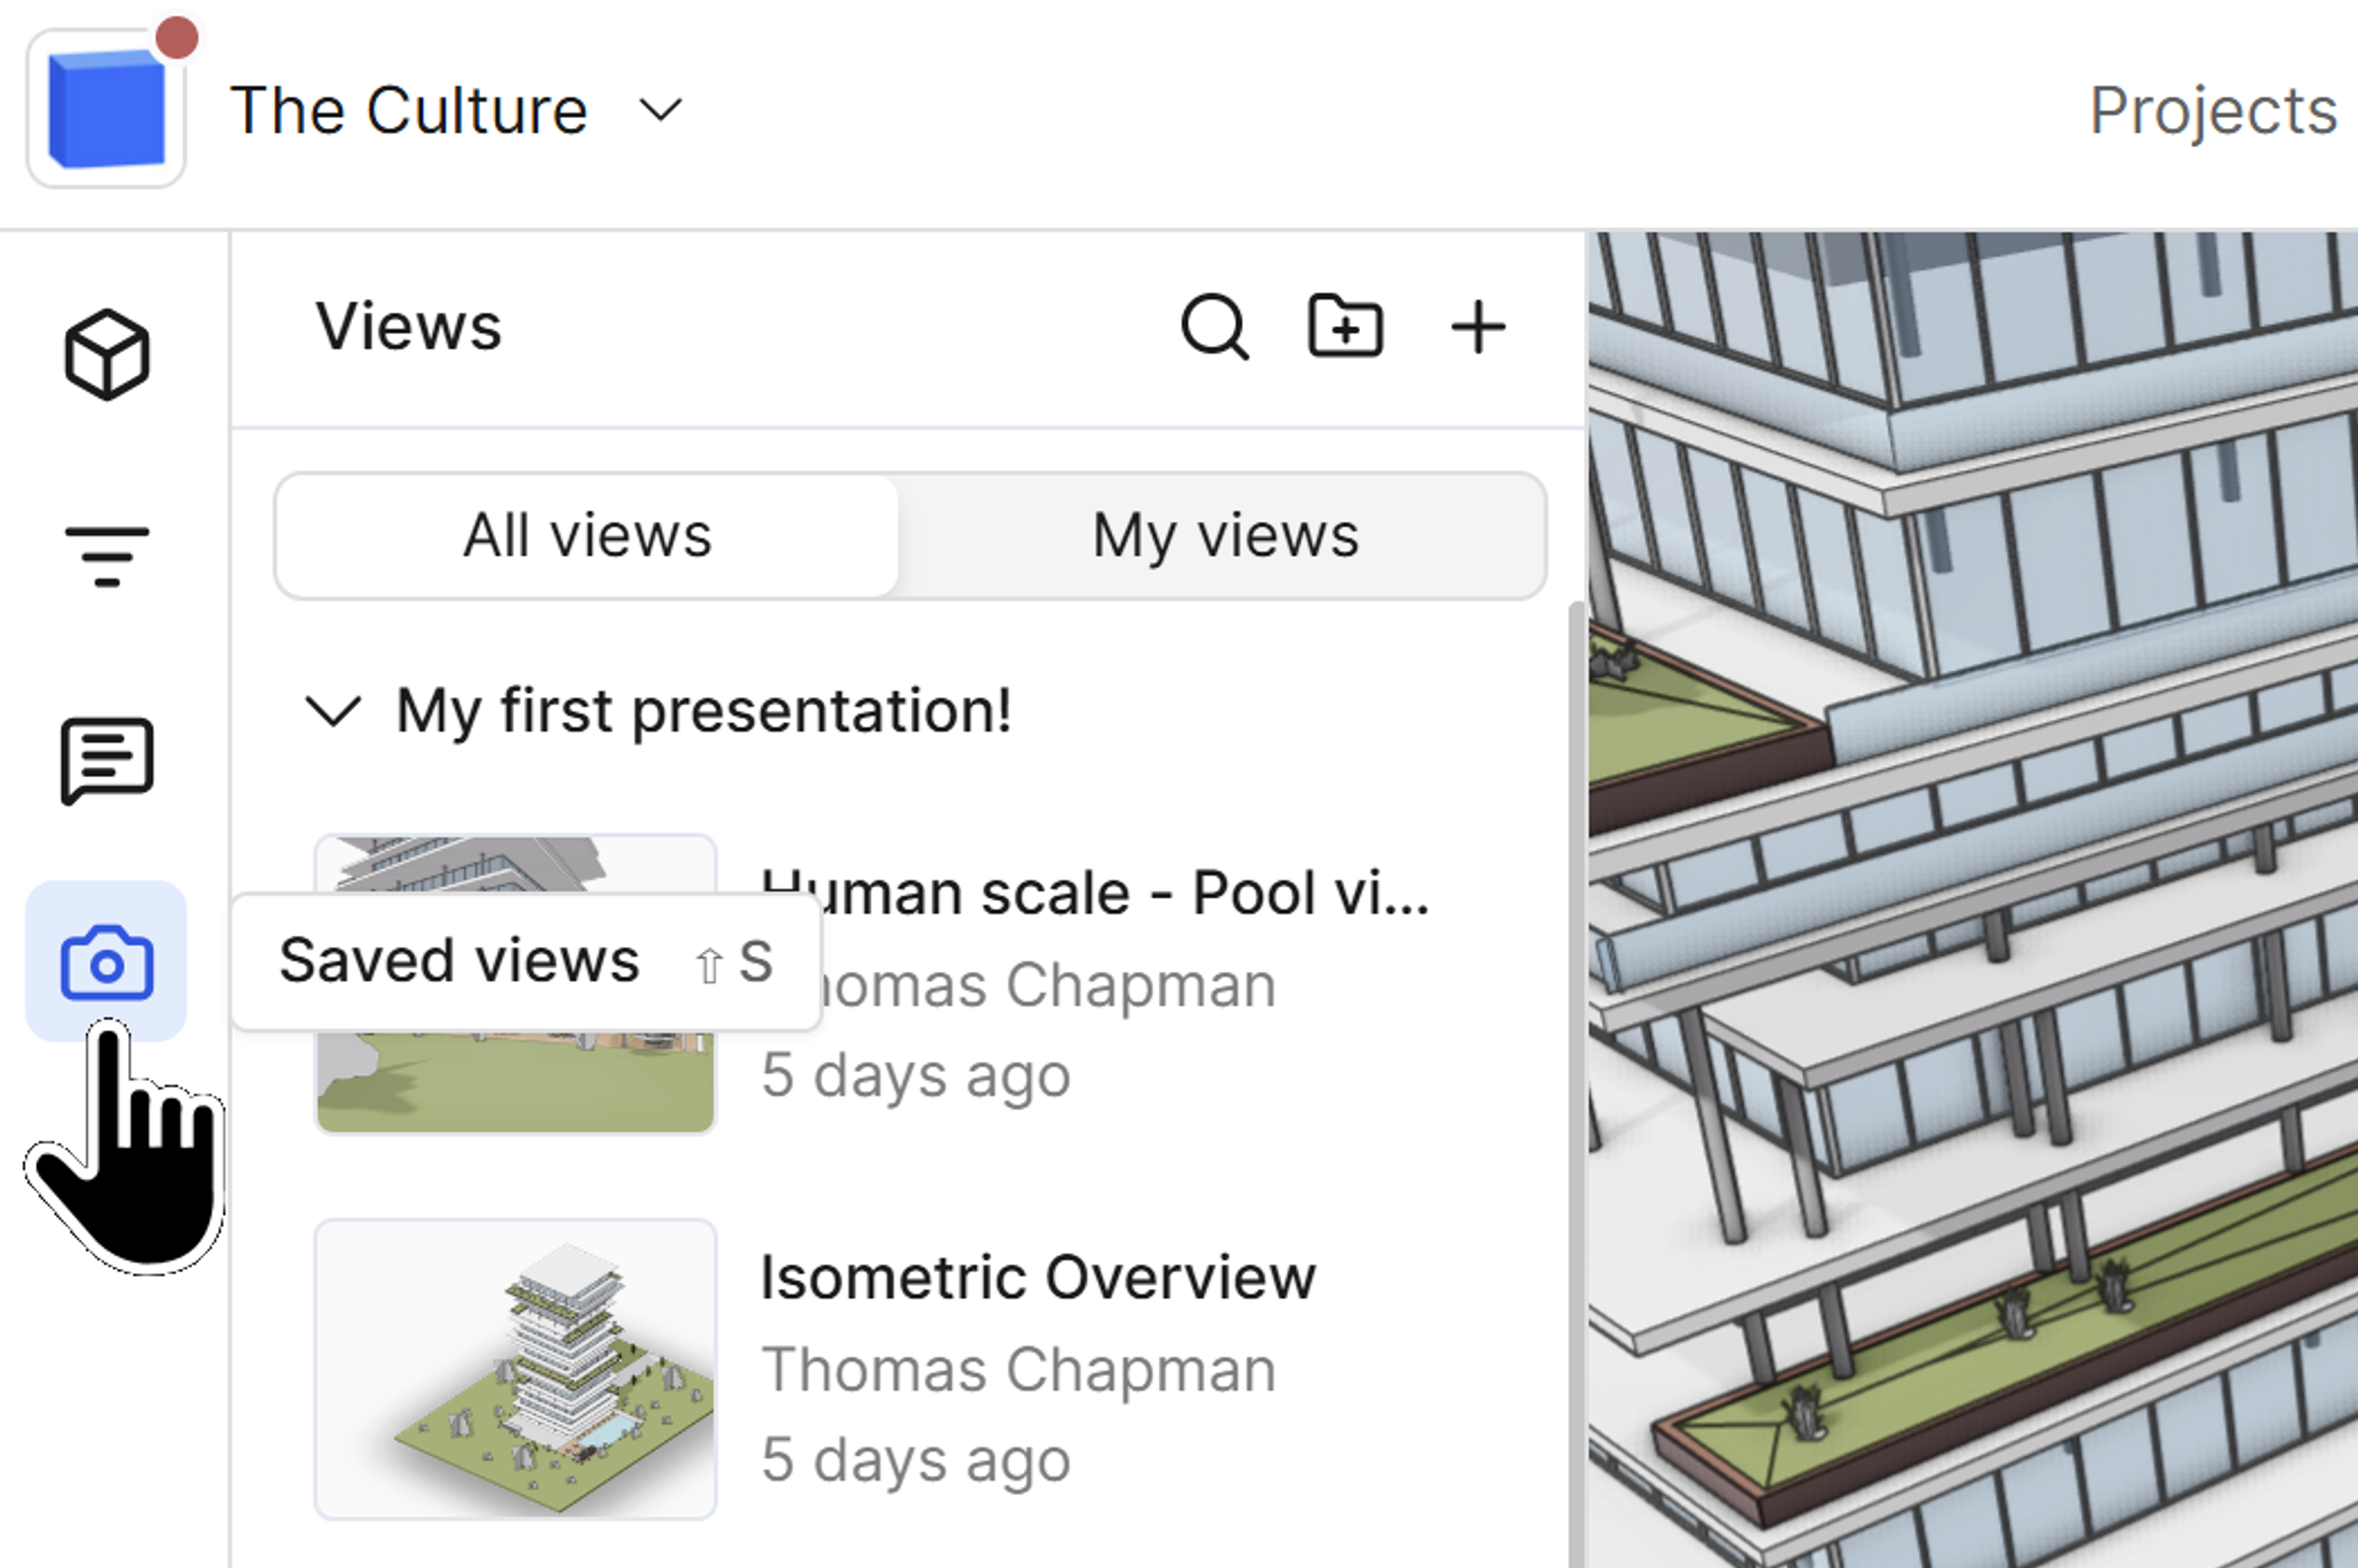
Saved views can be found on the left hand side of the web viewer
Saving a new view
Creating a saved view captures your current perspective within the model:
- Position your camera to the desired viewpoint in the 3D viewer.
- In the saved views panel, locate the plus icon in the top right corner.
- Click the plus icon to create a new saved view using your current perspective.
- The view is immediately saved and added to your list of views.
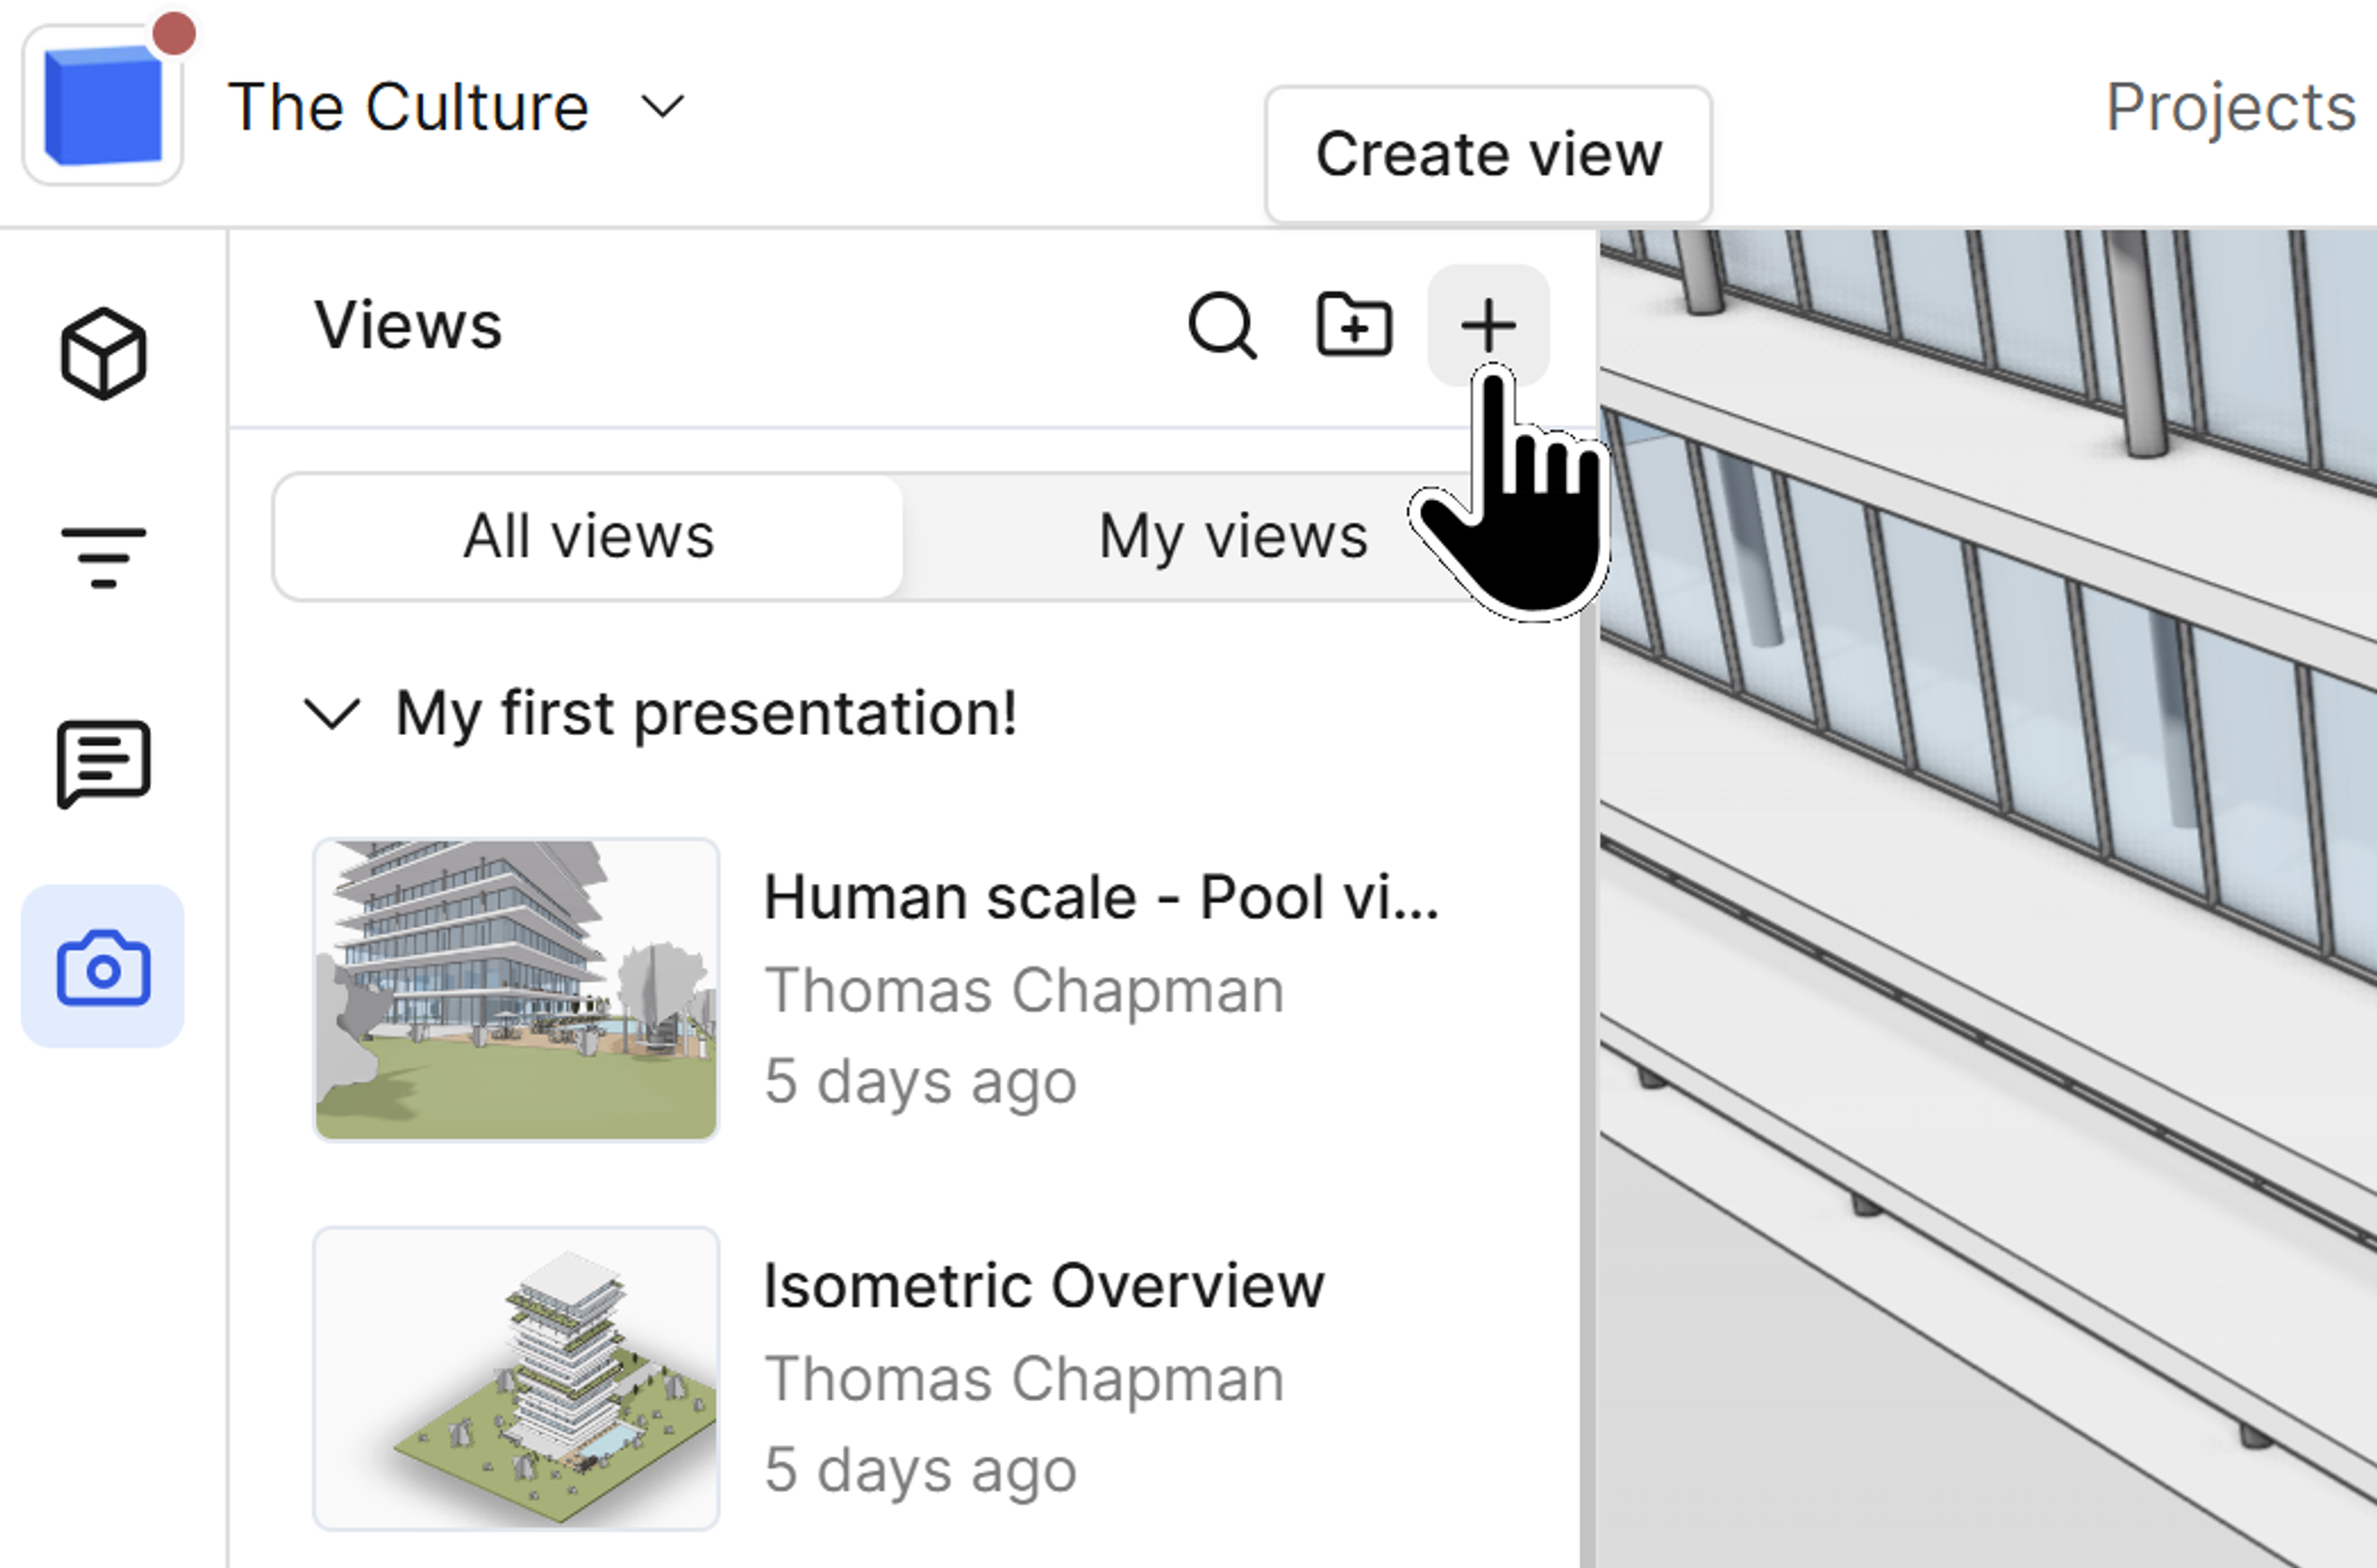
The create view button can be found in the top right of the saved view panel
Saved views preserve not just camera position but also your current filter and render settings, allowing you to instantly return to critical perspectives without manually repositioning each time.
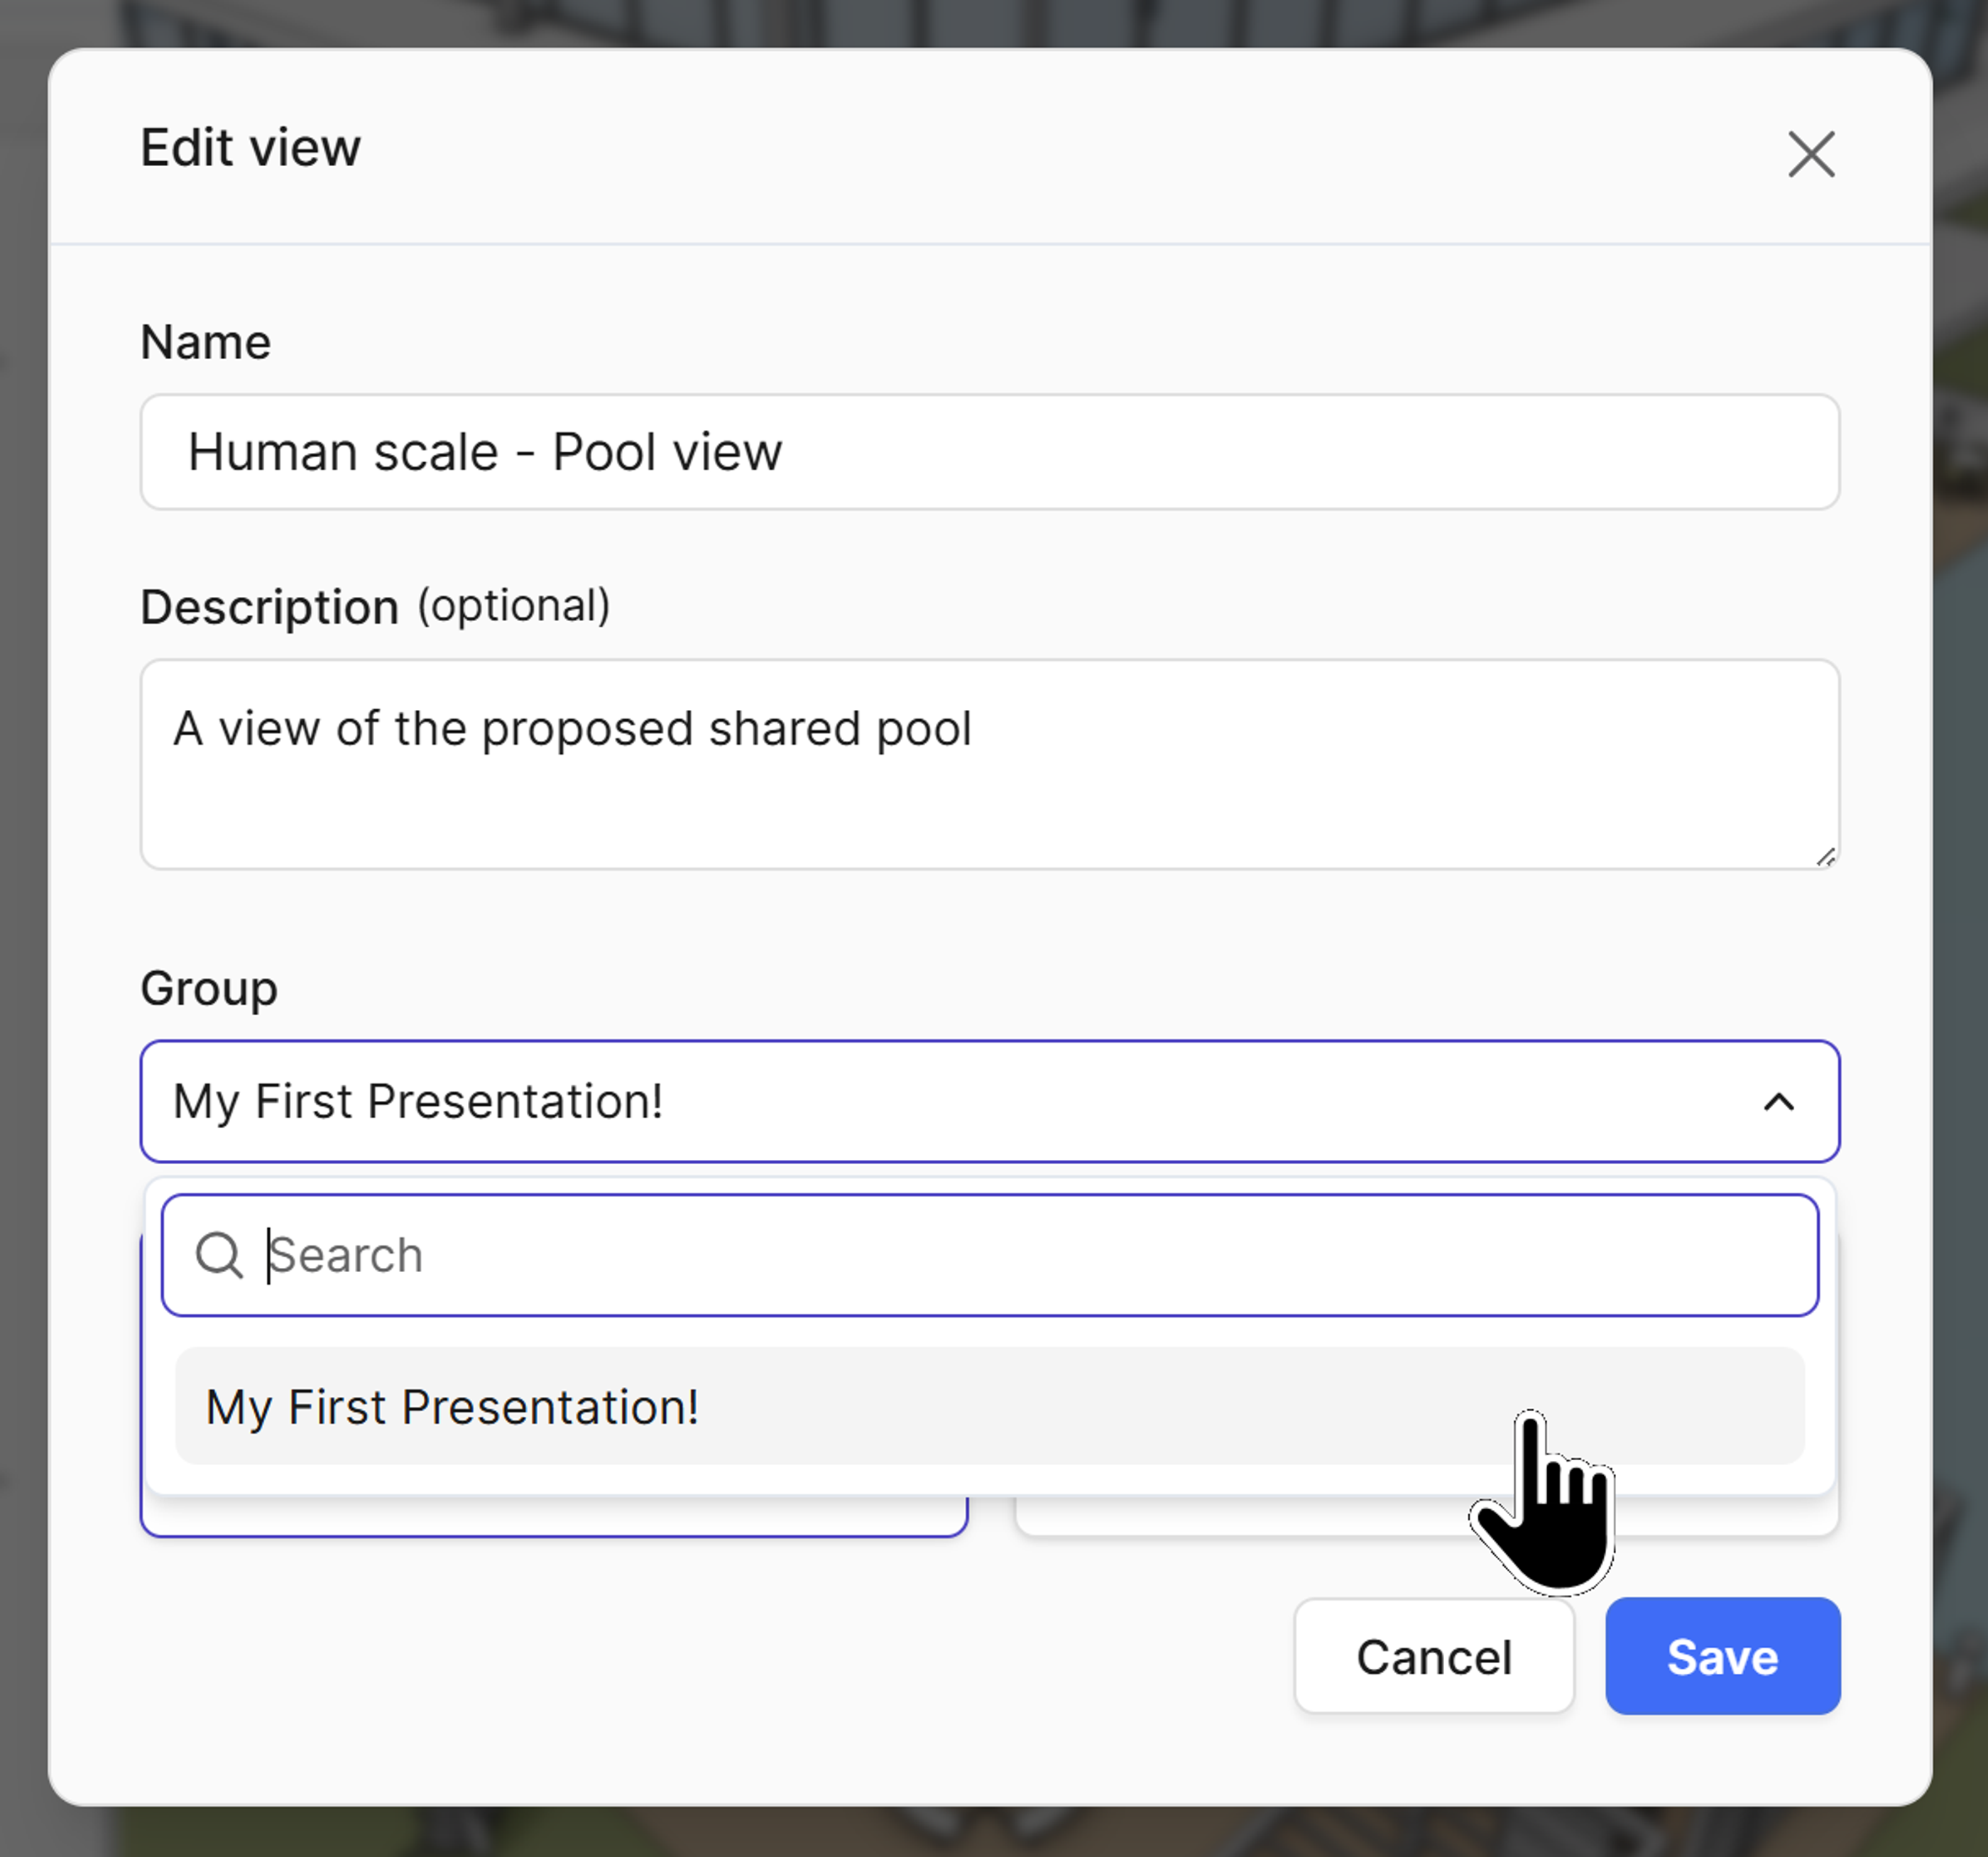
Editing view properties
Each saved view can be customized with descriptive information:
- Click the edit button on your newly created saved view
- You can now modify the following properties:
- Name – Give your view a descriptive title.
- Description – Add detailed notes about what the view shows or why it's important.
- Group assignment – Move the view into an organizational folder (covered in Stage 2).
- Privacy settings – Toggle the view to private if you want only yourself to see it.
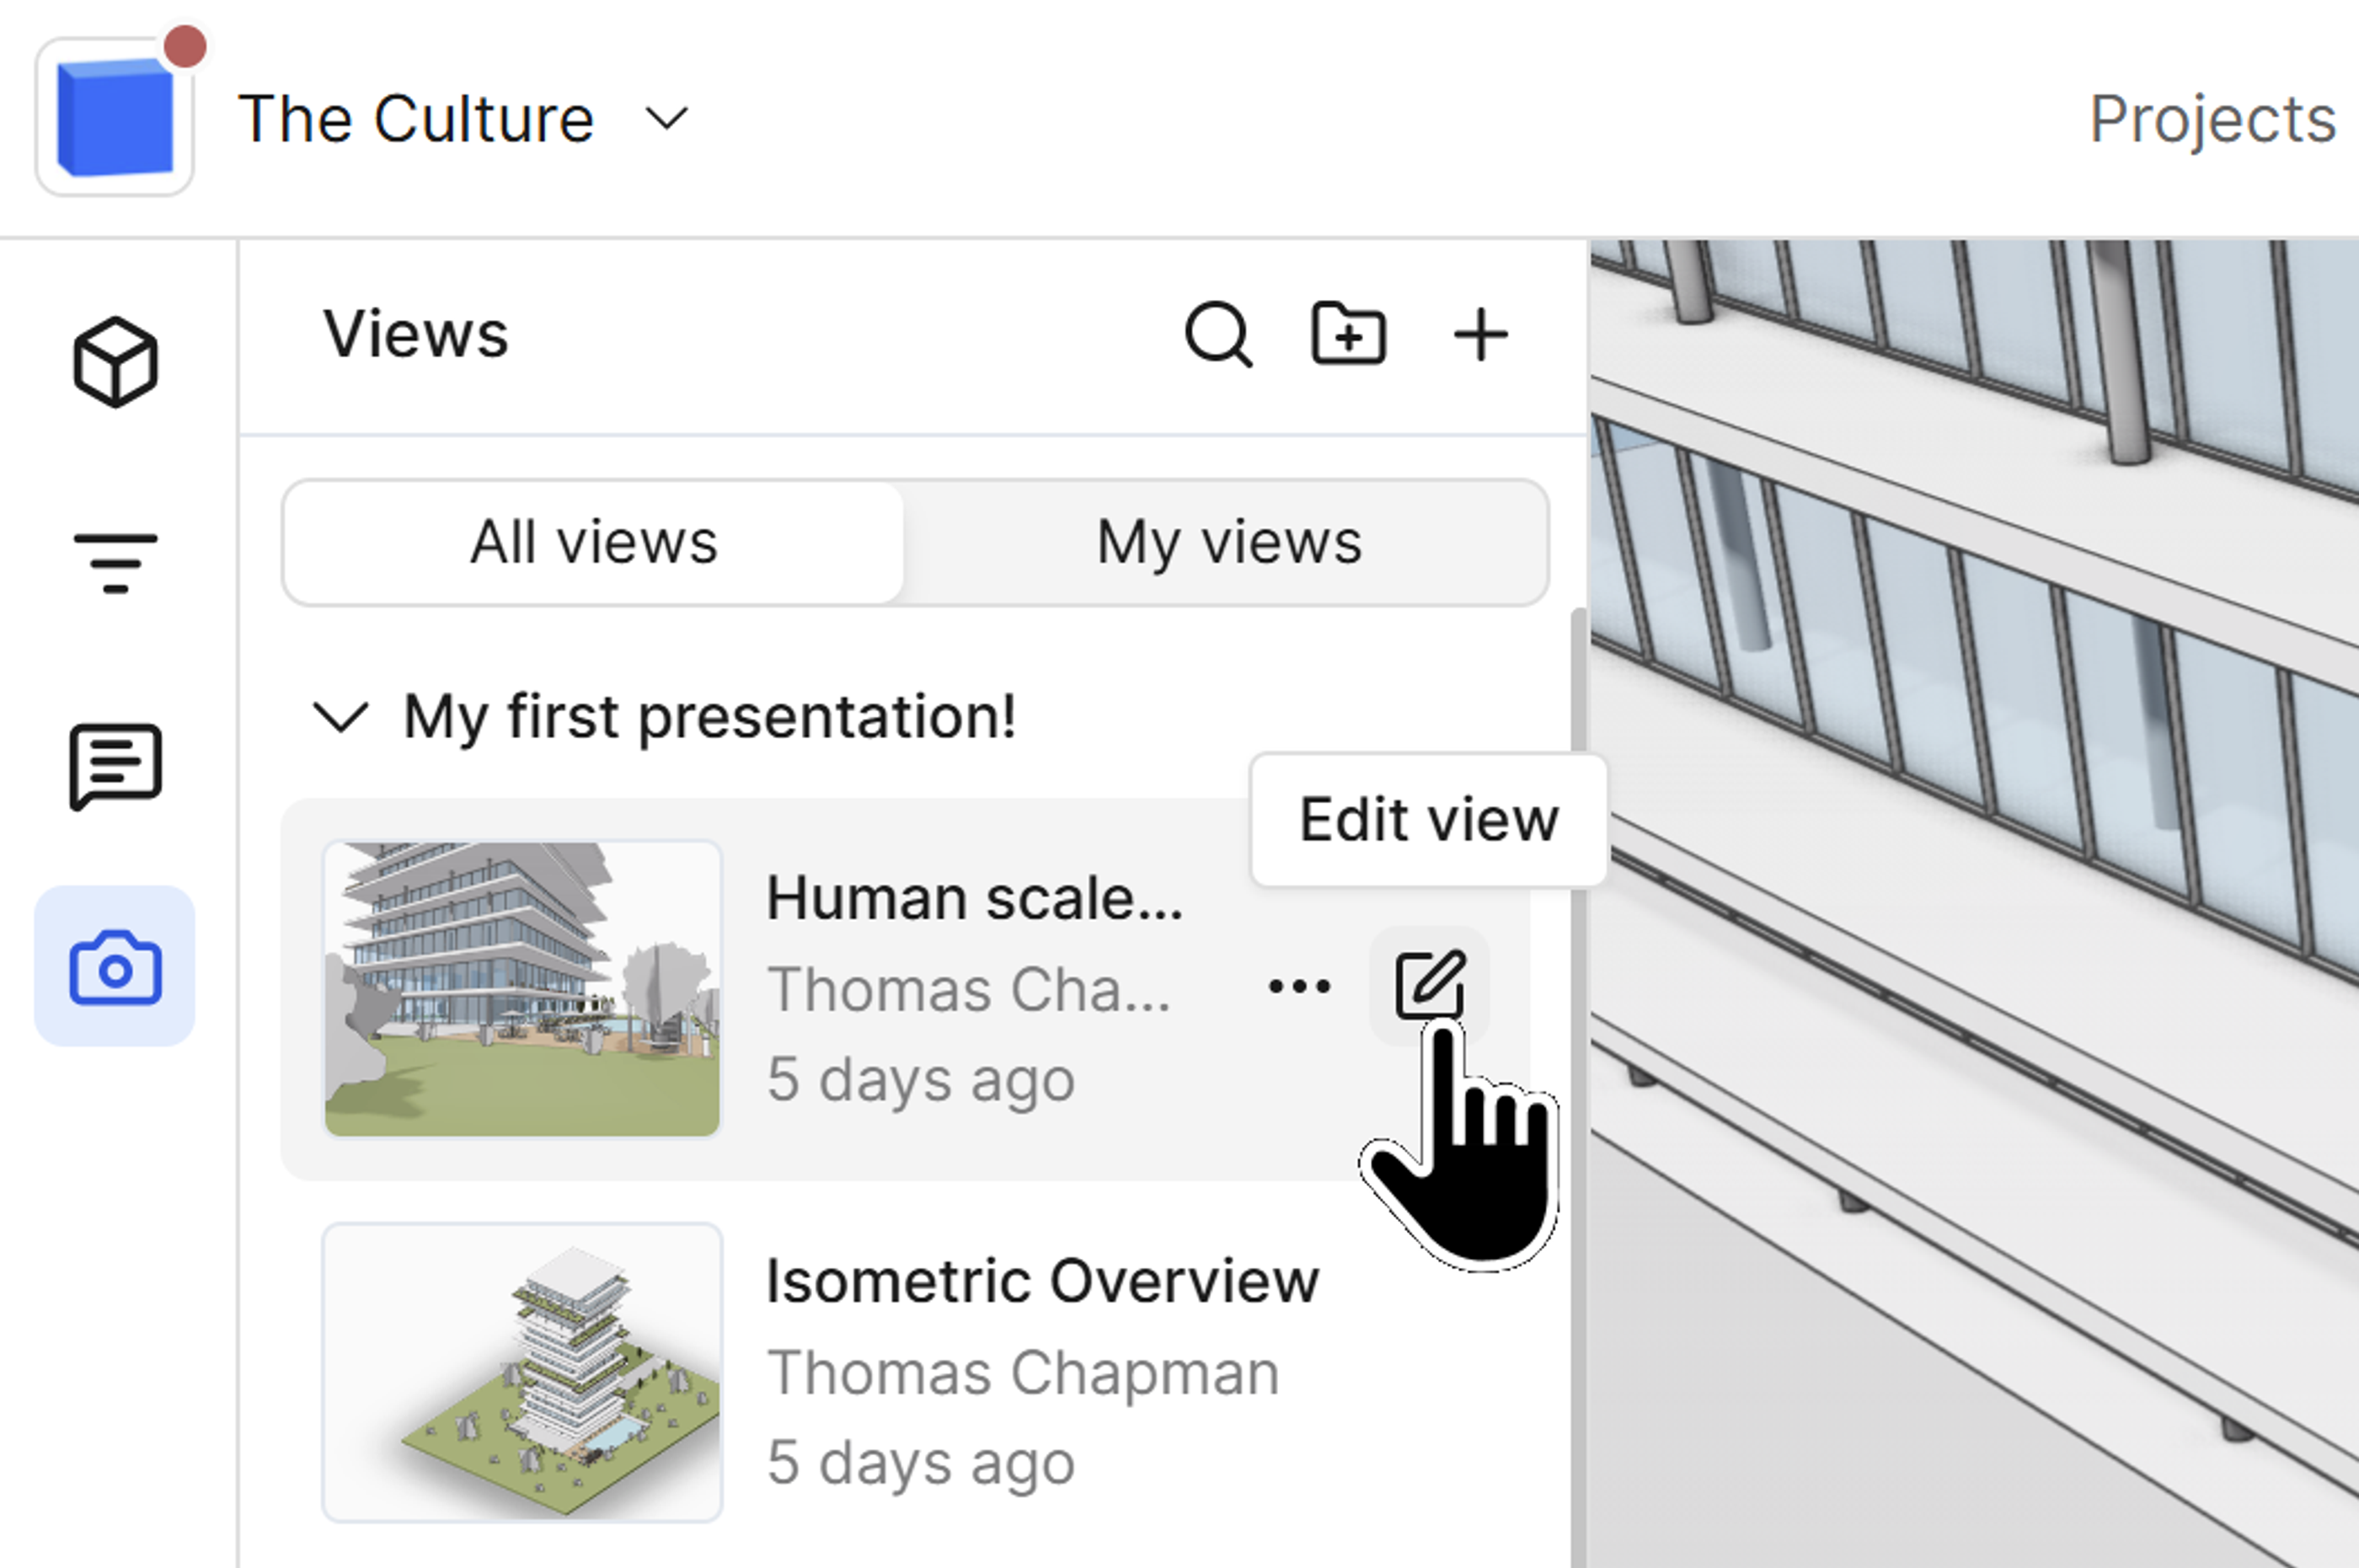
Saved view properties can be edited with the edit view button
Setting a view to private is helpful when working on shared projects where you don't want to overcrowd the view panel for other team members. Private views remain accessible only to you while still allowing you to work within the collaborative environment.
Stage 2: Organizing views with groups
Creating view groups
As your collection of saved views grows, organizing them into groups becomes essential for maintaining a clean workspace:
- In the saved views panel, locate the folder icon next to the create view button.
- Click the folder icon to create a new group.
- Give your group a descriptive name.
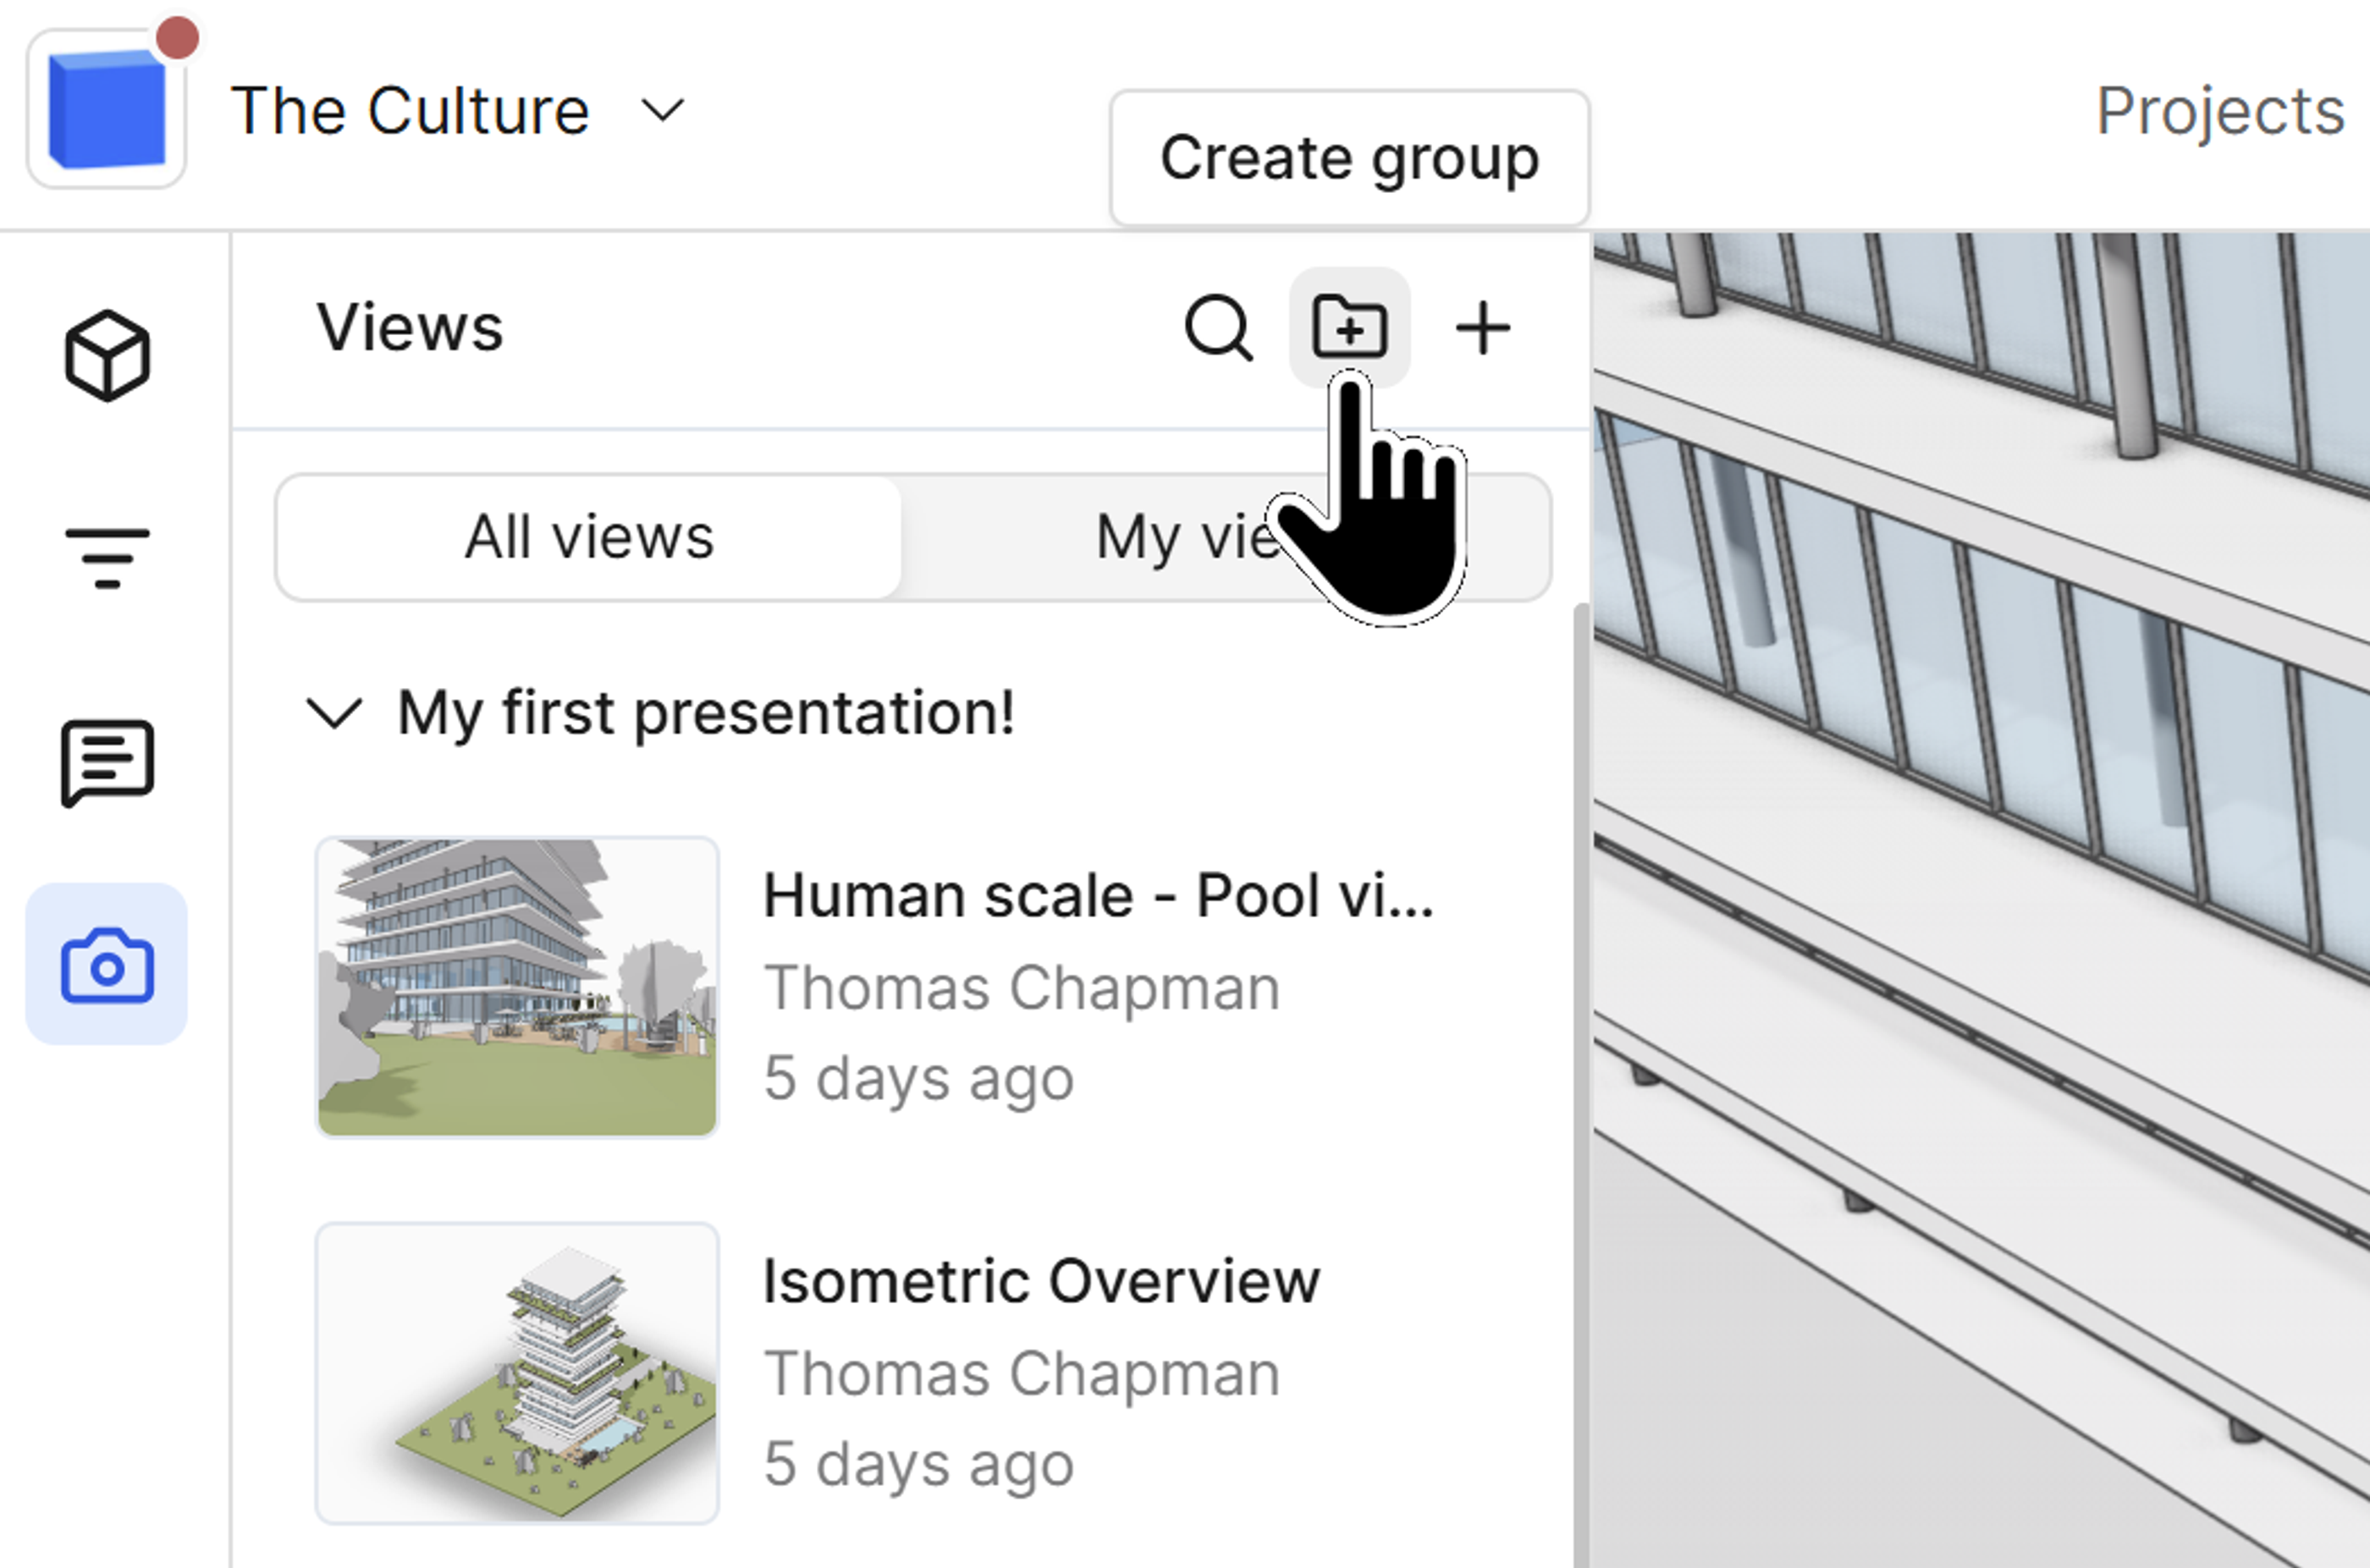
The create groups button can be found in the top right of the saved views panel
Assigning views to groups
There are two methods for organizing views into groups:
Method 1: Using the edit menu
- Click the edit button on any saved view.
- Select the desired group from the "Move to group" option.
- Save your changes.
Method 2: Drag and drop
- Click and hold on any saved view in the list.
- Drag it to your desired group.
- Release to drop it into place.
The edit view menu
Groups help you maintain organization across large projects. They also serve as the foundation for creating presentations, which we'll cover in Stage 3.
Stage 3: Creating presentations from saved views
Understanding presentations
Presentations are the logical extension of saved views, transforming them into curated, slide-style walkthroughs of your 3D model. Unlike static images or video recordings, presentations remain connected to your live model and can be shared with anyone, regardless of whether they have a Speckle account.
Setting up a presentation group
To create a presentation, you'll first need to organize your views:
- Create a dedicated group for your presentation (or use an existing one).
- Move all the saved views you want to include into this group.
- Arrange the views in your desired presentation order by dragging them up or down within the group.
Group title bar
Launching the presentation
Once your presentation group is configured:
- Locate the play button on the group title in the saved views panel.
- Click the play button.
- A new presentation tab will open in your web browser with your curated slideshow.
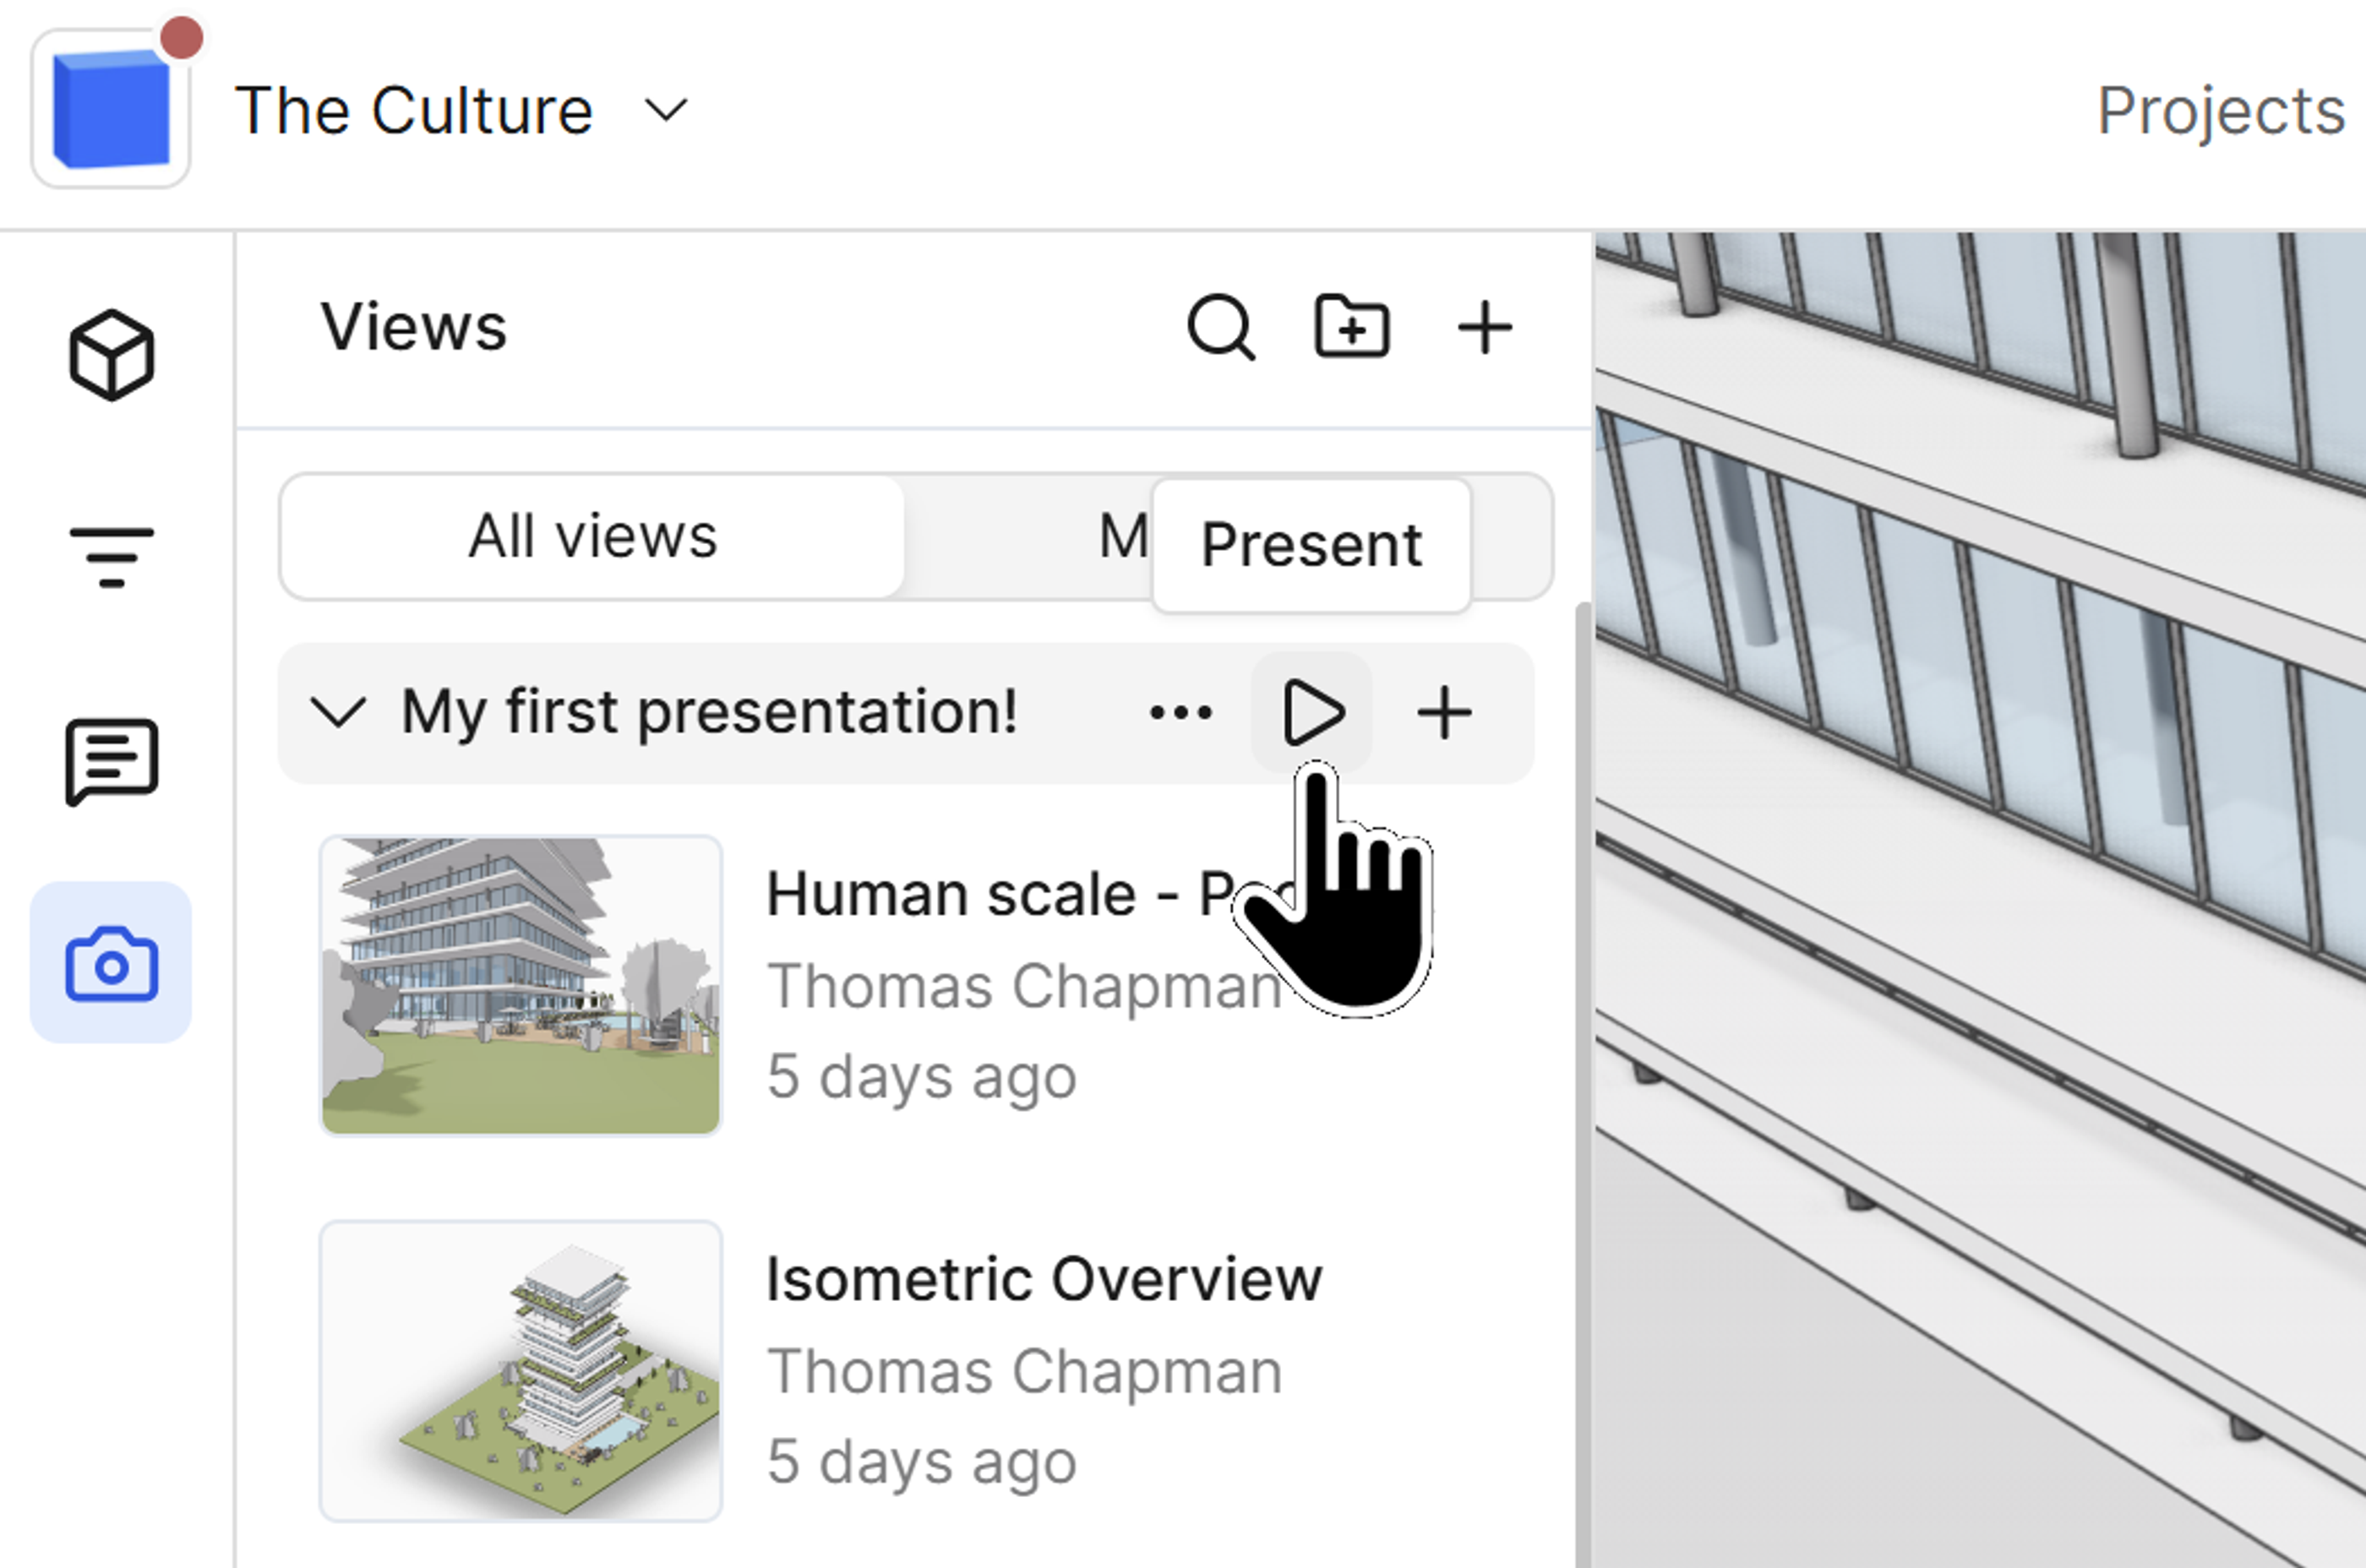
The present button can be found on the group title bar
Navigating the presentation interface
The presentation interface provides several navigation and viewing options:
Slide preview panel:
- Hover over the left-hand side of the screen to reveal a preview of all slides.
- Click on any slide thumbnail to jump directly to that view.
Slide viewer:
- Click the button on the top left to open the full slide viewer.
- Browse through thumbnails and click to navigate between slides.
Arrow navigation:
- Use the arrow buttons (left and right) to progress one slide forward or backward.
- This provides a linear presentation flow similar to traditional slideshow software.
Information display:
- Each slide displays its title and description on the right side of the screen.
- Click the edit button to modify the title or description directly within the presentation.
- Click the X symbol to hide the information bar for a cleaner viewing experience.
Full screen mode:
- Click the full-screen button in the top right corner to enter full-screen mode.
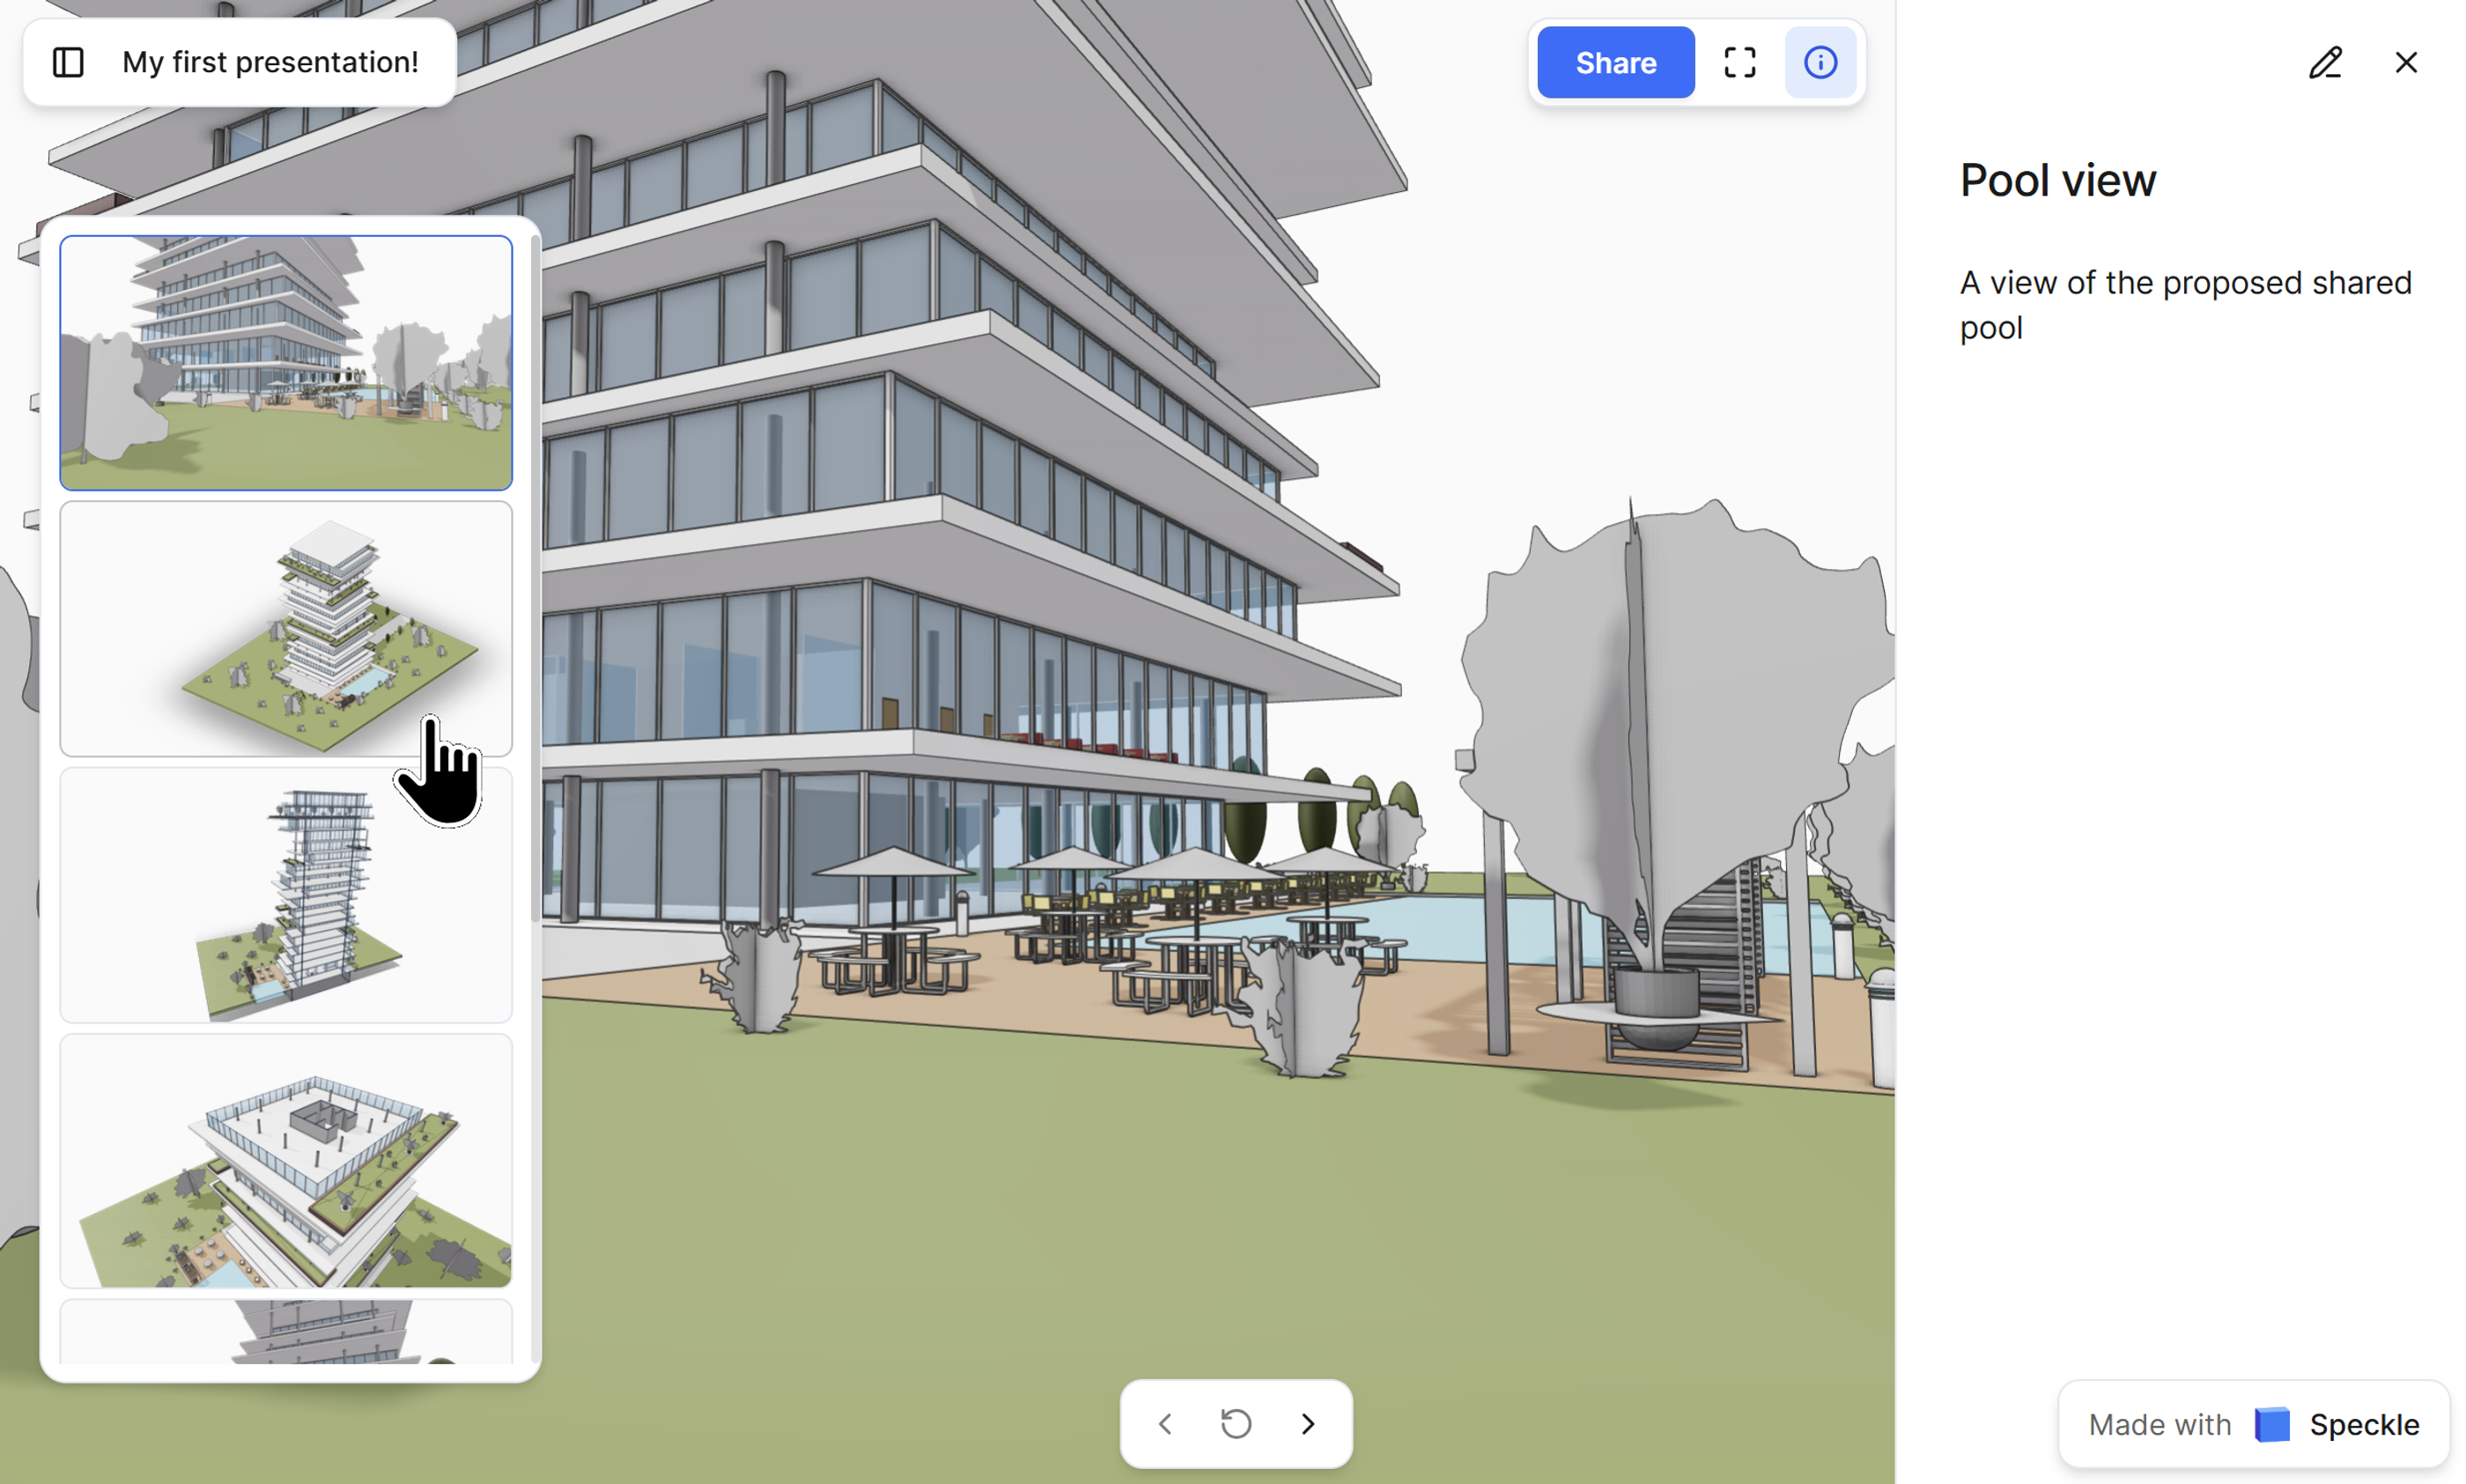
Presentation viewer UI
Sharing your presentation
One of the most powerful features of presentations is the ability to share them broadly:
- In the presentation view, locate the share button in the top right corner.
- Click to generate a shareable link.
- Send this link to anyone; they do not need a Speckle account to view the presentation.
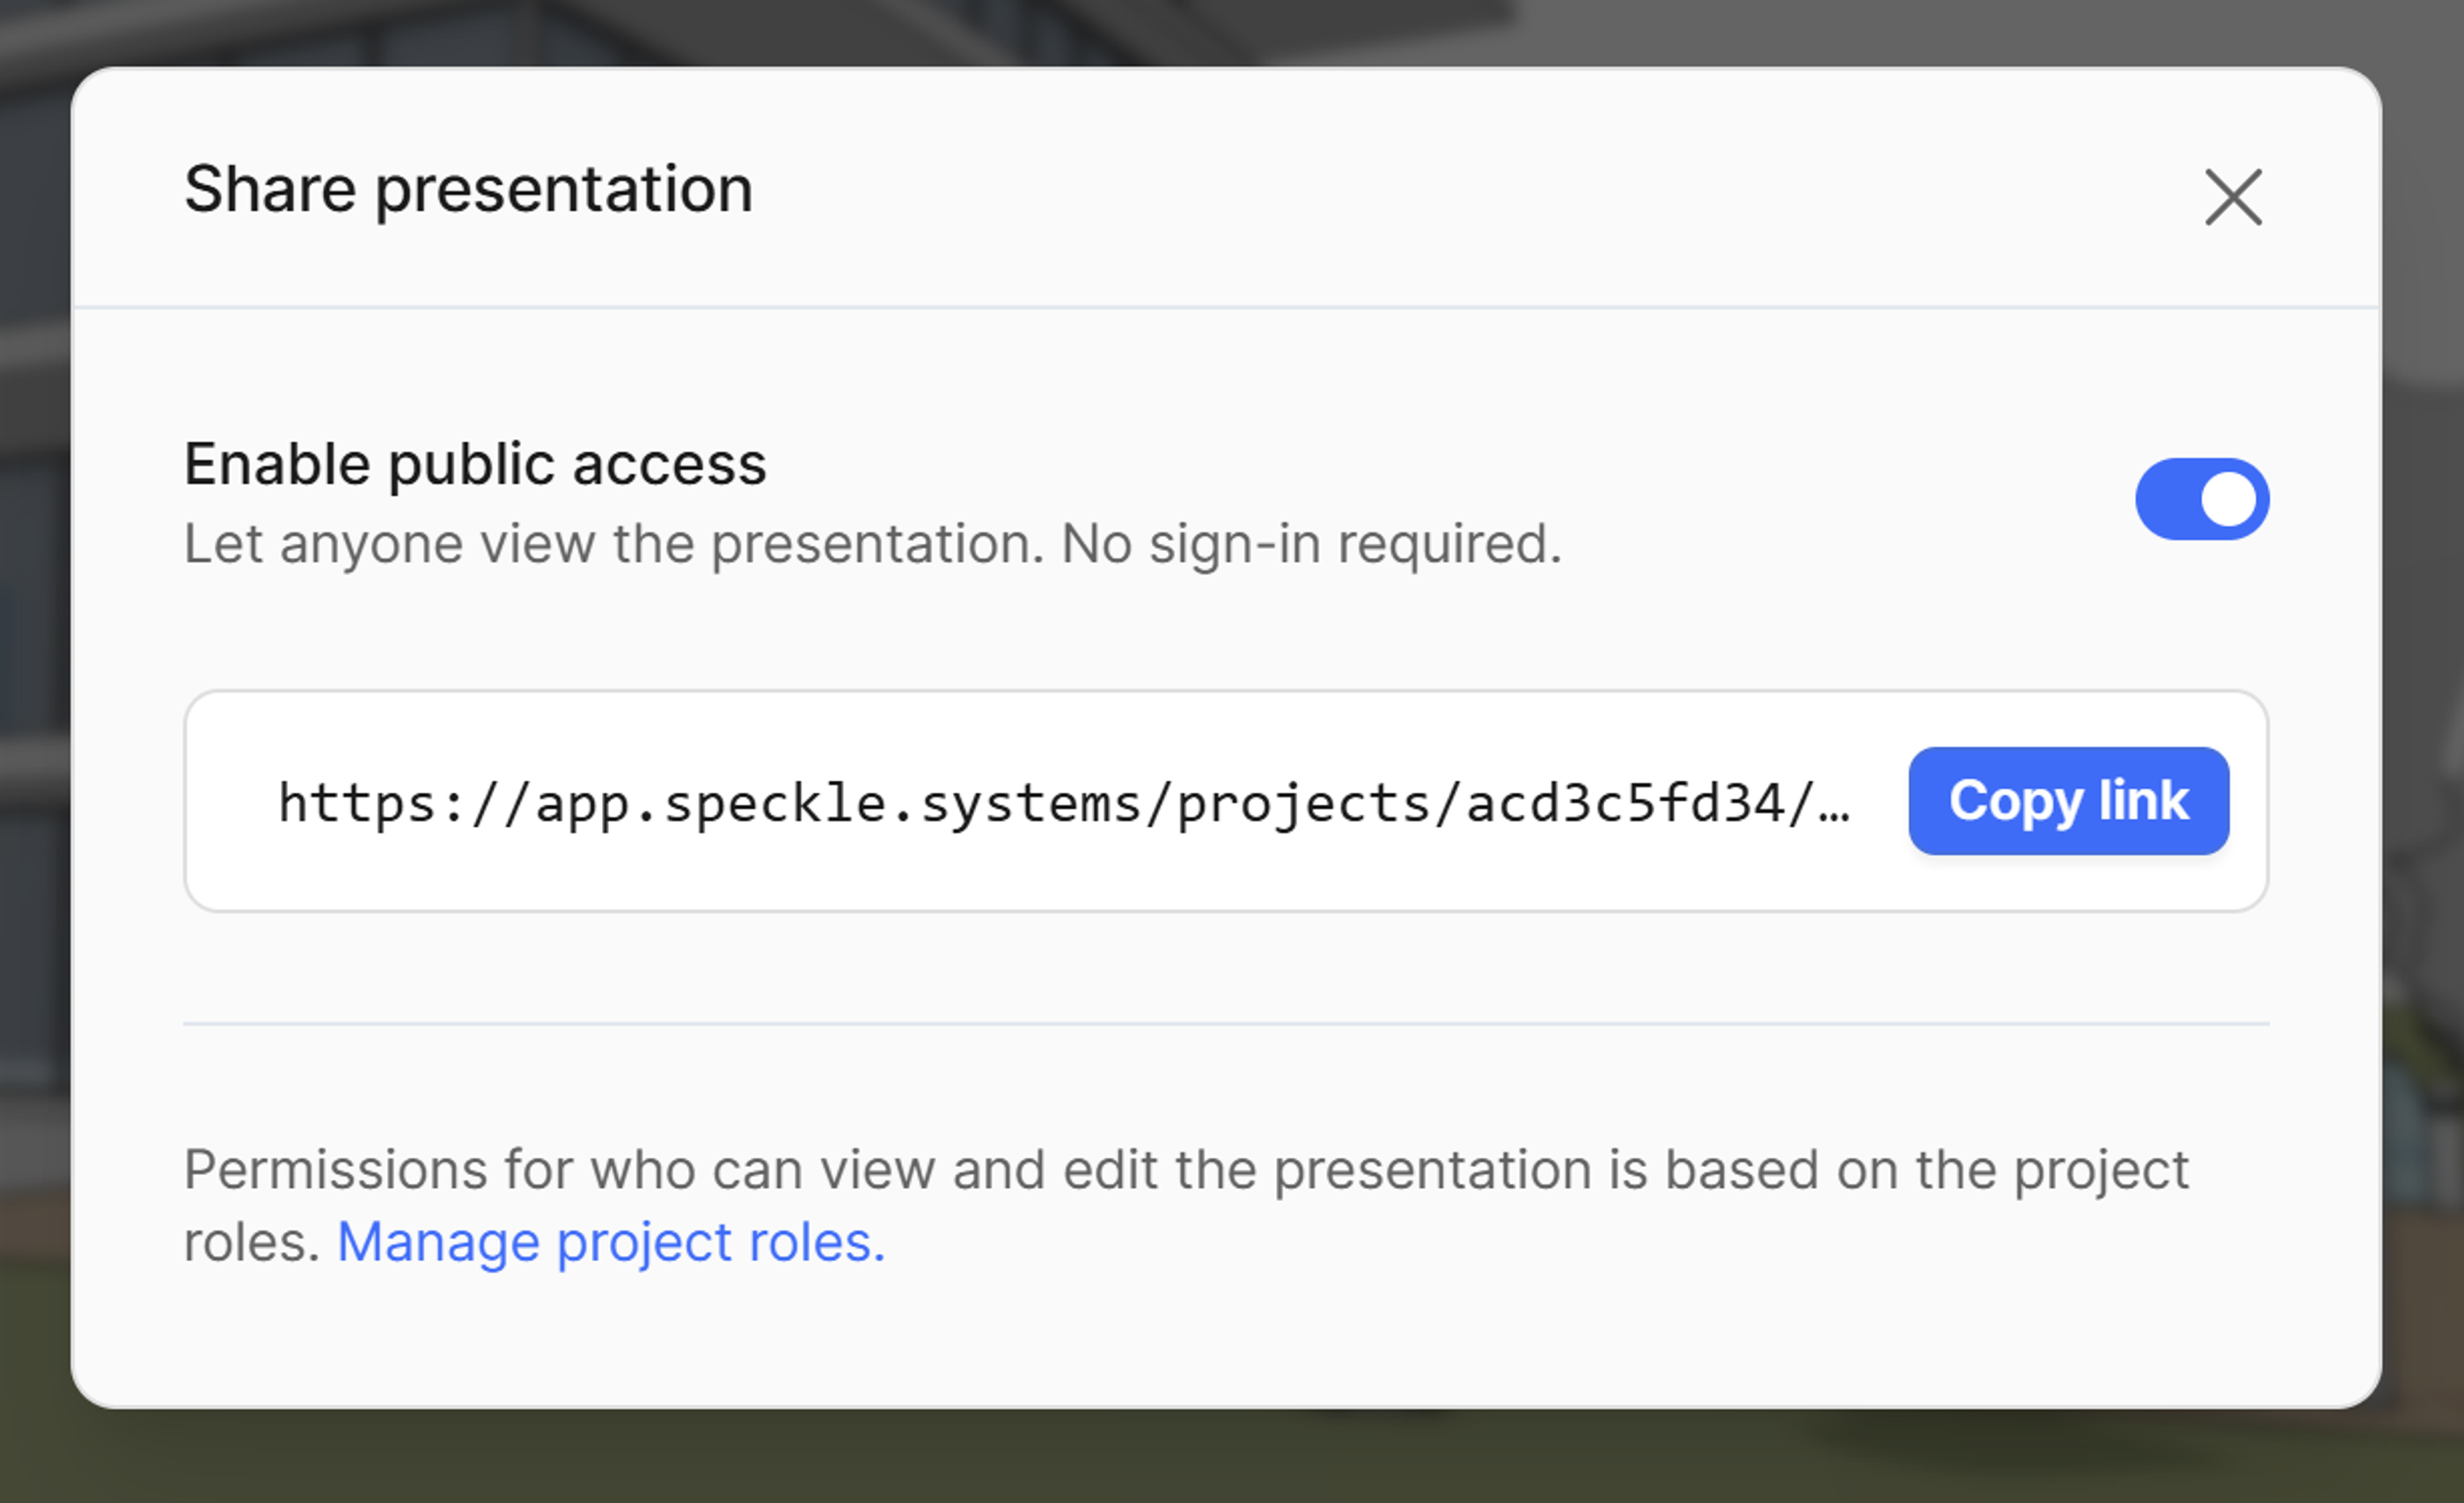
Share presentation menu
This eliminates the need to export static images, create separate documentation, or provide account access to external clients.
Conclusion
Speckle makes it easy to share your model data beautifully with your team and clients. No longer do you need to be locked into your desktop software to try to spin around your model. With Speckle's new presentation features, you can capture what is most important about your work and communicate it effectively across teams and clients anywhere in the world.
By integrating Speckle into your workflows, you gain not only the best BIM web viewer on the market but also data freedom, cross-application integration, asynchronous collaboration, and worldwide accessibility to your projects.
Communicate your design to any stakeholder more clearly than ever.